Wrike stands among the best project management systems that you can consider for the data import. It offers you many advanced features that can easily power up your project. However, if you choose Wrike as your next PM system, you face another challenge: the import. No need to worry, our Relokia team will share all possibilities with you right now.
Wrike Import Options
Wrike provides you with the ability to import such entities as tasks, projects, and folders from Excel files. Note that you have to add data about the task to the Excel file to enable the data import to Wrike. Additionally, you need to ensure that there aren’t any formulas in your XLC files. If you add some changes to the text in the description cells, you won’t be able to save the format during the import process. Most importantly, you can import no more than 5,000 tasks at once in the Excel file.
What’s more, is that you can import Outlook tasks as CSV files. This manual process requires three steps: exporting Outlook tasks, adding them to a Wrike import template, and importing to Wrike. Besides importing Outlook tasks, you can import your Microsoft Project data directly to Wrike. Along with tasks, you transfer their assignees, durations, and dependencies.
As you can understand, Wrike supports a few import options. Those ways limit you in the data which you can import, supported file formats, and source platforms. In contrast, our tool offers you the automated data migration option. Migration Wizard supports a big selection of PM platforms so that you can find your source system. Our tool saves all connections between your records while importing them from one PM system to another. You don’t deal with CSV and Excel files. Let’s see how the import to Wrike with Migration Wizard works.
What migration to Wrike looks like with an automated tool
Although the migration process is rather simple, the step-by-step guide will do no harm:
1. Go to the Migration Wizard page and log in there. If you don’t have an account with our service, you can simply create it with any suitable option for you: via email or any social media network;
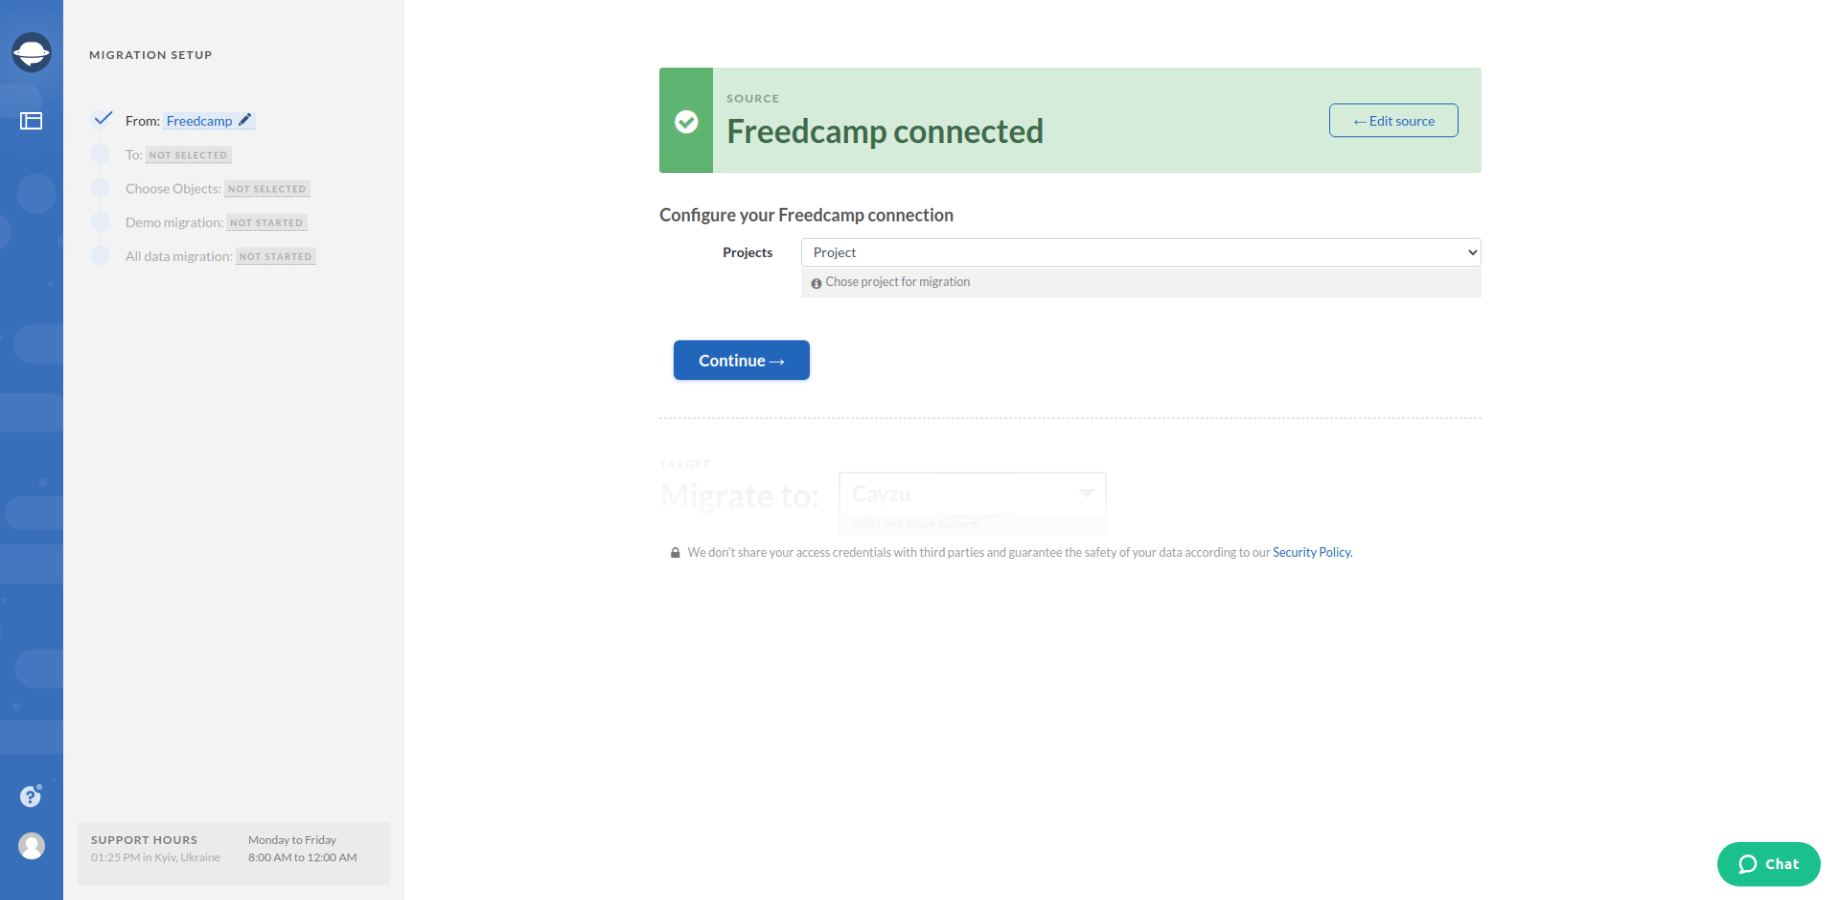
2. Select your source platform and provide the necessary credentials. After that, configure the connection:
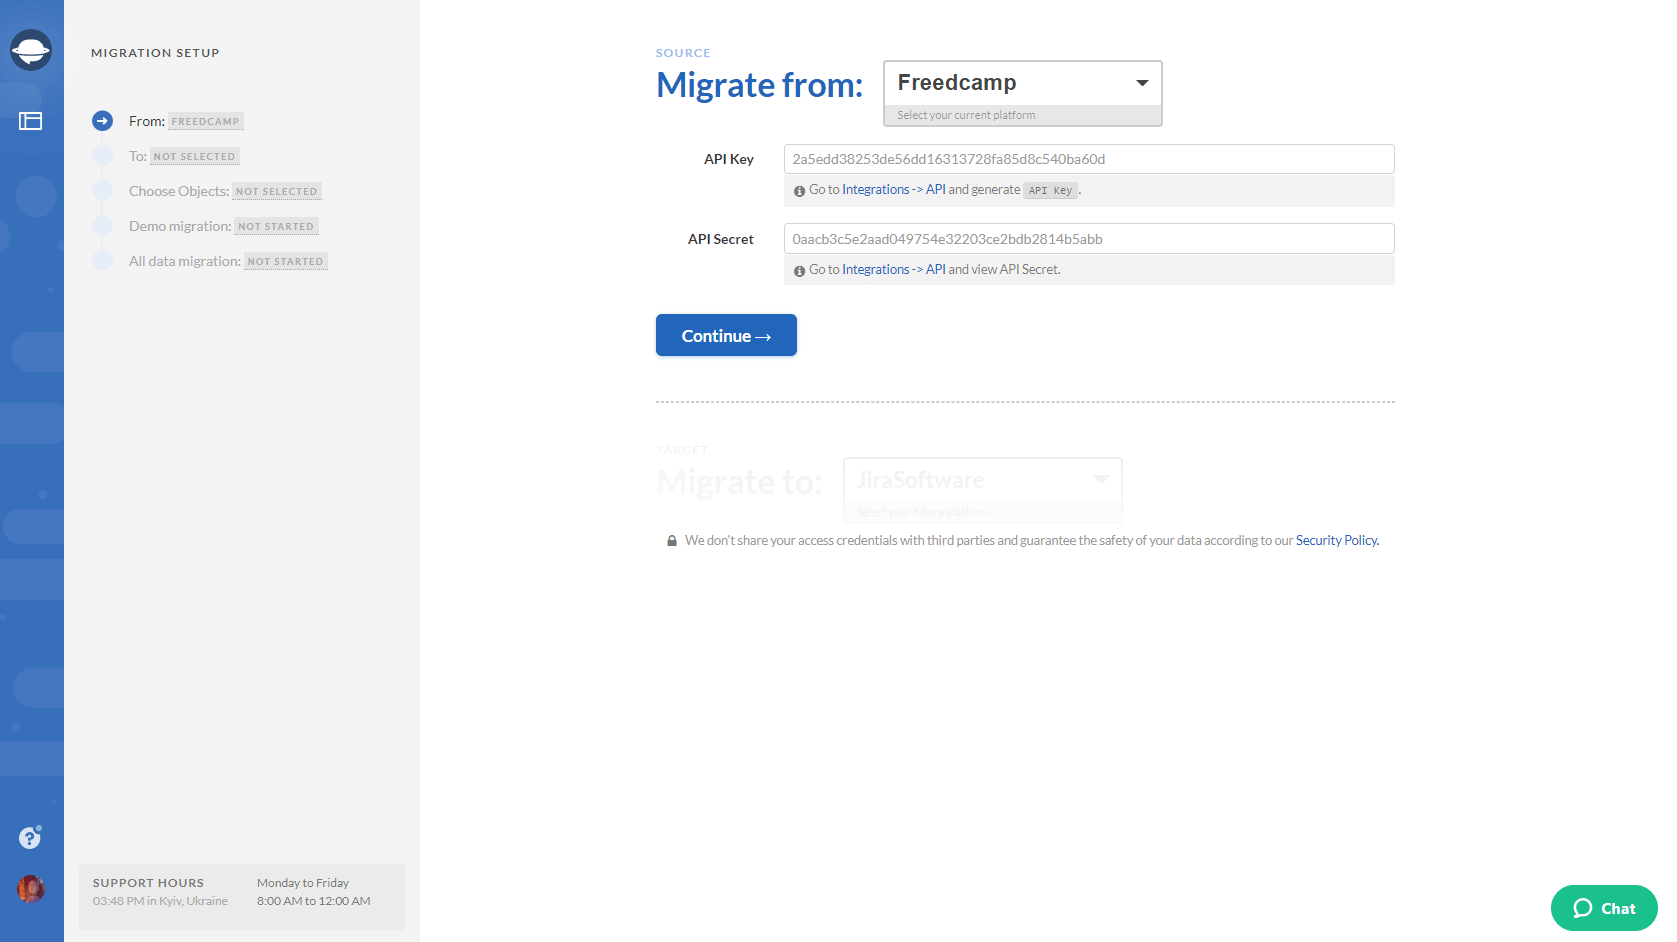
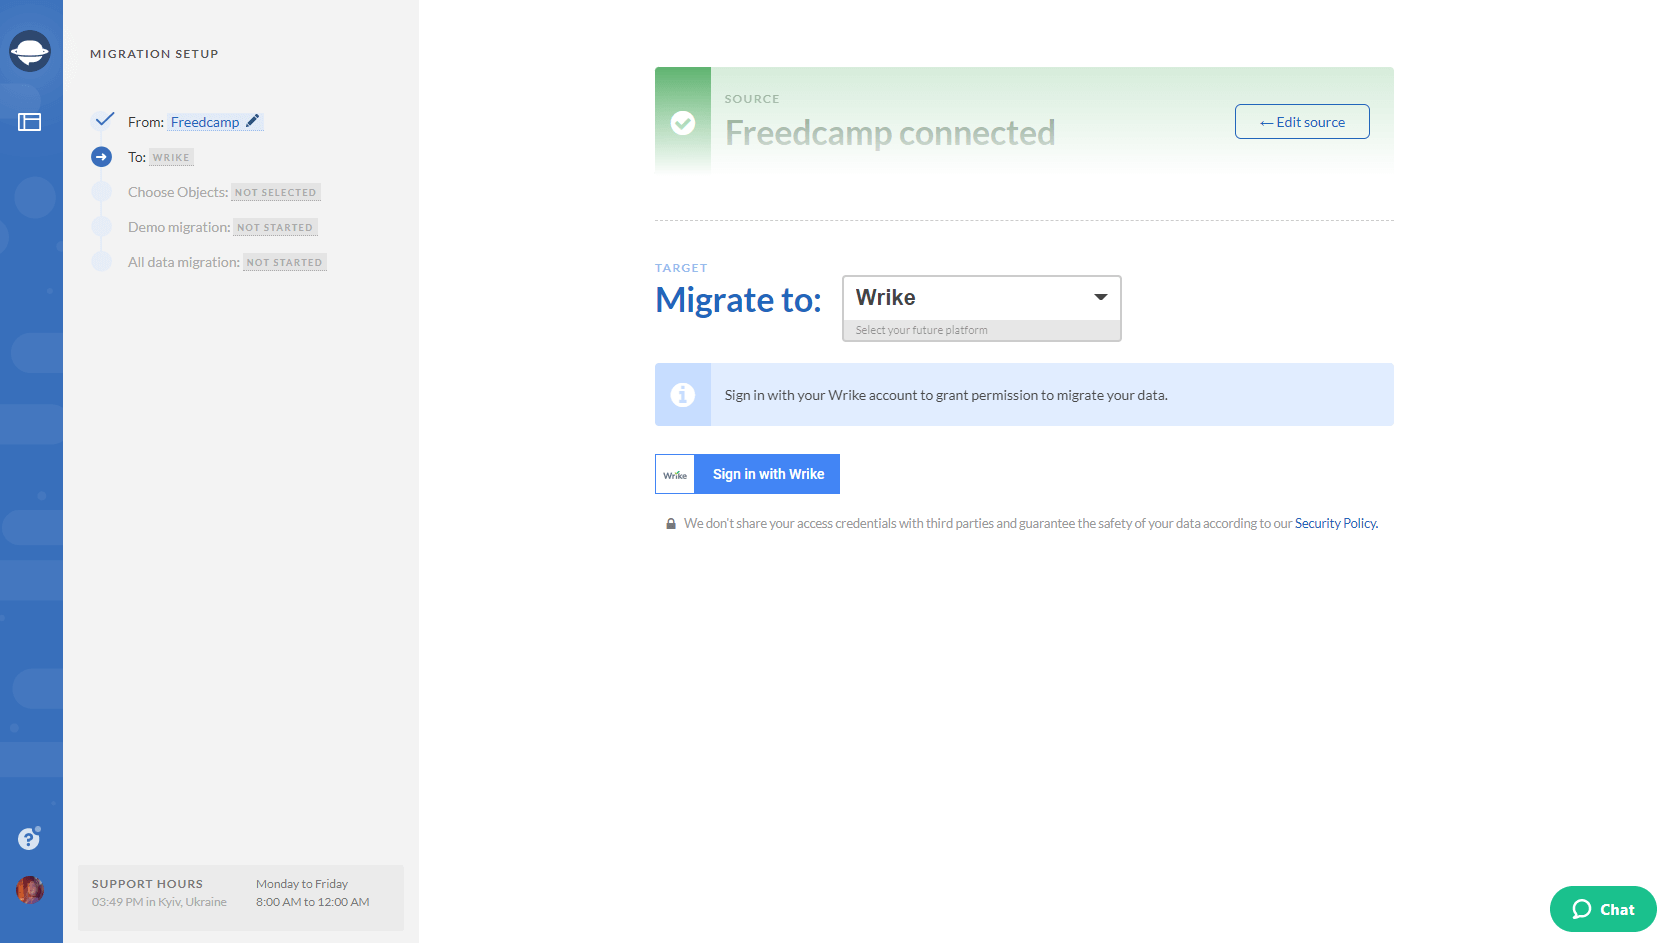
3. Then choose Wrike as your target platform and fill in the access credentials:
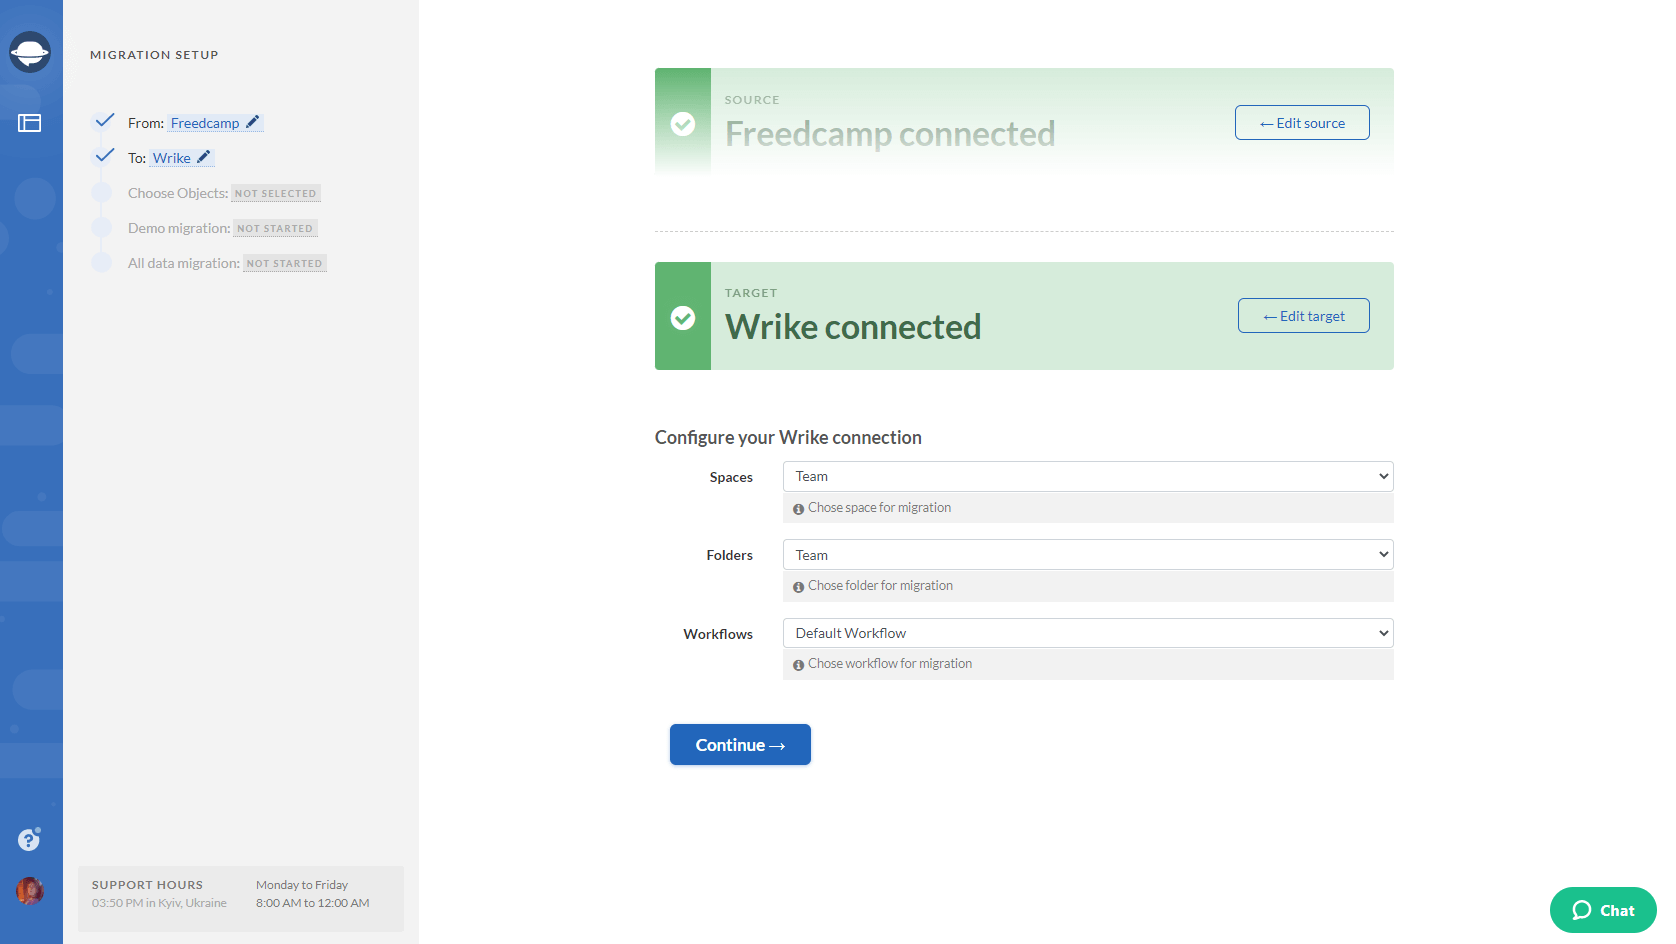
4. Configure the connection by selecting the needed Space, Folder and Workflow; The data import won’t be possible without these steps:
5. The next step is to select the records that you want to import to Wrike. Select Tasks and Migration Wizard will open a task mapping form:
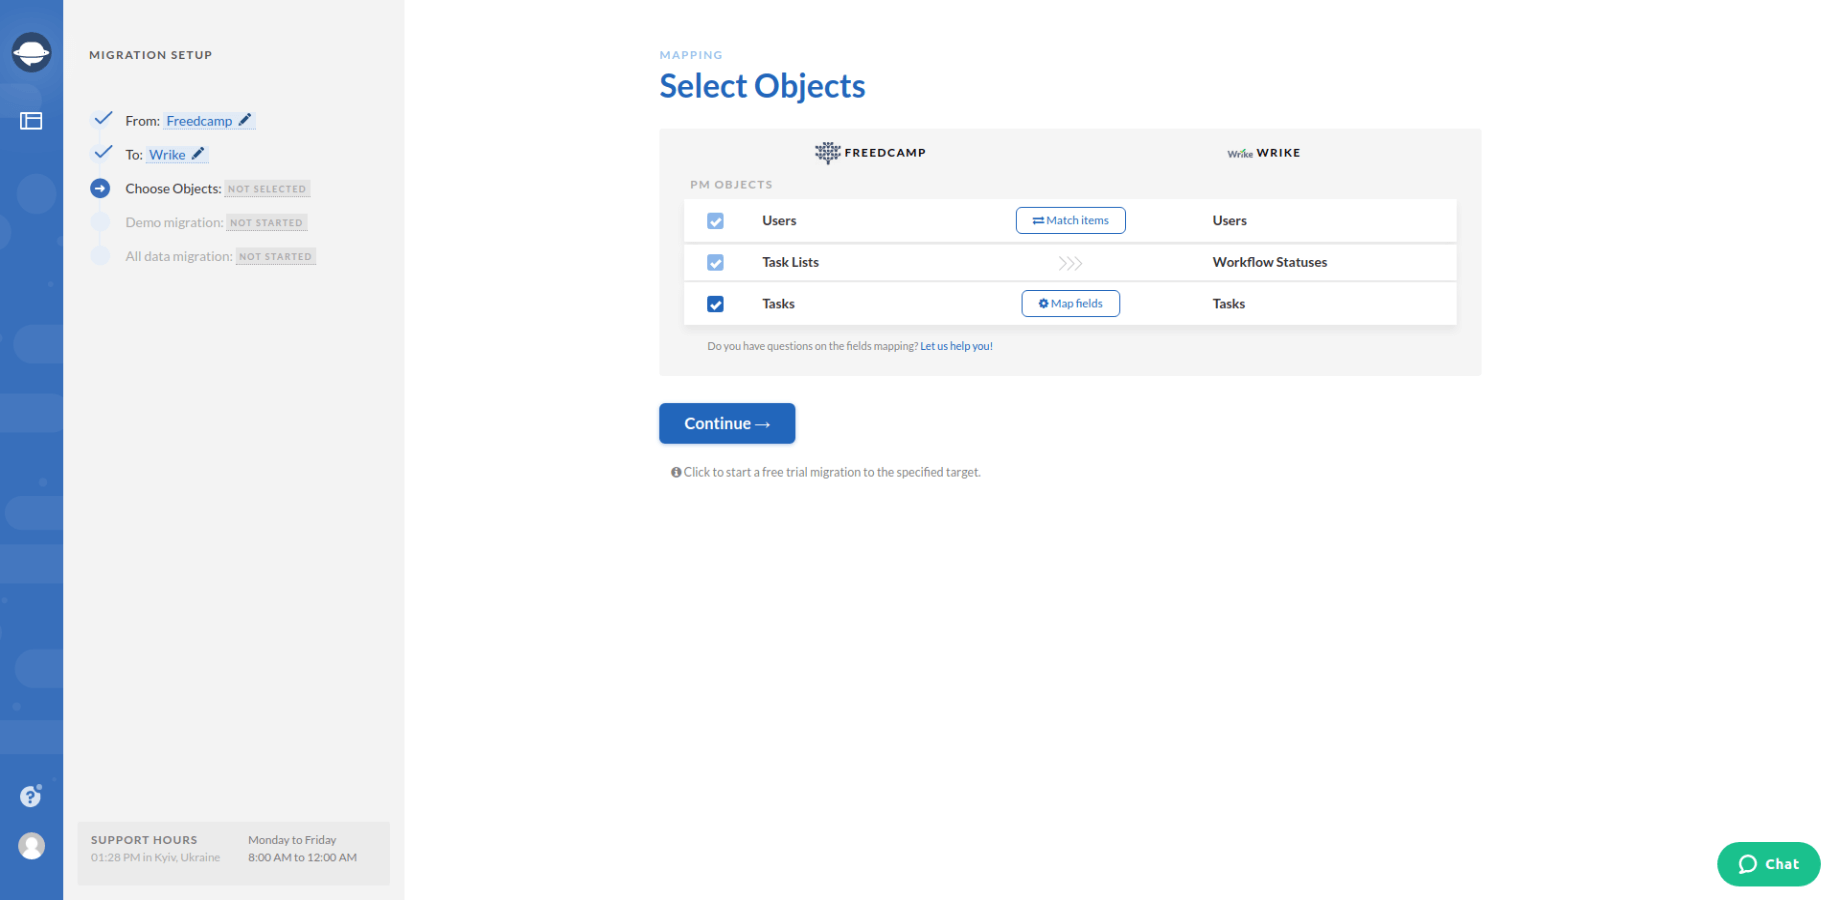
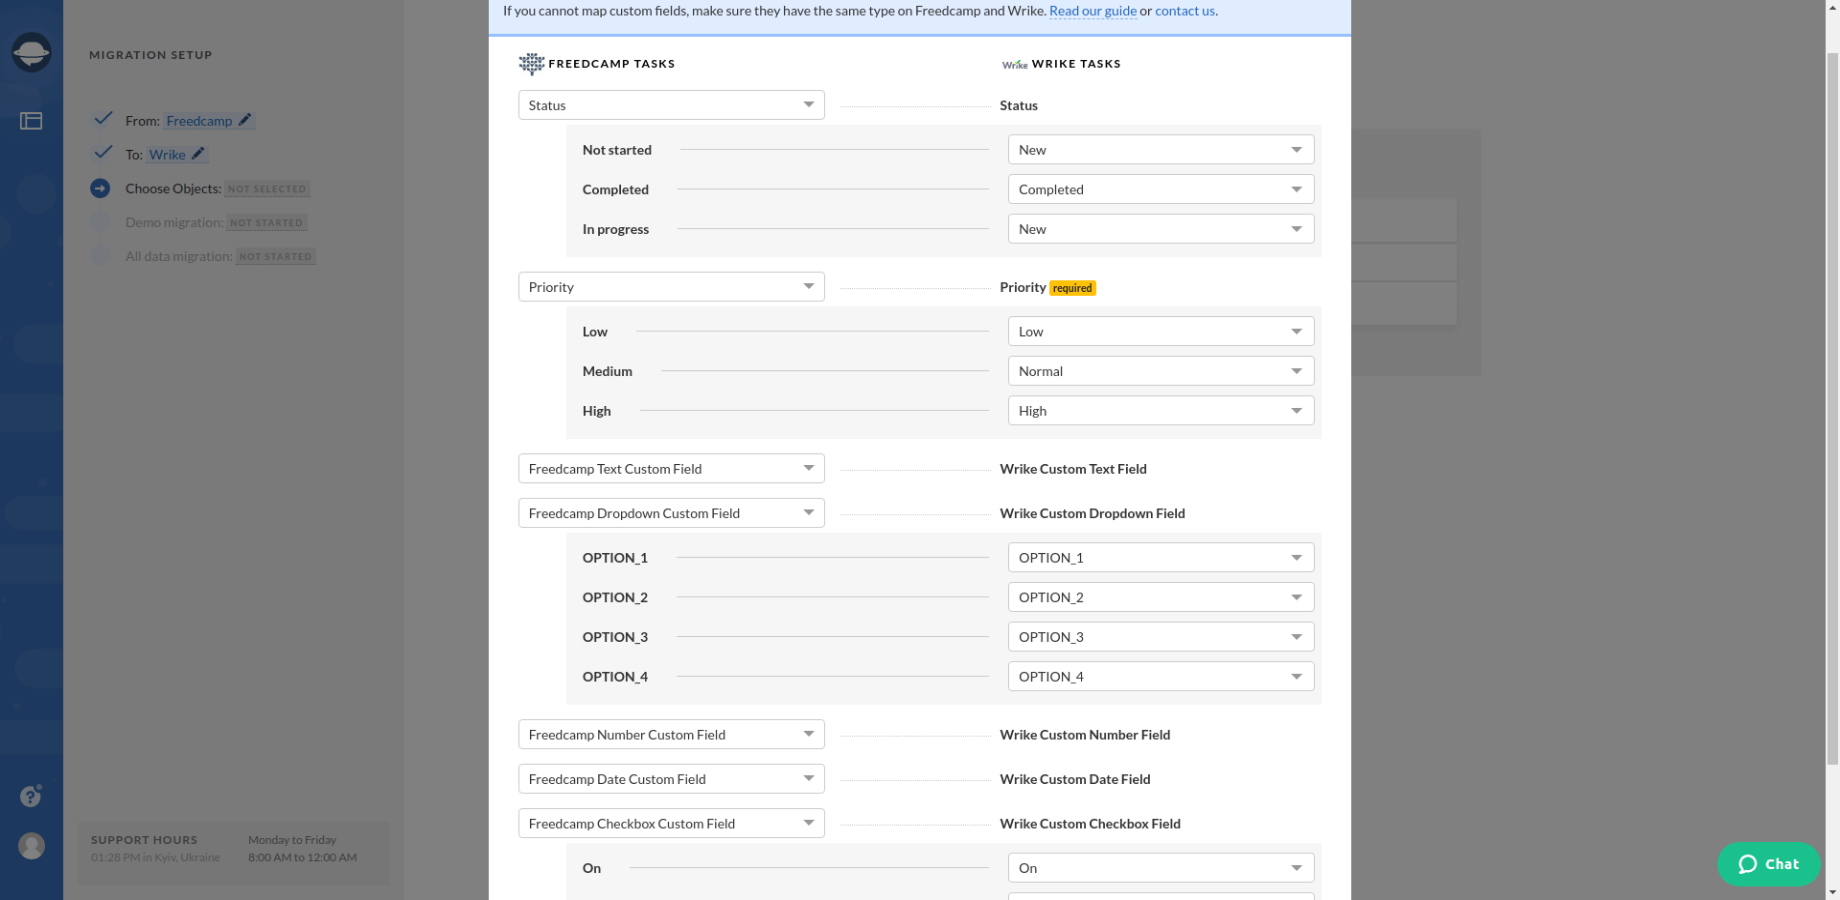
6. Your next step is to map the fields. Do it really carefully so that you locate your data once the Wrike import has finished:
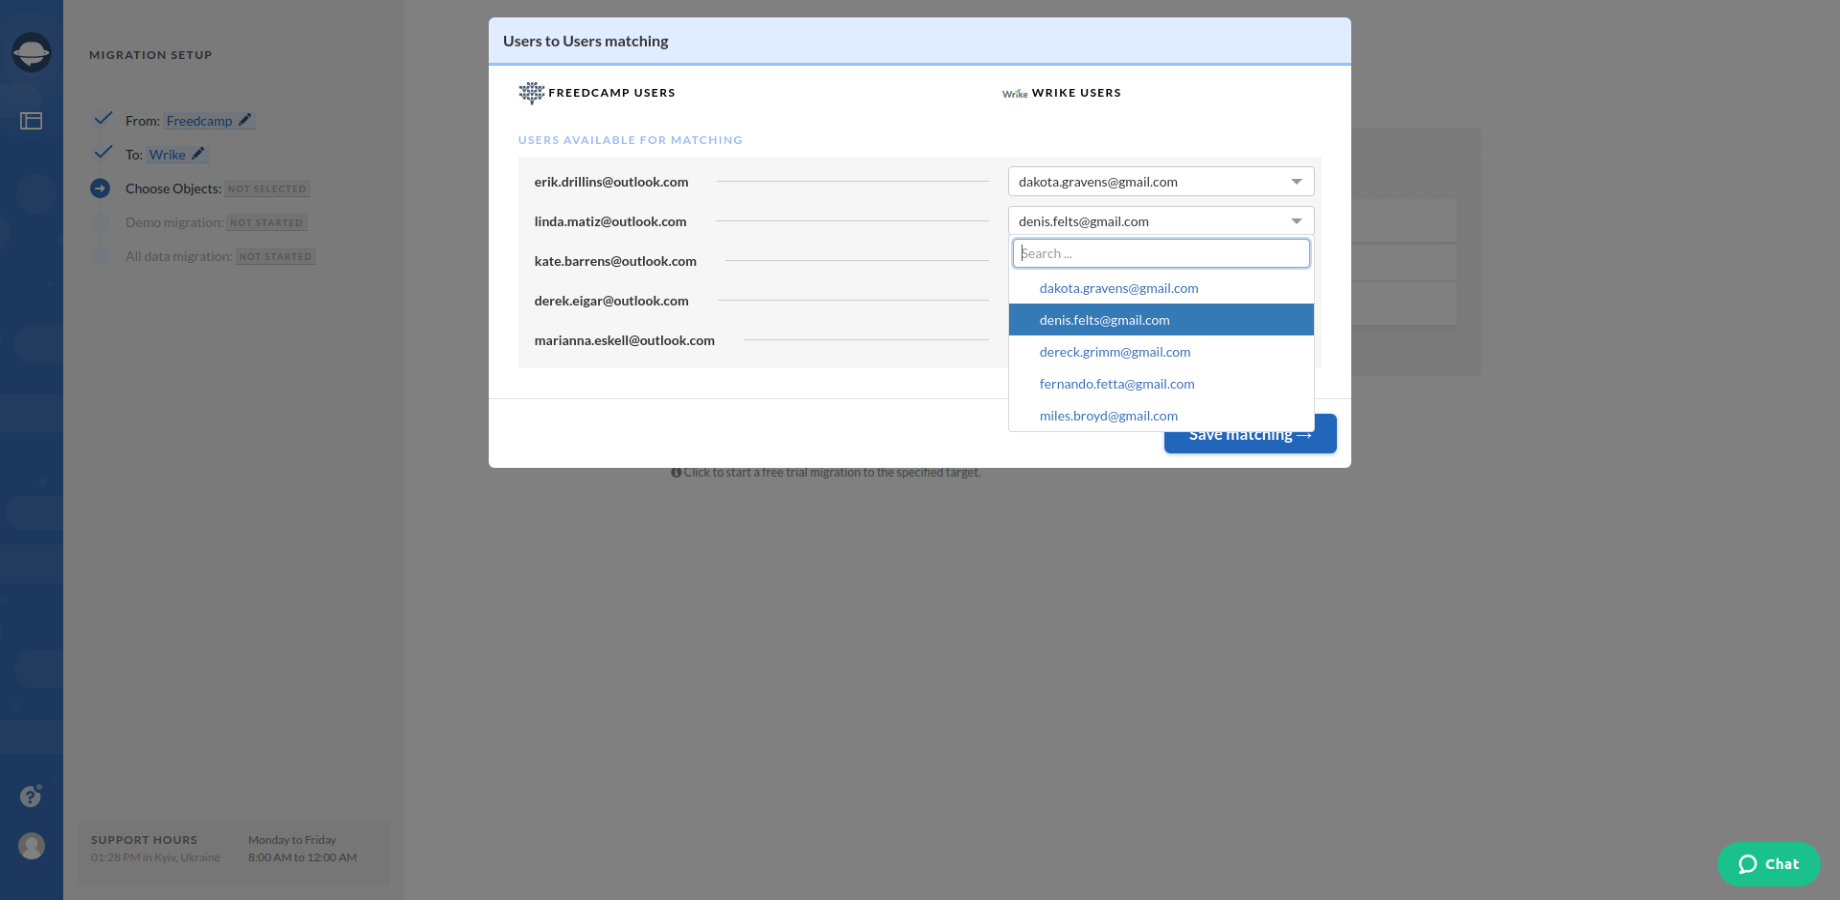
7. When Task mapping is done, move on to user matching. Click the Match items button and match users between the systems:
8. Then run the demo migration process by pressing the “Continue” button. The process won’t take longer than 5 minutes:
9. Check the import results to see how your data migrates to Wrike and how our tool works:
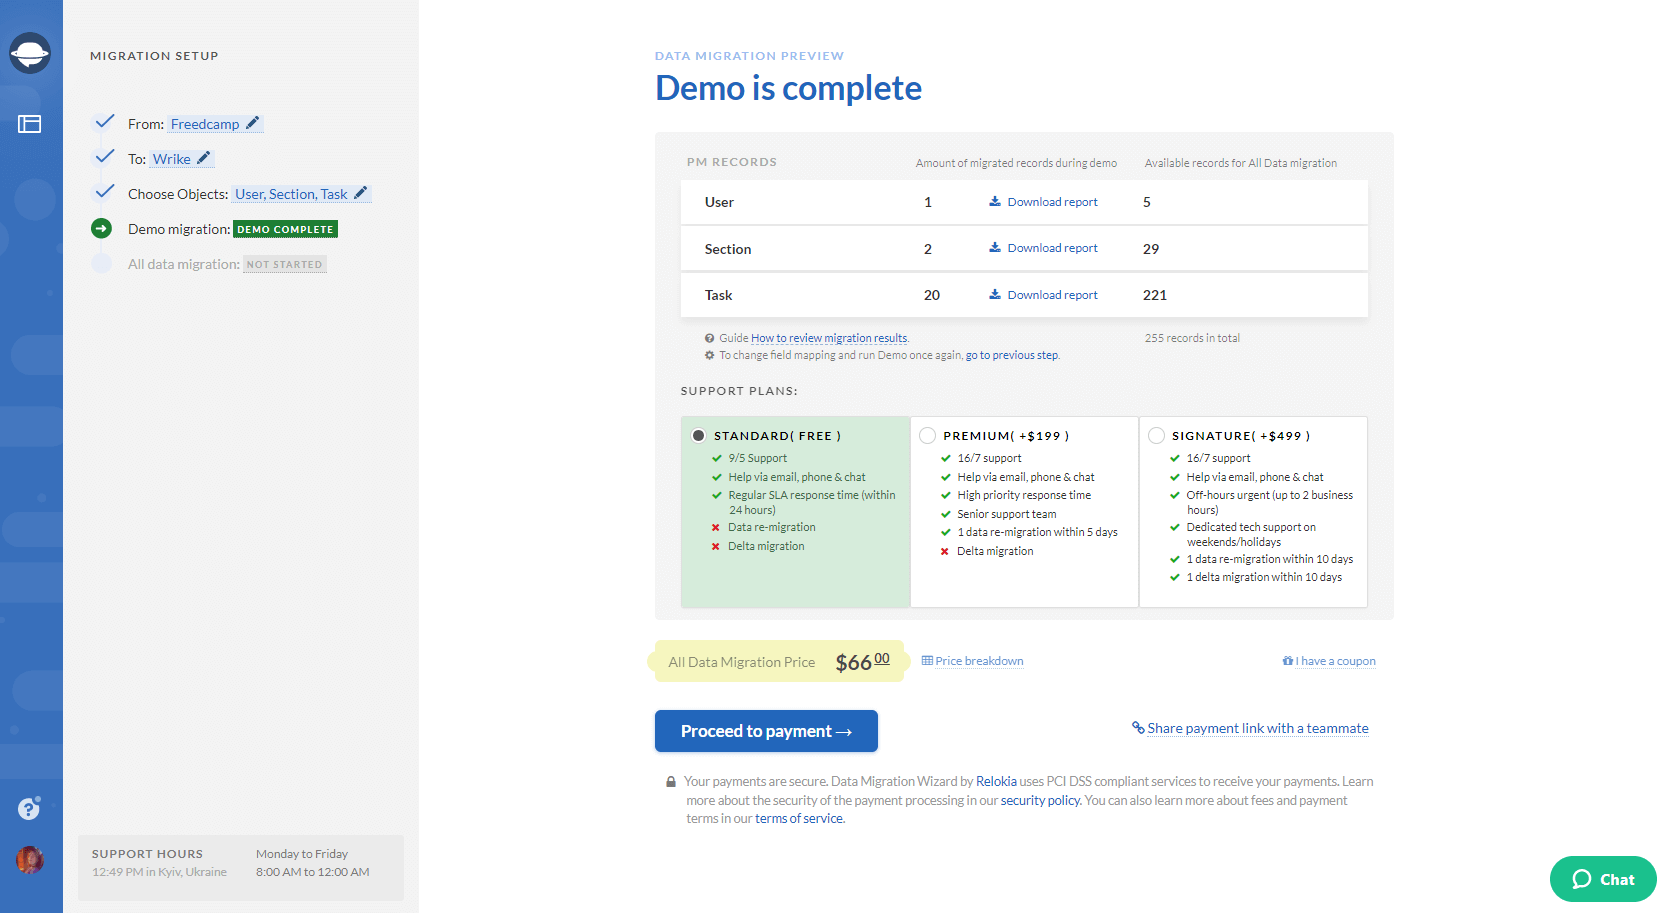
Note: Proceed with the next step if you are satisfied with how your data import went. Contact our support agents if you have any questions or would like to adjust the migration process to your needs.
10. Perform the Full Data Migration.
What data you can import to Wrike
Every project spins around the data, so losing any part of it causes a lot of difficulties. That’s why you need to know which records you can import to Wrike before the process itself. Here is the list of data that you can migrate:
- Projects / Folders;
- Projects lists / Task lists;
- Groups for tasks;
- Tasks;
- Task Comments;
- Task Attachments;
- Task Custom Fields;
- Inline Images;
- “Started at” and “Due” dates of Tasks;
- Users.
Note: All Comment Attachments migrate linked to Task Attachments. In addition, Inline Attachments transfer as a separate comment. “Due” dates migrate if there are “Started At” dates on the source platform. As for “Created at” dates of comments and comment authors, they migrate in the description of task comments. “Created at” dates add to the description field of tasks. You see users during the mapping process.
To cut the long story short, you import all the essential data to your Wrike account. In case this list doesn’t contain the records you would like to transfer, contact our support agents. They will assist not only with this issue but also with the customization data import.
Prepare for Your Wrike Import
Preparation makes everything, and the migration process isn’t an exception. So, to run your data transfer to Wrike, you need to do the following things:
- Check that you have access credentials to both source and target platforms. Migration Wizard doesn’t create a connection between project management systems without this information;
- Ensure that you have the admin right on both systems to perform Wrike import.
Boost your Team with Wrike Import
That’s it. Now you know what data you can import and how to set up your Wrike data migration. An awesome project management system can help you increase your team’s productivity and reduce downtime. Make your Wrike import the key to your success!


