Checklist for Bulk Project Management Migration
When embarking on a journey of adopting a fresh project management tool, enhancing your solution, or amalgamating data from various projects, meticulous planning for the seamless transfer becomes paramount. Embracing the power of the bulk project management migration option not only grants you the precious gift of time but also enables you to dive straight into the heart of your work post-migration. After all, efficiency lies in the art of swift action.
What is a bulk project management migration?
Bulk project management migration is transferring data from multiple projects ofone project management system to another in a single data migration. It saves you invaluable time and effort, sparing you from the painstaking manual or per project data transfers. Plus, bulk project management data migration unveils its true prowess when you find yourself in need of:
- migrating specific source projects, or
- consolidating select source projects with their target counterparts.
How does a bulk project management migration work?
Bulk project management data migration is divided into three stages:
- planning,
- target preparation, and
- Full migration.
It is essential to give each stage its rightful attention as they play a pivotal role in data integrity, save valuable time, and make the import process as smooth as possible.
Welcome to Stage 1: Planning, where we lay the groundwork for a smooth migration journey
Here’s what you need to do:
1. Provide us with a list of projects that require migration. Clearly indicate which projects should be transferred from the source account. If you want to move all of them, simply let us know the number and we’ll take care of the rest.
2. Let us know if you’d like our team to create all projects from scratch. Alternatively, if data needs to be migrated into existing destination projects, kindly provide us with the names of those destination projects along with their corresponding source projects.
3. It’s time to create user accounts for all users on the target platform and provide the matching scheme. To accomplish this, complete a file where you list each target user’s email alongside their corresponding source email.
4. Mapping for the Resolution field comes into play if it exists on both the source and target platforms. In this scenario, specify:
- how the source Resolution fields should be mapped to the target fields
- how the Status field should be mapped to the Resolution field
5. Once all projects are created, our diligent team will add all available custom fields as they are, ensuring that the values are seamlessly transferred. However, if there are specific custom fields that should not be migrated, provide us with the relevant requirements.
6. As soon as payment is made, our technical team will leap into action, diligently preparing the target account for migration. Rest assured, we’ll handle the technical details, allowing you to focus on the excitement that lies ahead.
Welcome to Stage 2: Target Preparation, where our tech team springs into action
Here’s what you need to know:
During this stage, our tech experts will create all necessary projects, fields, and sections on your target platform. This meticulous preparation process usually takes up to 4 days, ensuring everything is in perfect order for the upcoming migration.
Now, let us share some expert tips to make your bulk project management migration journey even snoother:
- To ensure a smooth and flawless experience, create all user accounts on the target platform prior to our team’s preparation work. This is crucial because our tech experts immediately associate users with the created projects. By adding users to their respective projects, they gain the ability to be assigned tasks and comment as authors, fostering collabortionon most platforms.
- Before diving into the preparation step, take advantage of our invaluable Demo Migration feature. Set up a trial migration for one project and carefully observe how the default fields migrate. If you notice any necessary fields missing or failing to appear during the mapping process, don’t hesitate to contact us immediately. We’re here to address any concerns and fine-tune the project management migration experience to perfection.
Rest assured, our team is dedicated to creating an optimal target platform that sets the stage for your migration triumph. Trust in our expertise, and get ready to embark on a seamless journey towards enhanced bulk project management migration efficiency.
Welcome to the grand finale, Stage 3: Bulk Project Management Migration
Get ready to witness the seamless transfer of your precious data. Here's what you need to do:
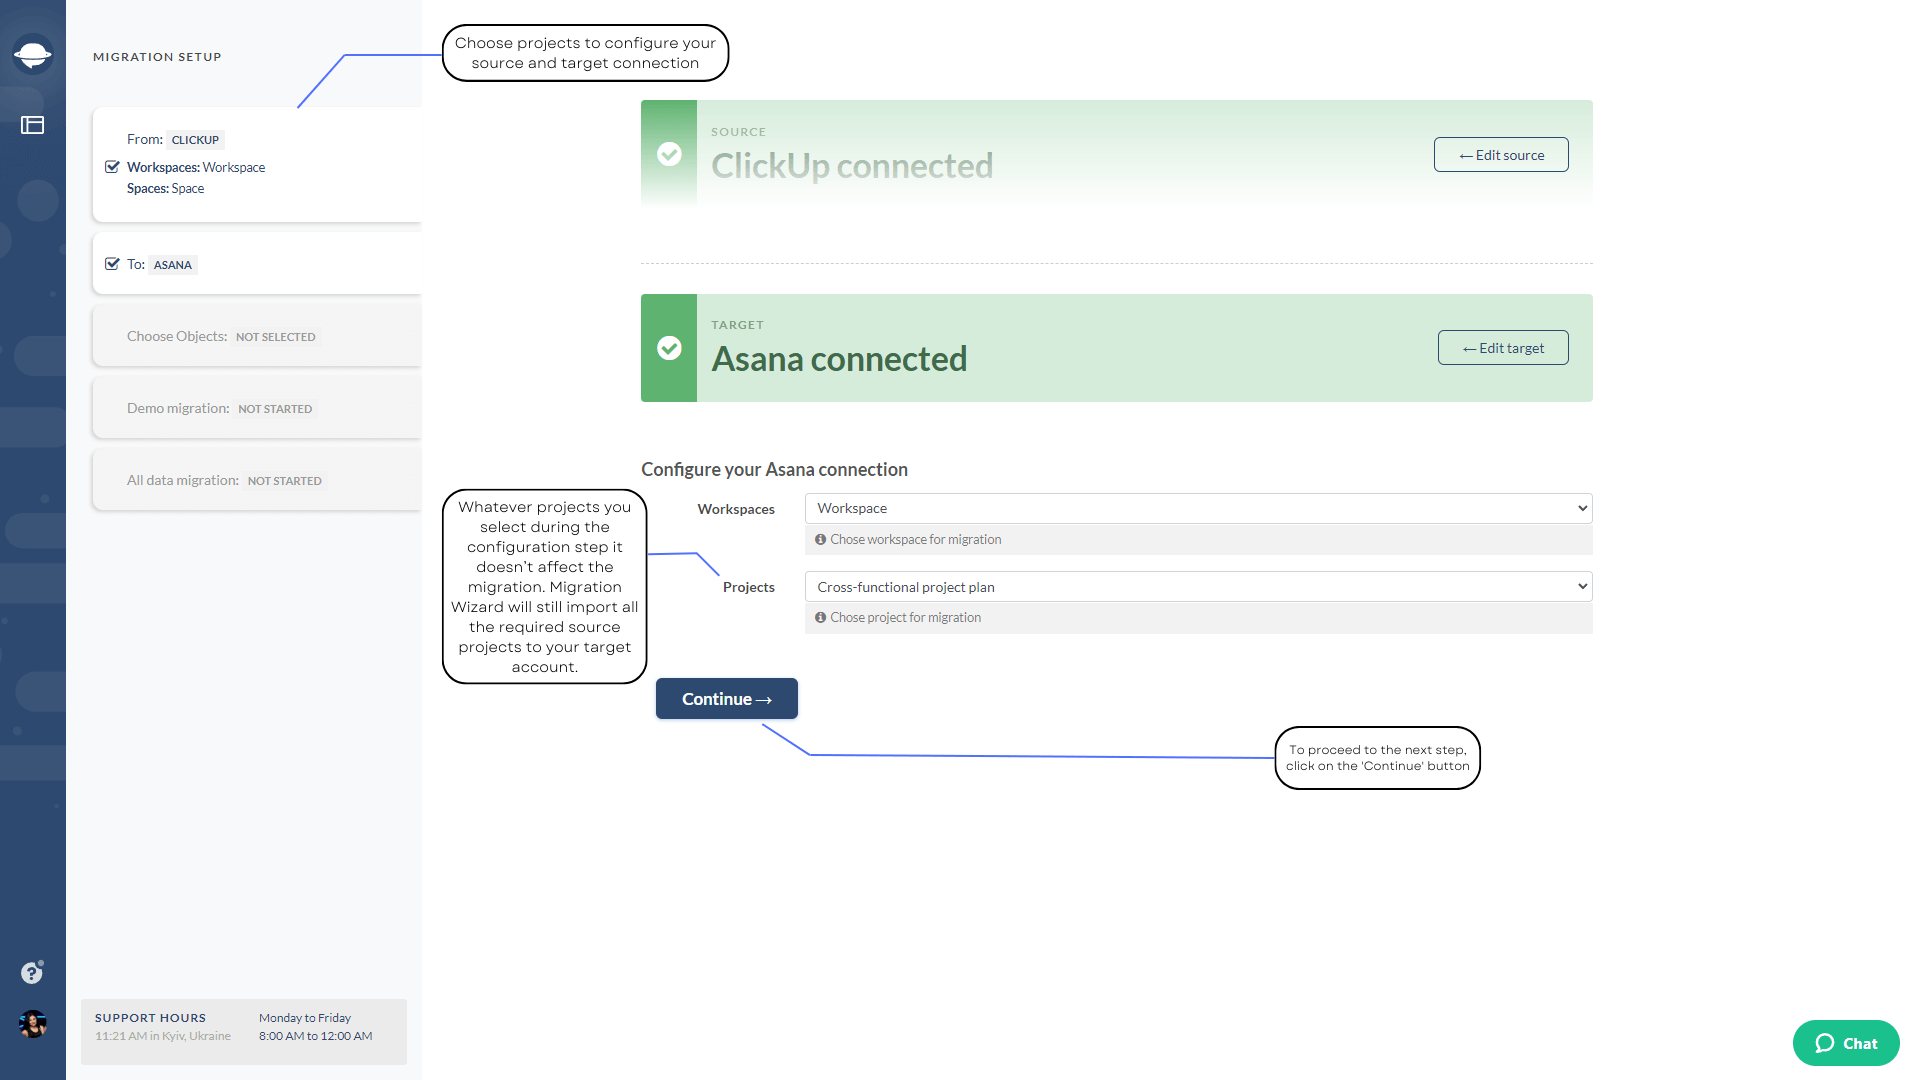
1. Let’s kick things off by restarting your Demo Migration. Take the leap and connect your source and target project management systems. During this process, you’ll have the opportunity to choose projects to configure your connection.

2. It’s time to map user profiles. Pay close attention to the matching scheme you’ve provided our team. Following it diligently will ensure accurate mapping and a seamless transition.
3. Custom fields will automatically be mapped for you during the bulk project management migration process. However, if you wish to remap any field, feel free to do so. Rest asured, your migration process will remain unaffected.
4. While mapping tasks, keep an eye out for the Project field. This crucial step ensures that tasks are accurately placed within their designated projects, further streamlining your project management experience.
5. Once you’ve restarted a Free Demo, the counts will be recalculated, giving you the most up-to-date information. Now, it’s time to take the plunge—pay for your data import—and initiate the Full Data Migration by making your payment. Brace yourself for the transformational journey ahead as your data finds its new home in the target account.
Congratulations! You've reached the final stage of the setting up guide of the bulk project management migration. Trust in our expertise, embrace the process, and prepare to unlock a new level of project management excellence.