Get Started
Our Project Management Data Migration services guarantee a smooth and secure transfer of your data across supported platforms. The Migration Wizard automates the process, ensuring that data replication is accurate and painless.
What is Project Management Demo Migration?
The Demo Migration offers you a free opportunity to transfer a batch of data to your Target project management system using the Migration Wizard. It's a risk-free way to experience the process, you can modify and set it up as many times as you like.
If you're ready to get started, here’s how to begin:
- Connect your Source and Target.
- Choose the data objects you want to migrate.
- Match tasks between your Source and Target.
- Start your free Demo Migration.
How to check the results of the free Demo Migration?
Once the Demo Migration is completed, you will see a summary table displaying the number of migrated, skipped, and even failed records.
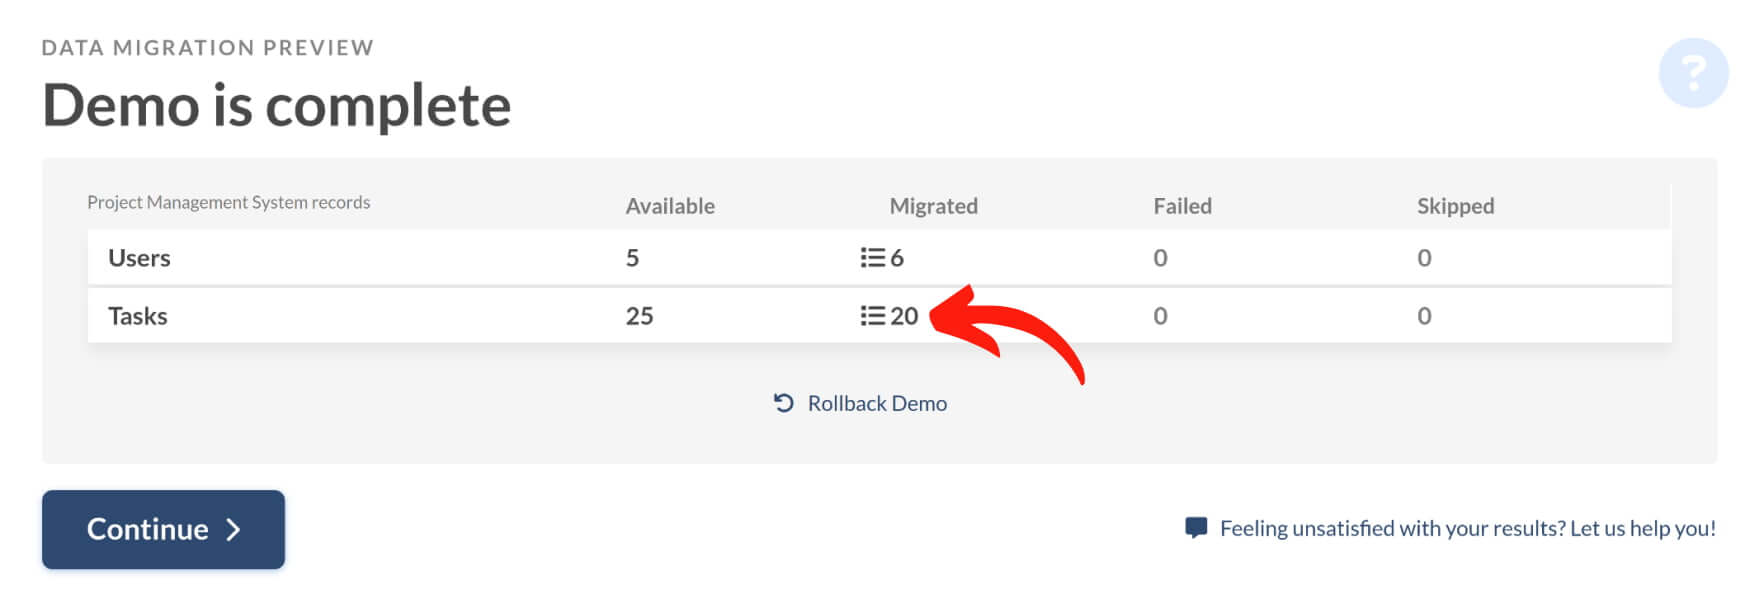
To review specific records, click the button to access a list of record IDs. Use these IDs to locate and verify each record on the Source and Target, and ensure they migrated correctly.
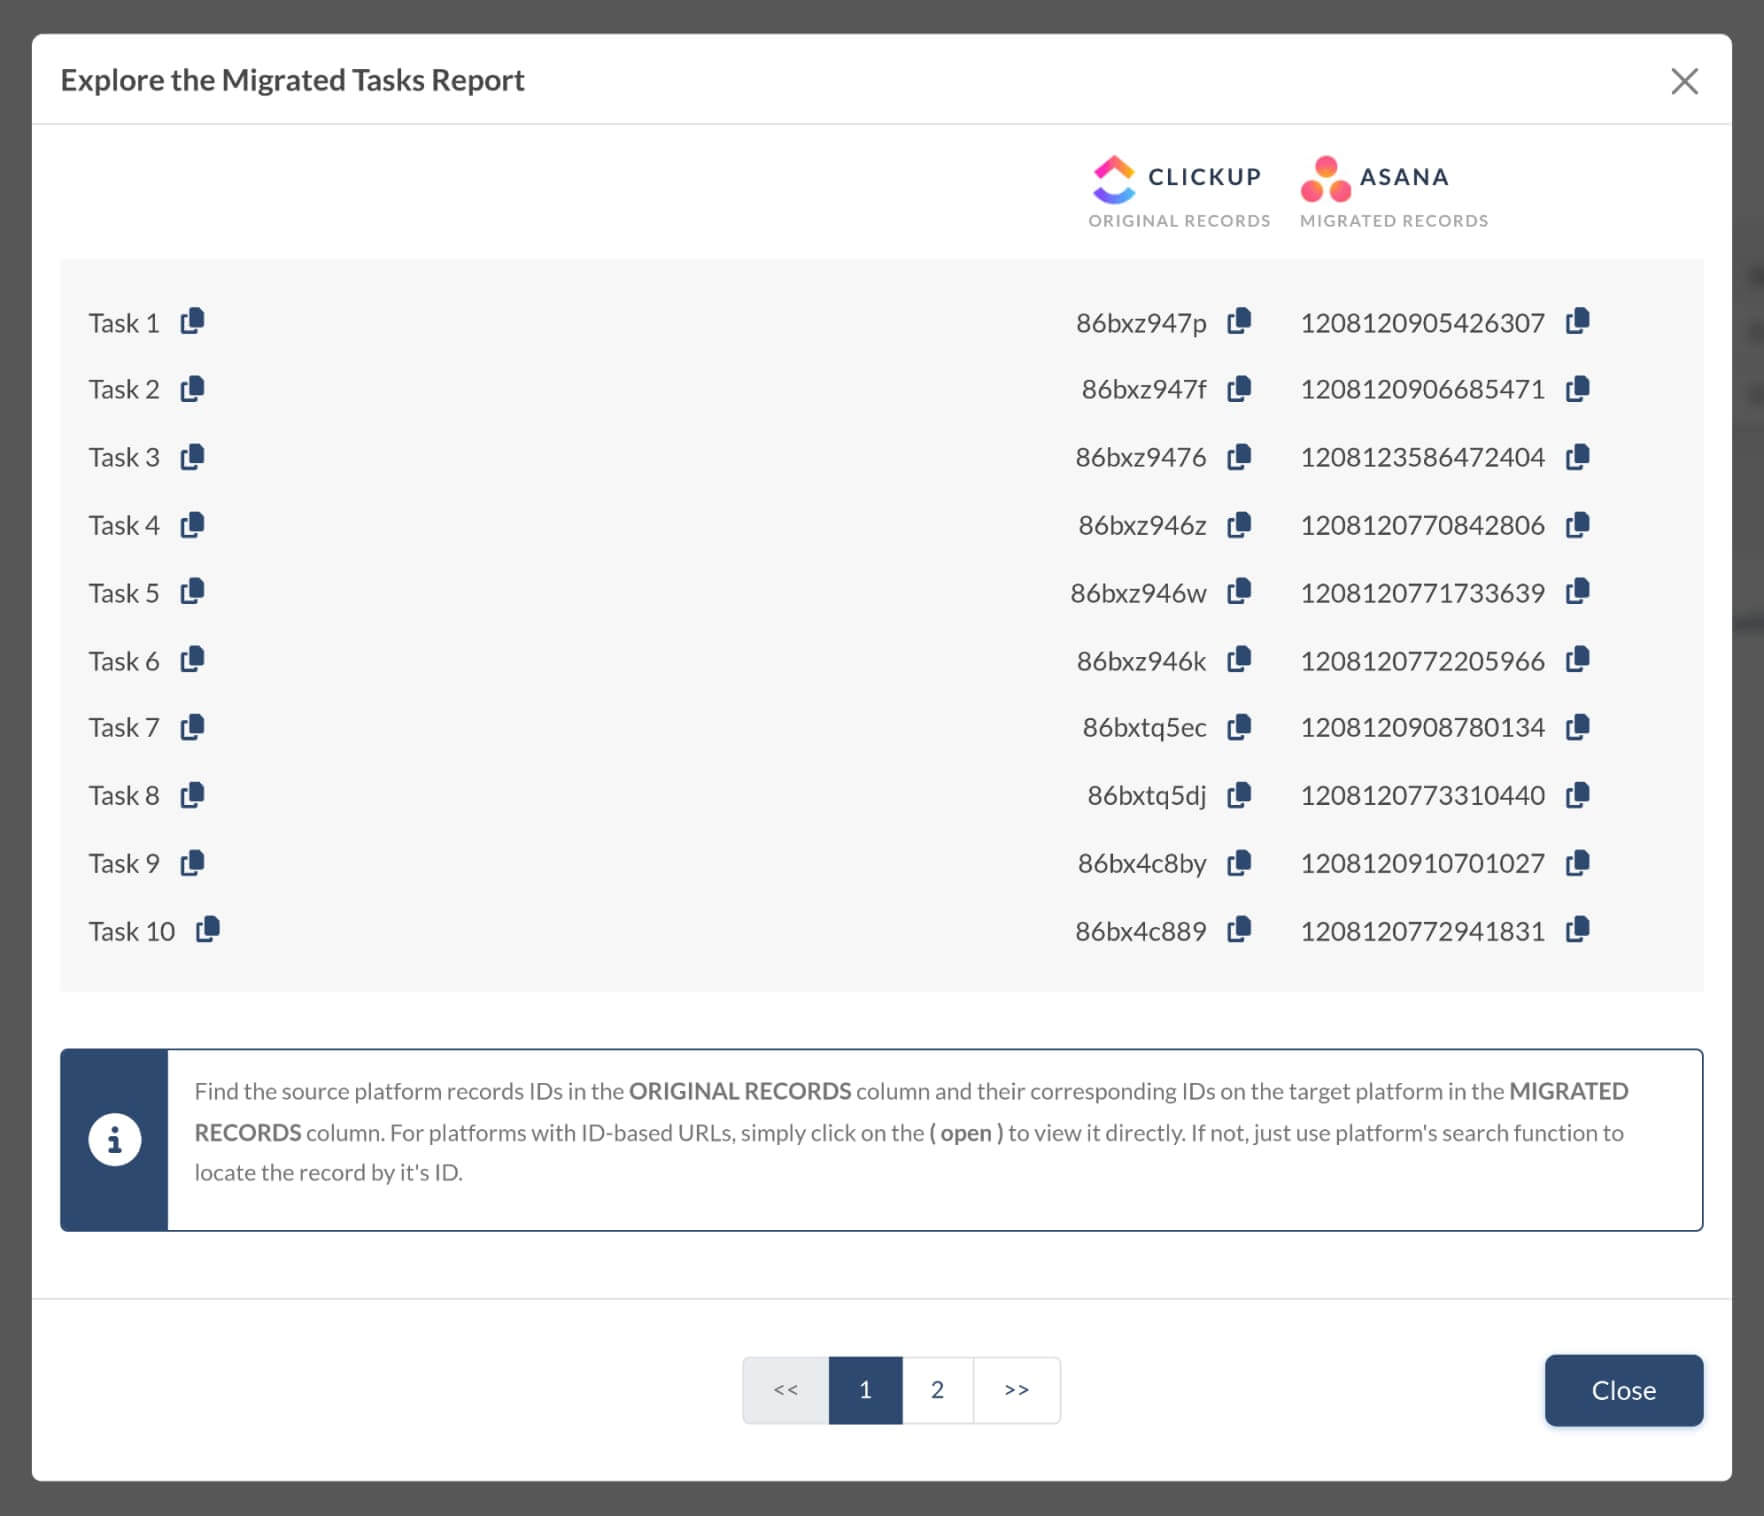
For instance, if you’re migrating to Asana, you can search by the ID, and Asana will pull up the respective task.
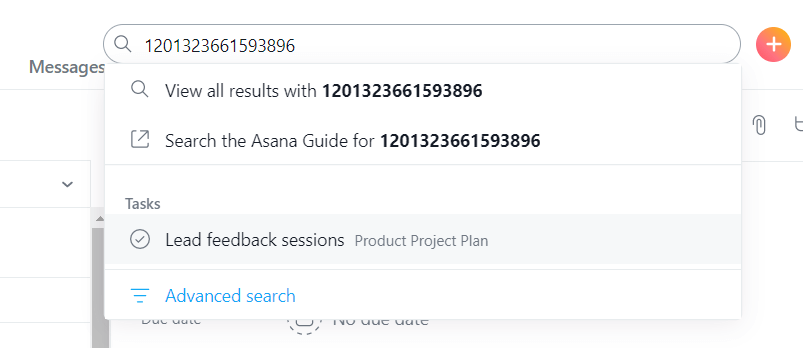
The process may differ depending on your project management software. If you need assistance locating the records, you can contact our support or your vendor for guidance on searching records by their IDs.
Consider an extended support plan
You can run multiple tests to make sure the data migrates correctly. But if you need additional assurance, consider upgrading to a Premium or Signature support plan that includes data re-migration.

If any issues arise, these plans allow you to re-migrate your data. The Standard support plan users can re-migrate data within 5 days, and Signature customers can re-migrate data within 10 days after the Full Migration is completed.
What do skipped/failed records mean in migration results?
Skipped or failed records indicate that certain issues occurred with those specific records during the Demo Migration. Once your Demo is finished, you can review the reasons for skipped or failed records, which can help you prevent similar errors during the Full Migration.
If you encounter skipped or failed records during the Full Migration and require assistance in reviewing and re-migrating them, you can select the Signature support plan. See more on support plans.
What is re-migration and when is it useful?
Data re-migration is the process of deleting all previously migrated data from your Target and migrating it again. This service can be beneficial if something goes wrong during the initial migration or if you need to adjust your data migration.
We offer data re-migration as a part of our support plan.
- Standard: 1 data re-migration within 3 days
- Premium: 1 data re-migration within 5 days
- Signature: 1 data re-migration within 10 days
Re-migration allows you to rerun a Full Migration, ensuring that your data is accurately and completely migrated to your Target. This service provides an added layer of insurance and flexibility for your data migration needs.
What’s the difference between automated and custom migration?
Here’s a breakdown of the difference between automated and custom migration:
-
Automated Migration:
- Process: Uses the Migration Wizard to transfer basic records.
- User Involvement: You handle the migration yourself, following a few simple steps.
- Pricing: The tool automatically calculates the total number of records and the associated cost for Full Data Migration.
-
Custom Migration:
- Process: Tailored to your needs, allowing for complex and specialized data transfers.
- User Involvement: Requires coordination with our support team to address your unique requirements.
- Pricing is based on the number of records and the complexity of your needs. Contact our agents for a detailed quote.
The Custom Migration option may be more suitable if you have specific migration requirements.
What is Delta migration?
Delta migration is the process of migrating data created or updated during or after the initial migration. It is an essential service that allows you to continue managing your projects during migration without any interruption or loss of data.
Here’s how Delta migration works: The Migration Wizard automatically detects new data on your Source and transfers it to the Target. The migration service ensures no duplicates are created by replacing existing data with the updated version.
Note that Delta migration may not be possible if your Target’s API doesn’t permit third-party apps to remove data from the system.
Delta Migration can be started between 9 am and 9 pm on weekdays in EET/UTC +3. If you need to start it outside these hours or on a different day, contact us to arrange the details.
What is a Rollback Demo, and how does it work?
The Rollback Demo lets you remove migrated records on the Target. This option is only available for project management platforms that support it. Not all data can be deleted, as removing certain entities may lead to inconsistencies in the future. Such entities will remain in your Target.
After completing your Demo, you can find the Rollback Demo option under the details on available and migrated entities in the Migration Wizard.
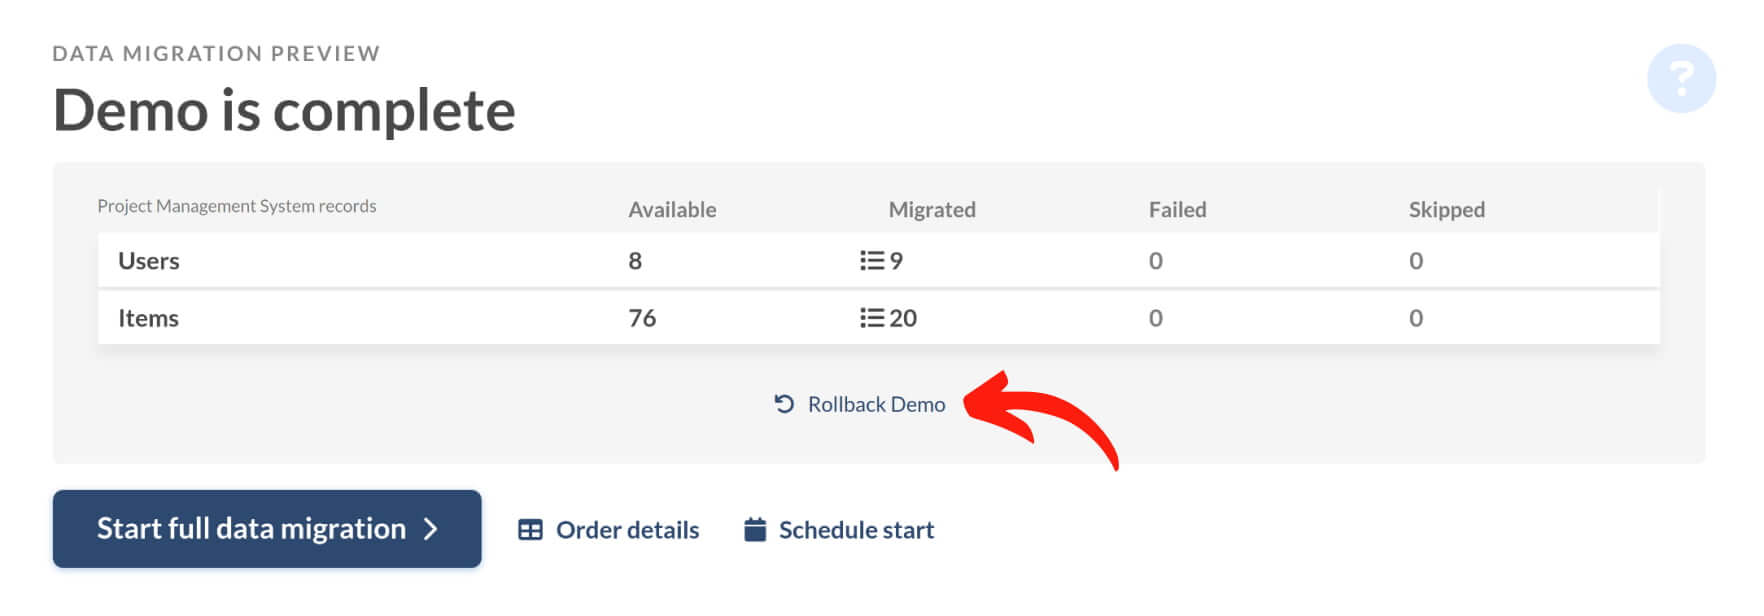
Clicking this option opens a window displaying a list of records available for deletion from your Target. If there are multiple options, you can choose the ones to delete. Once you've chosen, click the Continue button.

In this example, 20 items were deleted. Once the Rollback Demo is complete, check your project management data migration dashboard — no migrated items will remain in your Target.
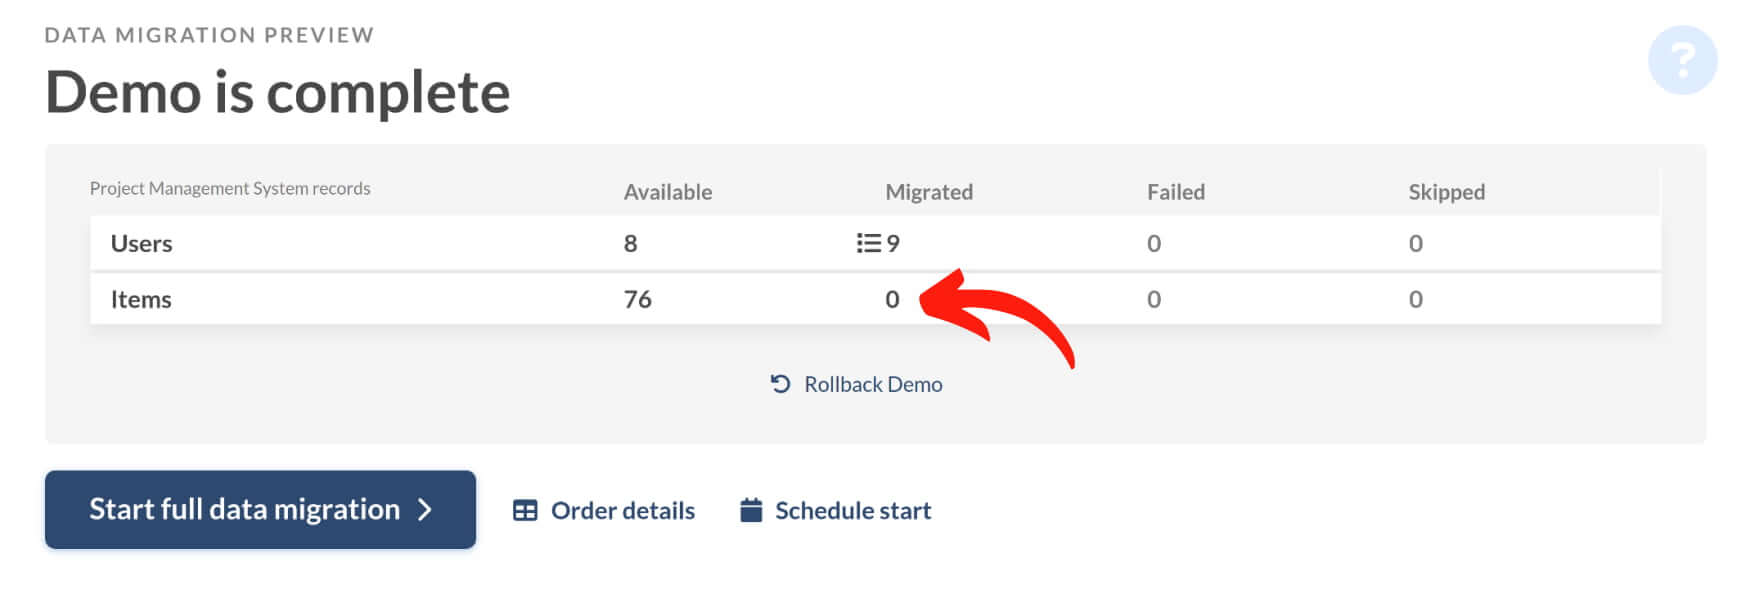
After performing a rollback, the Rollback Demo option will indicate no data left to delete.

You can rerun your Demo Migration as often as needed, and use the rollback option after each Demo. Our support team is just a click away if you have any questions.
What Is an Archived Migration?
For compliance reasons, Relokia retains access to your migration for 3, 5, or 10 days (depending on your support service plan) after completing the Full Data Migration, and 7 days after finishing the Free Demo Migration. You can contact support to report issues, request customization, etc.
After this retention period (3, 5, or 10 days after the Full Data Migration and 7 days after the Free Demo Migration) expires, Relokia removes all information related to your migration for security purposes.
If your data migration has been archived, simply start a new migration.
How to allow support access to a Project Management Data Migration?
To ensure we provide you with the best support, our team might need access to your migration details. Here’s how to easily grant support access.
Go to your migration dashboard and find the migration you need help with. Click the wrench icon 🔧 next to the migration. Follow the instructions in the message that appears.

Put a tick next to the “Allow support access” checkbox, and click “Save” to proceed.

If you haven't granted support access but need help, our team will send you a request. Look for an email with a link to the Migration Wizard. Click it, grant access, and save your choice. This will enable our support team to assist you effectively.
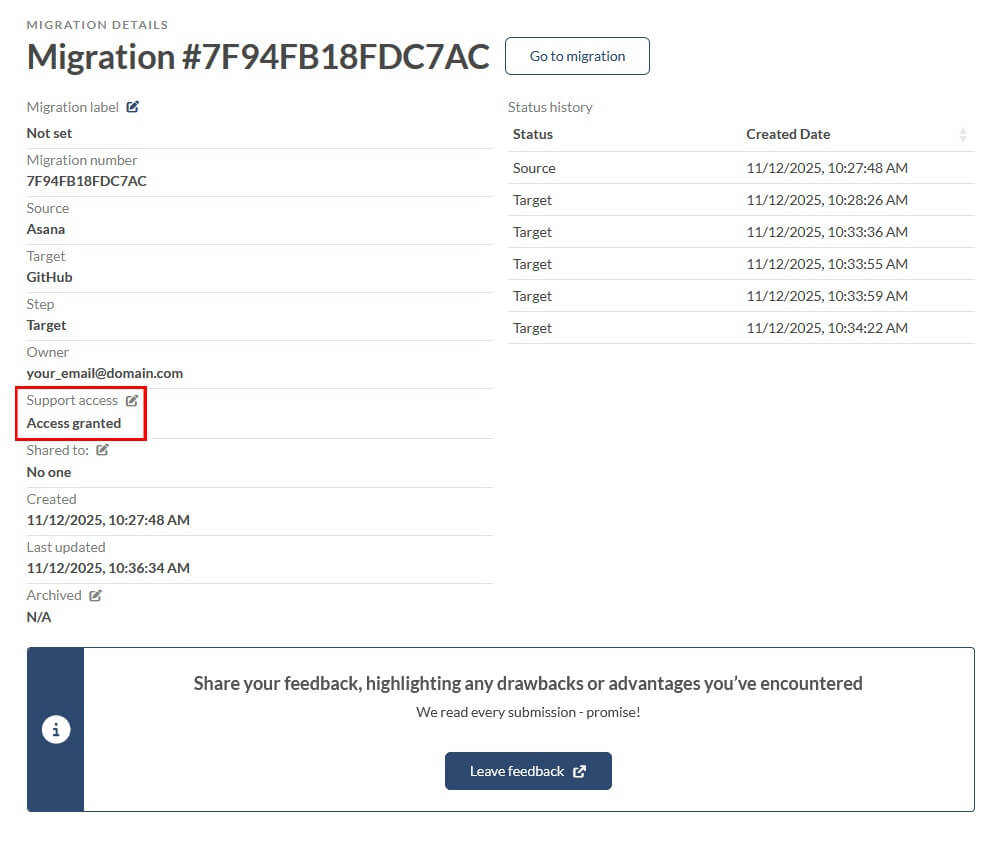
To check if you've granted access, go to the migration details page and review the access status. You can also grant or adjust the access from this page.
How long does data migration take?
The duration of your project management data migration can vary based on several factors:
- The number of records you want to migrate
- The number and size of attachments
- The API limits of Source and Target
- The API specifications
- The type of software (cloud-based, on-premise, open-source, etc.)
Complex project management migrations with extensive data or custom configurations may require additional time. For a more accurate estimate tailored to your specific needs, contact us.
How to speed up a data migration?
To accelerate your project management data migration, consider the following steps:
The API limits of both your source and target platforms significantly impact migration speed. Contact your project management software vendor and request a temporary increase in API limits for your account. Higher API limits can help speed up the migration process.
Ensure that the data being migrated is clean and well-organized. Remove any unnecessary or redundant records to streamline the migration.
Schedule your migration during periods of low activity to minimize the impact on your systems and take advantage of less congested API usage.
Reduce the number and size of attachments if possible, as large attachments can slow down the migration process.
If you have any questions or need assistance during the migration, our team is available to support and guide you through the process.
When can you start your project management data migration?
You can start your project management data migration any time after your purchase. You can either begin setting up immediately or schedule the migration for a more convenient date.
If you have any questions or need assistance with the process, our team is always available to help. Simply drop us a line, and we'll be happy to assist you.
What is data mapping and how to migrate custom fields?
Data Mapping is the process of matching and aligning data fields between your source and target during a migration. This ensures that data is accurately and consistently transferred to the new system.
If the project management tool you’re migrating to supports custom fields, create all the necessary custom fields on the target system.
Go to Migration Wizard and begin setting up your migration. Connect the source and destination system. Then, you will see the page where you can select objects you want to migrate and map task fields.
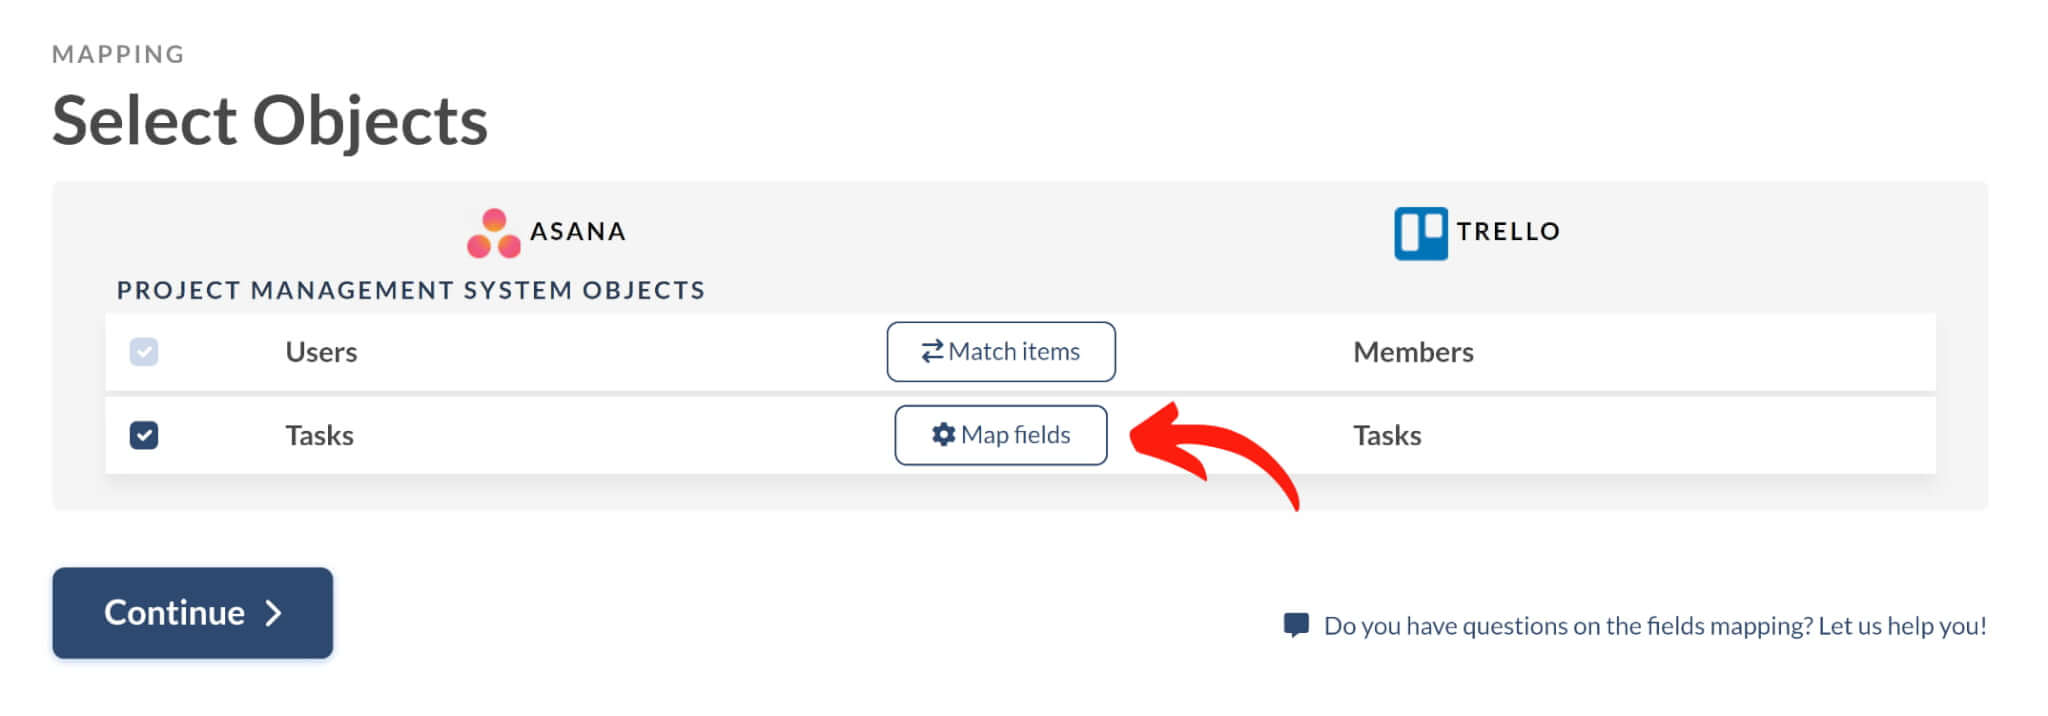
Click the “Map fields” button, and you will see a form with fields available for mapping. Custom fields are located at the bottom of the form.
Map task fields and save the mapping. Then, continue with your data migration.