Microsoft Project Data Migration Guides
How to export tasks and resources from the Microsoft Project desktop as CSV?
To export your tasks and resources as CSV, open your Project on the Microsoft Project desktop and check for permission to perform this action. If you can’t save files in a CSV format, here’s what you need to do:
- Press the “File” option, and then go to the “Options” dialog tab. The tab redirects you to “Project Options”.


- Under the “Project Options” tab, press the “Trust Center” option.
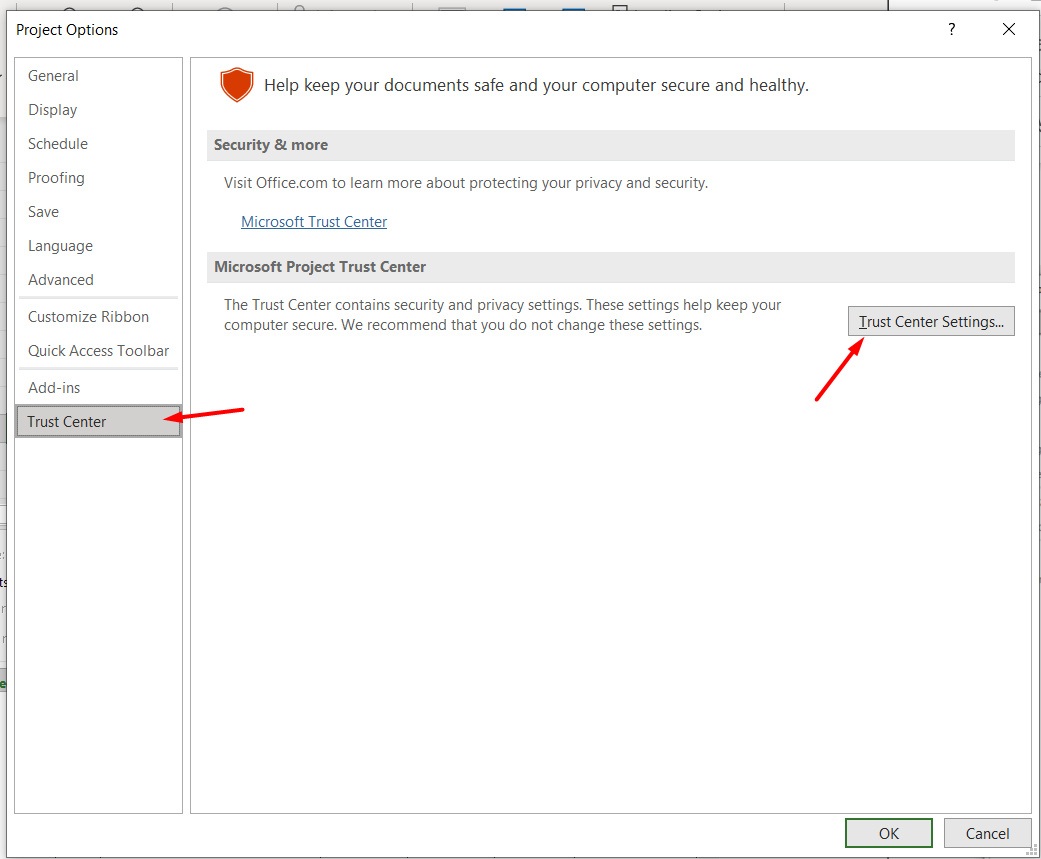
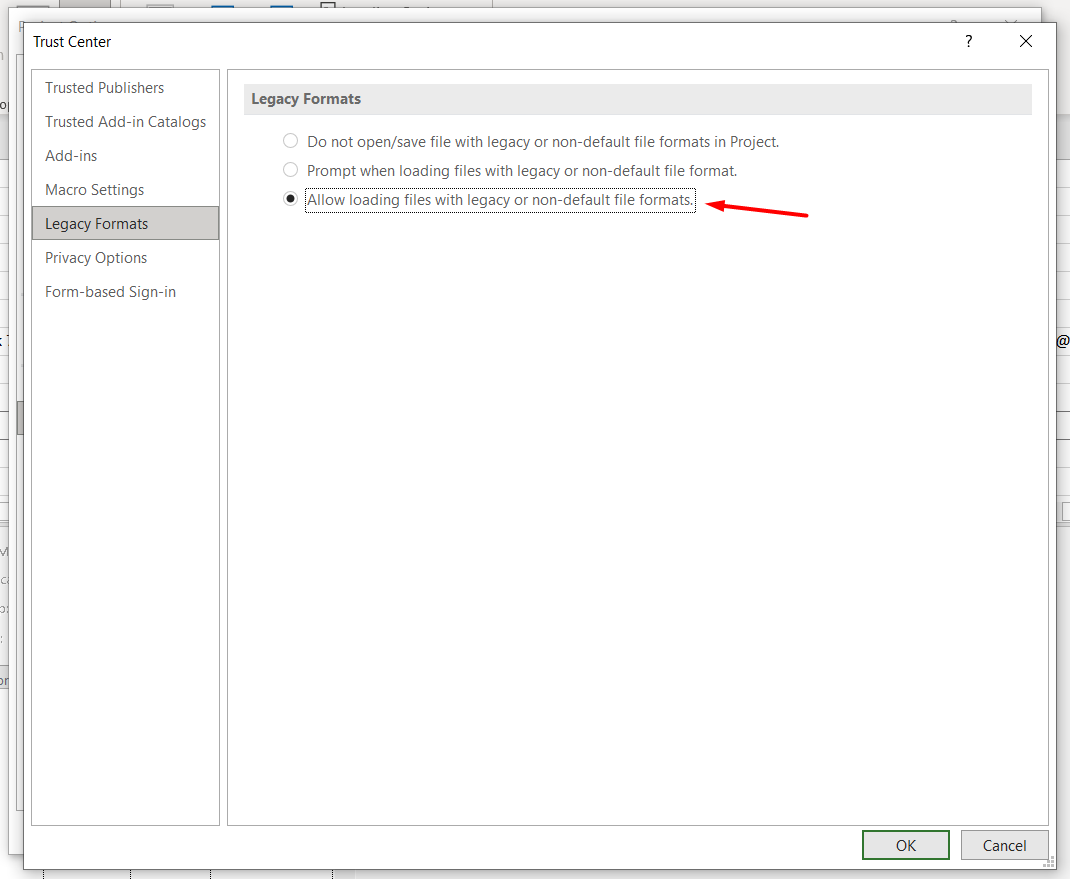
- Click on the “Trust Center Settings” button, which leads you to the “Legacy Formats” tab.
- Choose the “Allow loading files with legacy or non-default file formats” option and press “Okay”.
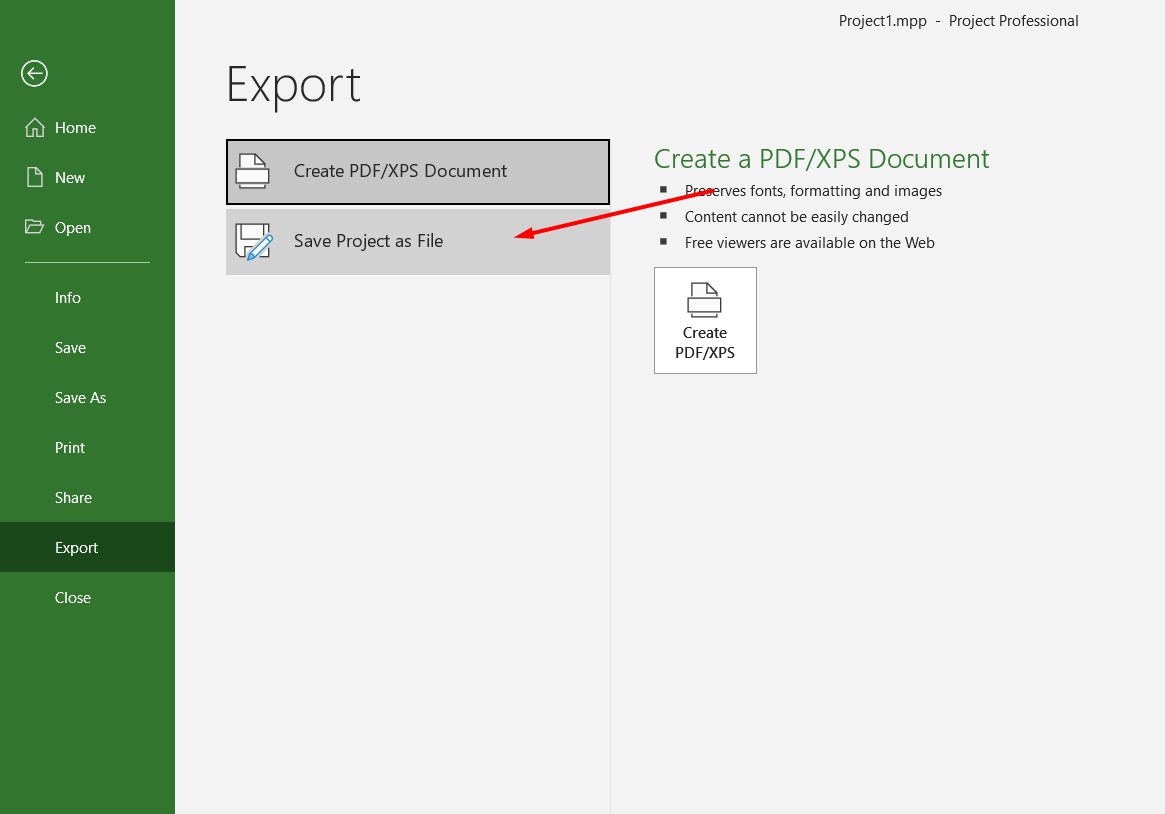
After you’ve changed the settings, return to the “Home” tab and choose “Export”:
- Choose the “Save Project as File” option.
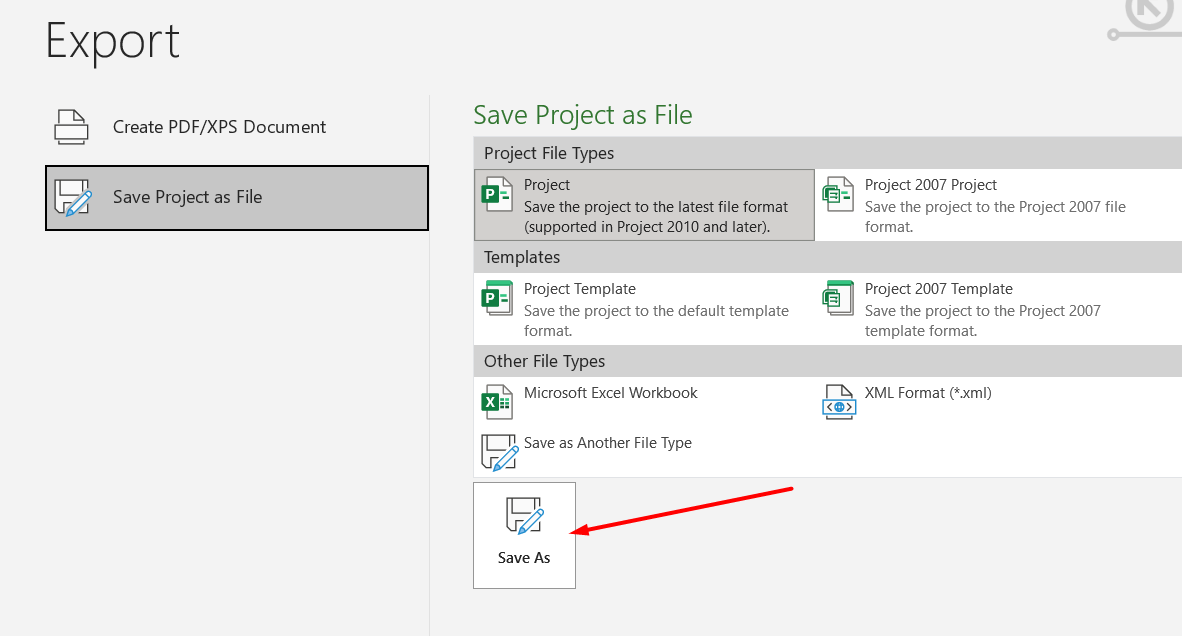
- After that, under “Project File Types”, select “Project” and press the “Save as” button.
- Define the file location and save it as type “CSV” (comma delimited) (*. CSV).
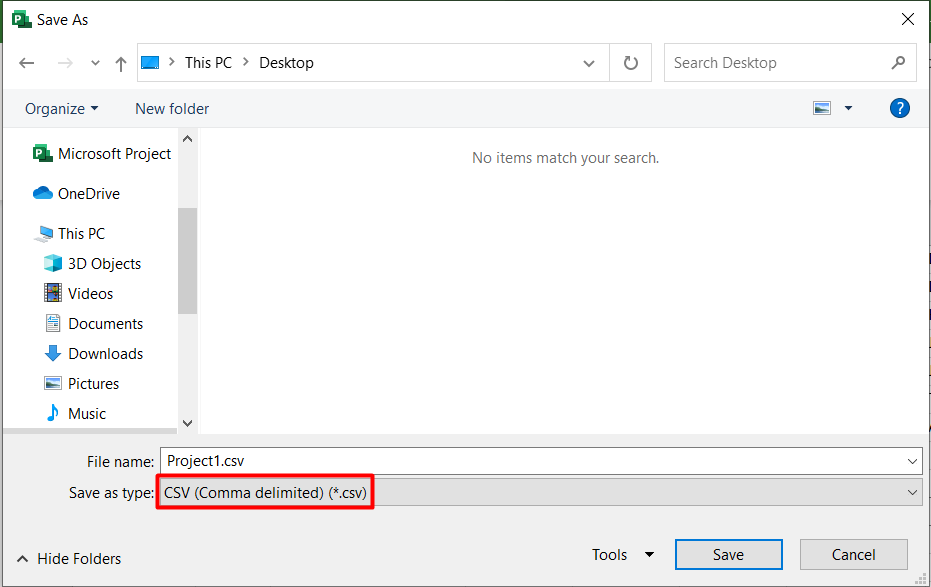
- Press the “Save” button.
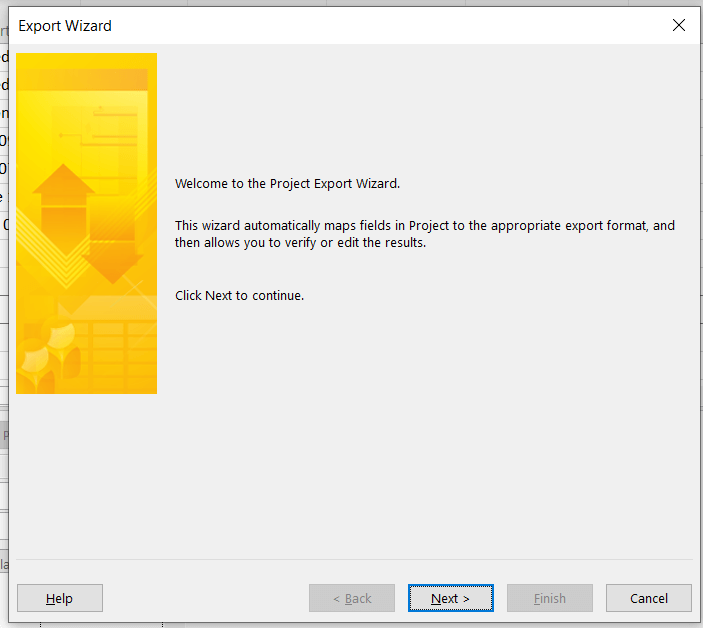
When you’ve pressed the “Save” button, the Export Wizard will open automatically. Here, you need to do the following steps:
- Click the “Next” button to continue.
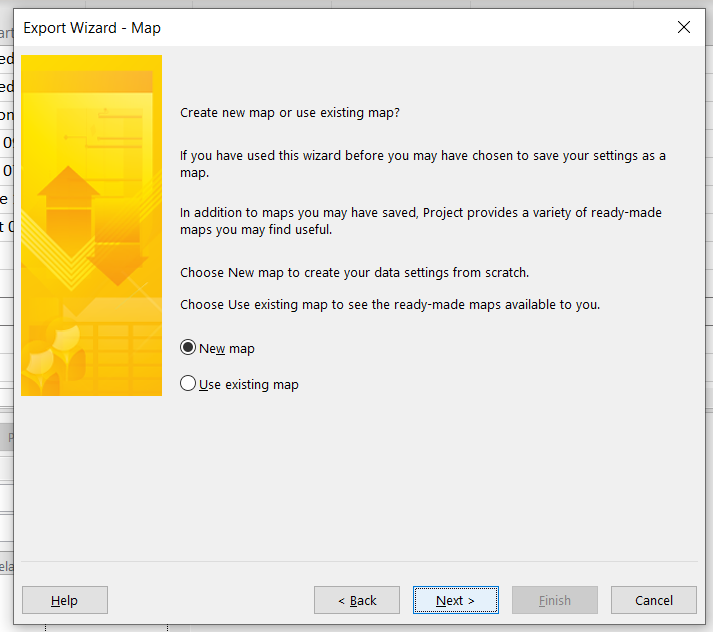
- Choose “New map” to create your data settings from scratch and press “Next” again.
- Select the types of data you want to export: tasks or resources. Then click “Next”.
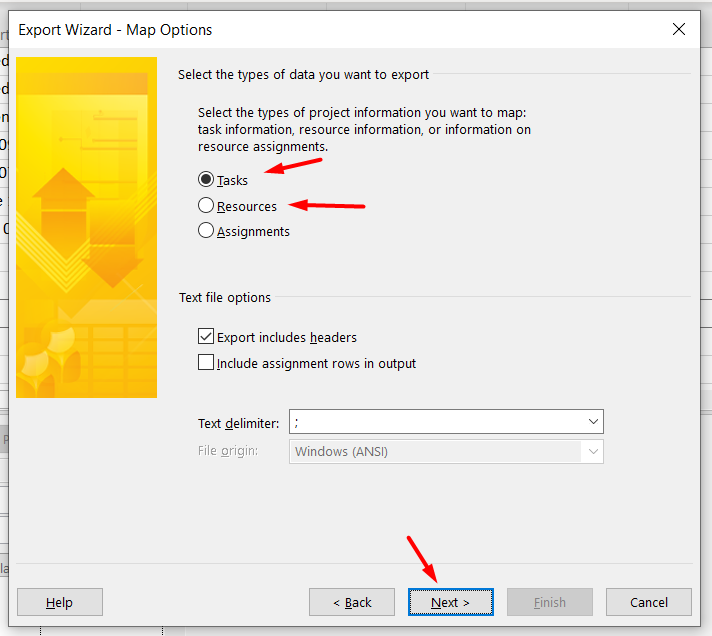
Note: Microsoft Project allows exporting one data type at a time, so you’ll need to run two exports.
- Choose the needed fields.
What fields are required and what fields are optional when preparing a CSV file of tasks?
You can download the sample CSV file for task fields and modify it by adding your data.
| Header | Format | Field |
| ID | 1 | Required |
| Name | Schedule kick-off meeting | Required |
| Status | Open | Required |
| Priority | 500 | Optional |
| Resource_Names | Sarah Johnson | Required |
| Notes | We need to investigate this case as quickly as possible | Optional |
| Created | YYYY-MM-DD HH:MM:SS | Required |
| Start_Date | YYYY-MM-DD HH:MM:SS | Optional |
| Finish_Date | YYYY-MM-DD HH:MM:SS | Optional |
| Deadline | YYYY-MM-DD HH:MM:SS | Optional |
You can download the sample CSV file for resources fields and modify it by adding your own data.
| Header | Format | Field |
| Name | Sarah Johnson | Required |
| Email_Address | sarah@yourcompanydomain.com | Optional |
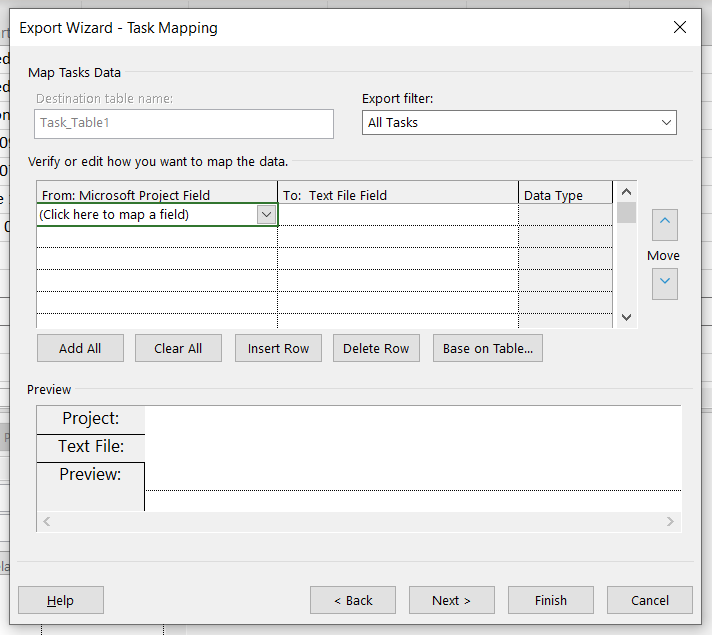
- Press the “Finish” button to save the files.
If you can’t install Microsoft Project Desktop, export your tasks and resources as CSV from Microsoft Project Online.
Check out this guideline to learn how to do it. If something wasn’t clear enough, or you’d like to get into more details, feel free to contact our support team for help.
How to export tasks and resources from Microsoft Project Online as CSV?
To export your tasks and resources as CSV, you need to open your Project in Microsoft Project:
- Then, press the “Go to Project Online” button down below:
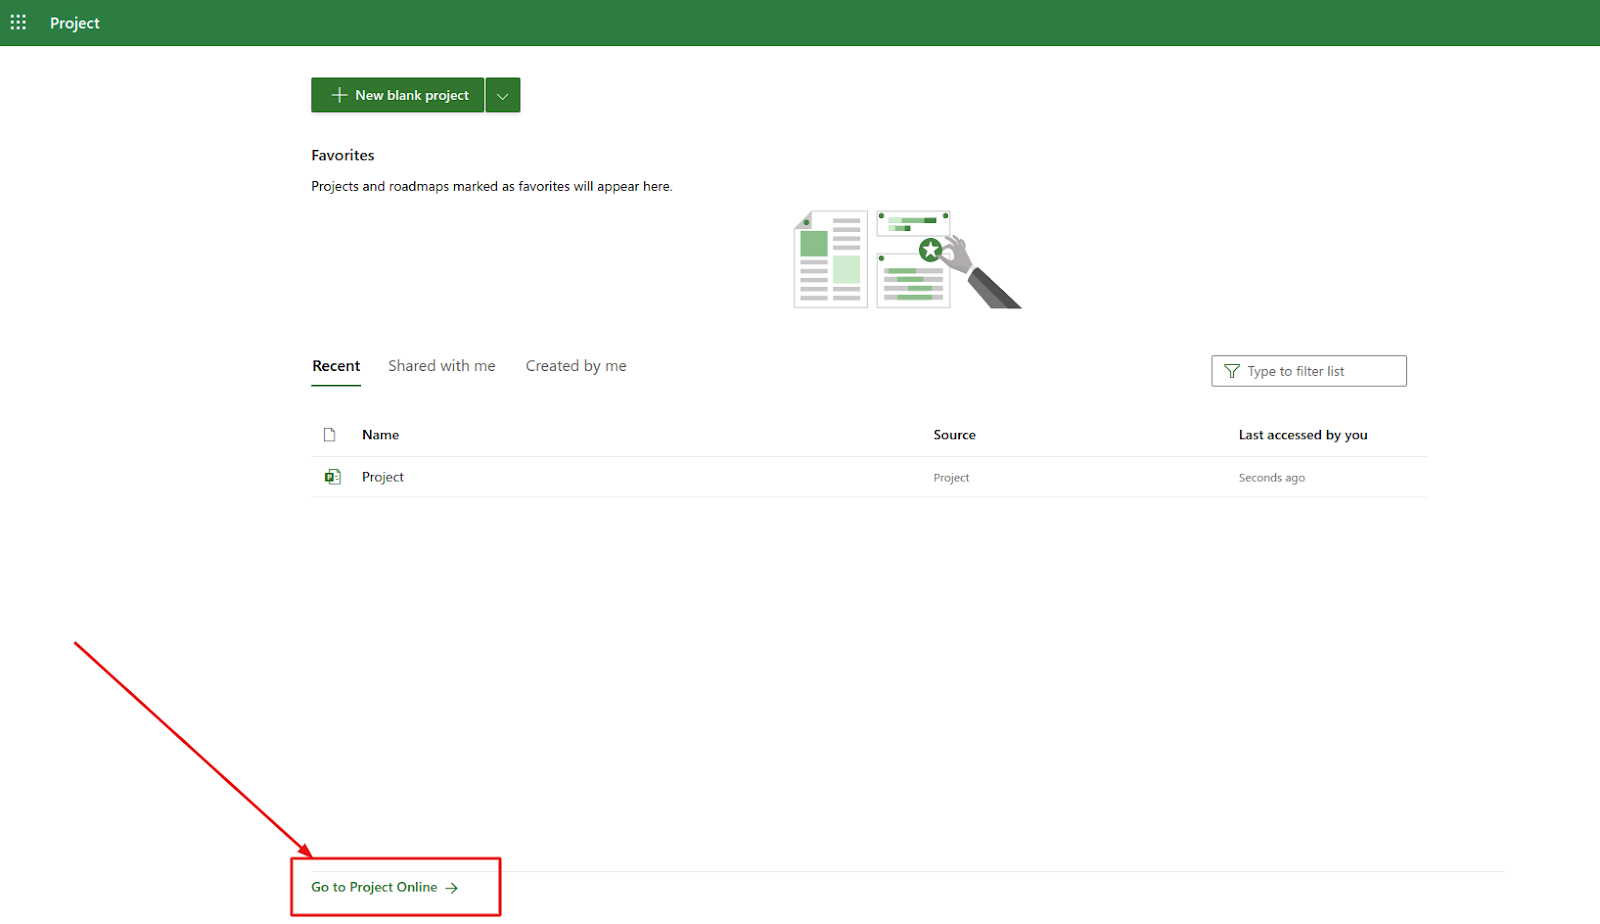
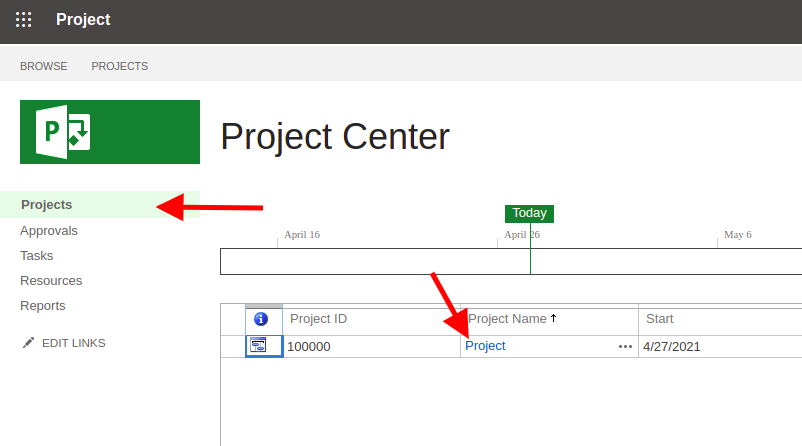
- On the Project Center page, click on the “Projects” option;
- Open the needed Project:
Note: Your CSV files should comply with our samples. Download the samples from Migration Wizard to check if you have all columns and the data format in your CSV files like in our samples.
- Go to the “Option” tab in the Project and choose the “Export to Excel” option for tasks:
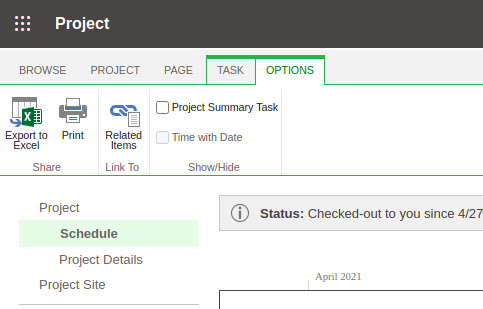
- Then, under the “Project” tab, select resources
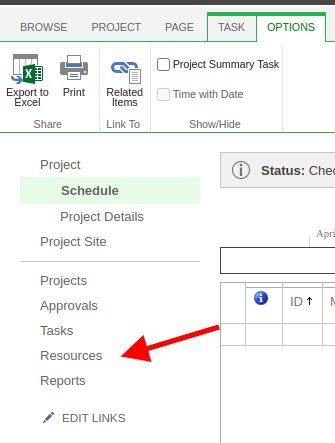
- Under the Resources tab, click on the “Export to Excel” button

- Both Excel files will download automatically.
Note: Convert the Excel files to CSV before exporting them into Migration Wizard. You need to upload CSV files with tasks and resources to configure your Microsoft Project connection with our tool.