Some time ago we informed you about the possibility of Jira Software Import. However, what should you do in case you want to export your data from Jira Software to another platform?
Well, you’d simply need to check this article, because from now on, you can migrate data from Jira Software in an automated way.
A few words about Jira Software
Jira Software is a project management platform that was designed to work with your projects in an efficient manner. It will assist you in planning, tracking, and releasing your software projects. Furthermore, Jira Software allows you to customize your workflow according to your team’s individual wishes and integrate it with a number of applications.
So, Jira Software might be a solution for you if you are looking for a project management tool with broad functionality. However, you’d be able to draw a conclusion whether Jira is something for you only by trying another project management platform and comparing your experiences.
The list of data you can export from Jira Software
Here is the list of data that you can migrate from Jira Software to other Supported Platforms in an automated way:
- Users
- Sections (Note that Sections will be seen as Statuses by Migration Wizard)
- Tasks along with tags, attachments, and comments
- Sub-tasks together with tags, attachments, and comments
- “Created At”, “Updated At”, “Completed At”, and “Due” Dates
- Authors, Attachments, and “Created At” Dates for Comments
Note: The same fields migrate for both tasks and subtasks. The fields "statutes" don't migrate for sub-tasks.
In case there is something else you want to export from Jira, contact our support team and inform them about it. This way, our technical department will be able to customize your data migration according to your requests.
A step-by-step guide to migrate from Jira Software
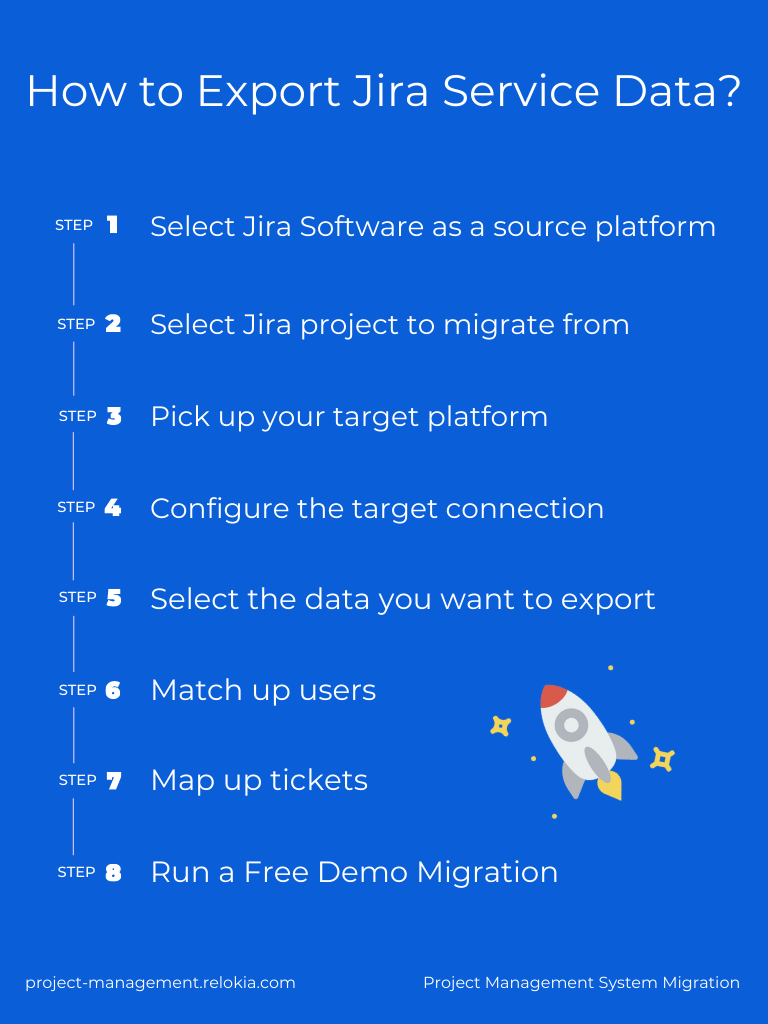
1. Go to Migration Wizard and sign in or log into your account.
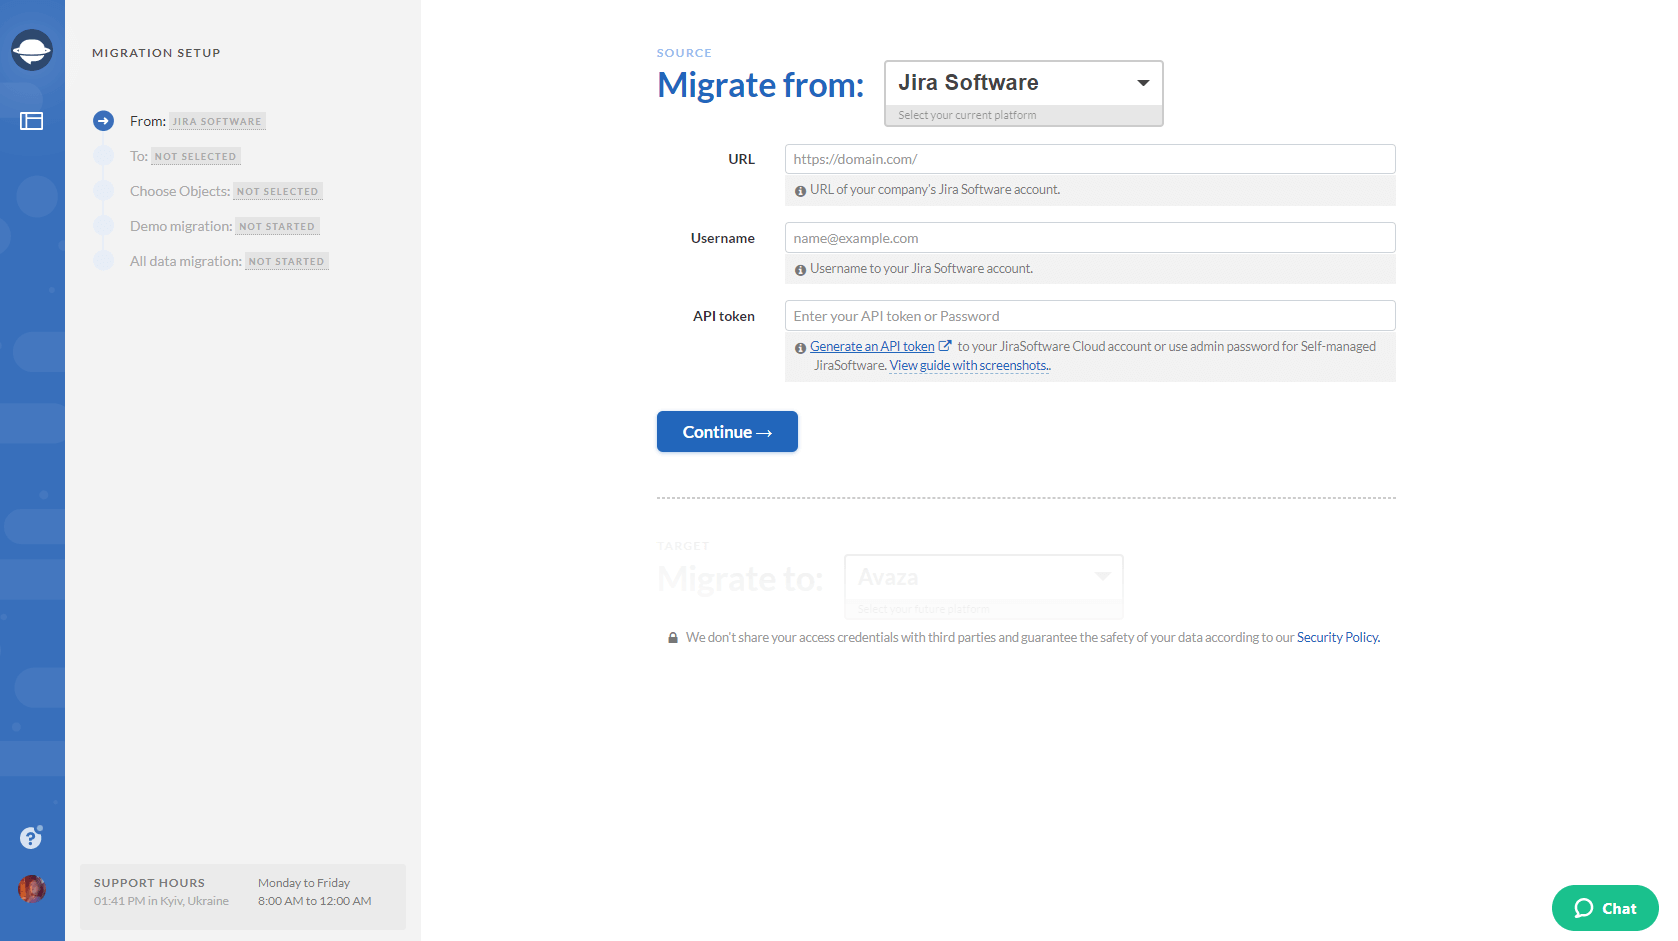
2. Select Jira Software as your source platform and fill in the necessary credentials such as URL, Username, and API token in order to connect it to the Migration Wizard tool.
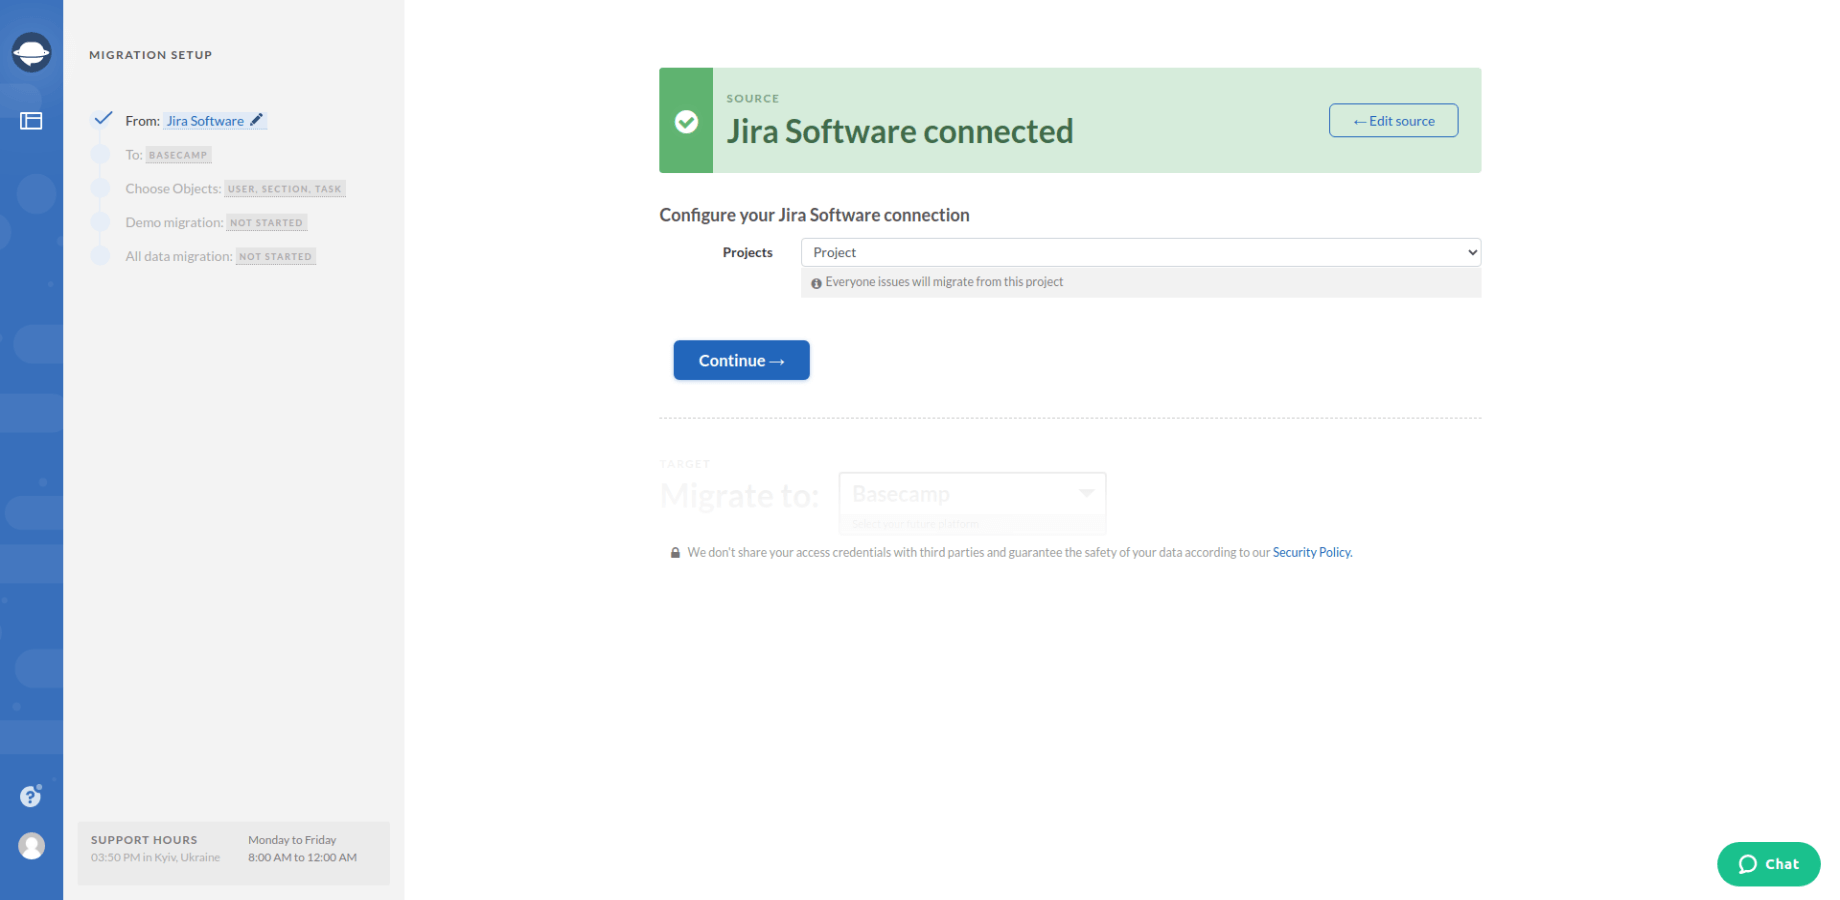
Also, configure your Jira Software connection by choosing a Project you are migrating from.
3. Now, select your target platform and sign in with the necessary credentials that depend on the platform you’re transferring your data to.
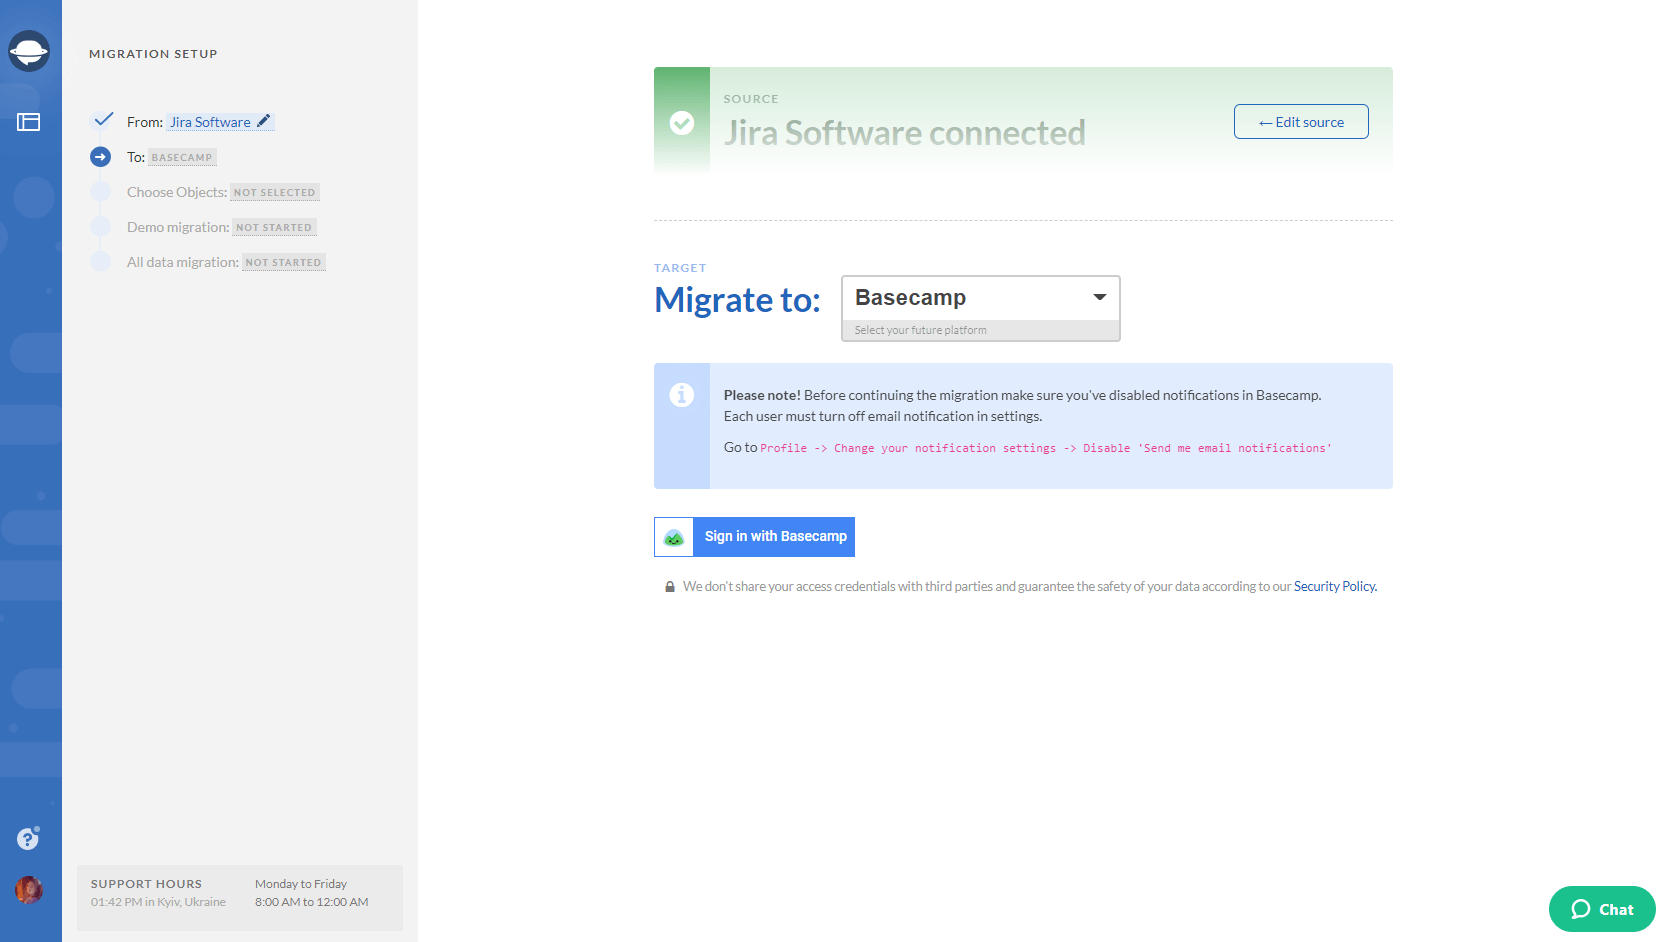
Note: You can migrate your data from Jira Software to a variety of Supported Platforms. Just in case you haven’t found a preferable platform on the list, drop us a line.
Depending on the platform you’re migrating to, you might also need to configure the connection.
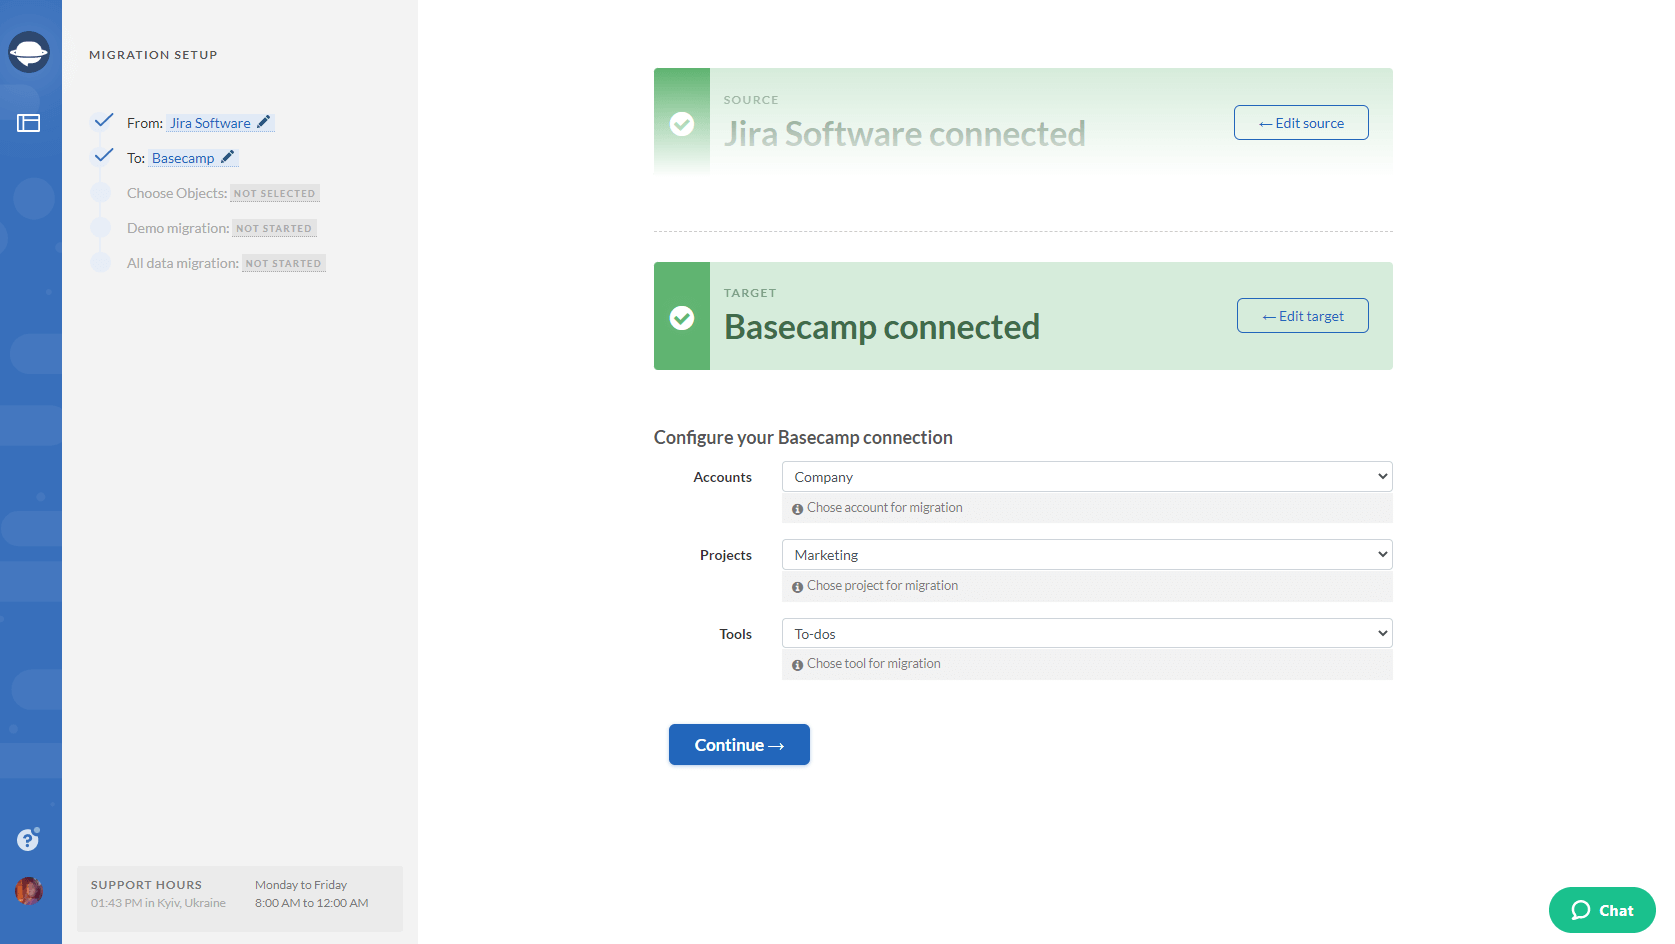
4. Select Tasks and Migration Wizard will open a task mapping form.
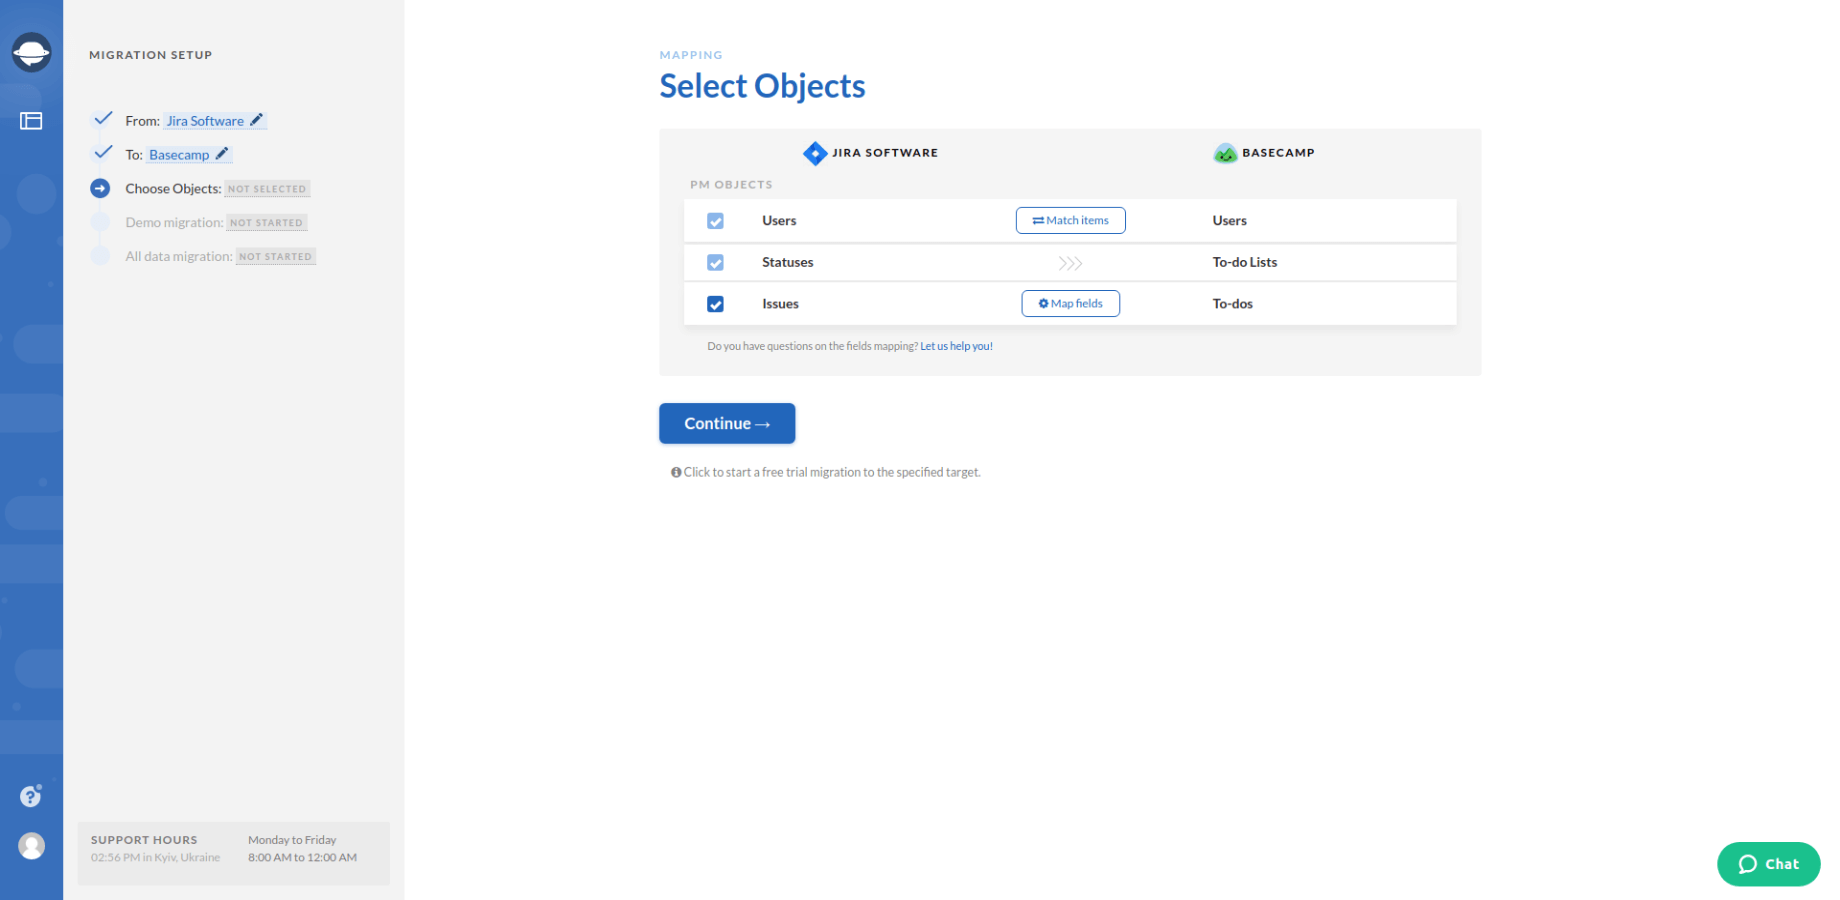
5. Map the route of your tasks to make sure it migrates the way you want. Set up the mapping of sub-tasks if applicable.

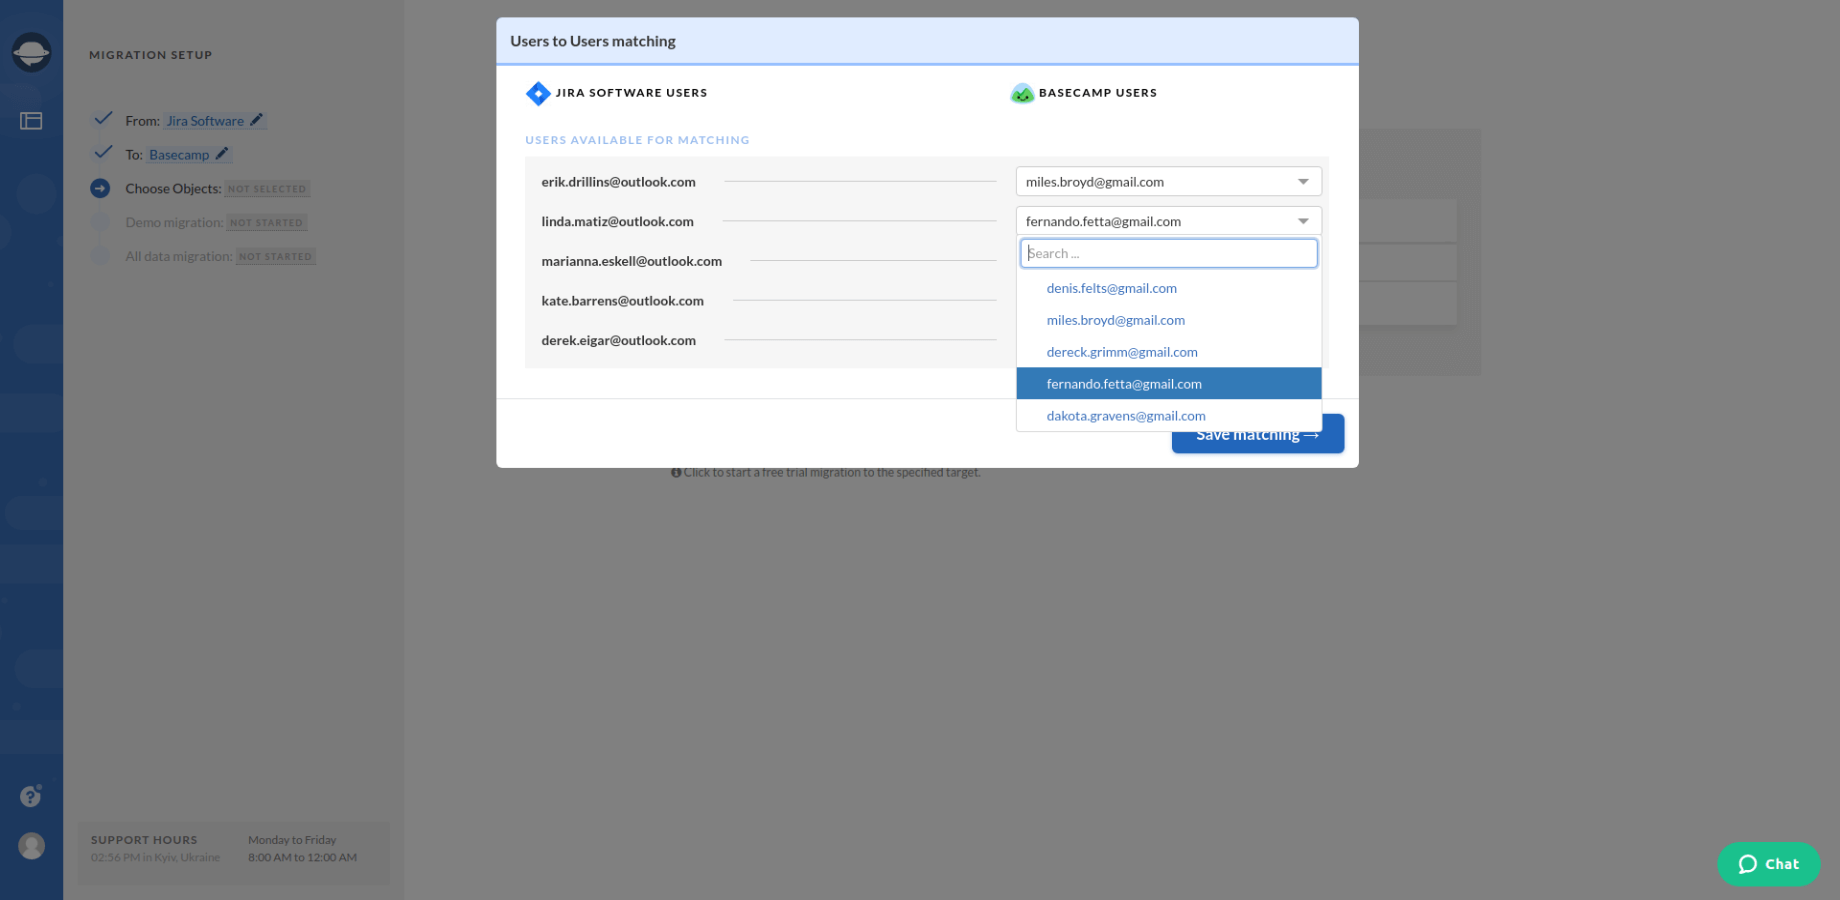
6. When Task mapping is done, move on to user matching. Click the Match items button and match users between the systems.
7. Run the free demo migration. Check the result of your demo data export from Jira Software by going through the information on how your data migrated.

Note: Proceed with the next step if you are satisfied with your demo migration result. If you still want to customize or change anything, contact us right away.
8. Export all the necessary records from Jira Software by initiating the Full Demo Migration.
Initiate your Jira Software data export now
That’s all. Now you know how to export your data from Jira Software successfully. So, either drop us a line if you have any additional questions or initiate your data migration from Jira now!


