How to Create Users in Zoho Projects?
To migrate and match users while switching to Zoho Projects, you need to create their profiles manually.
Here’s how you do it:
1. Sign up with your Zoho Projects account.
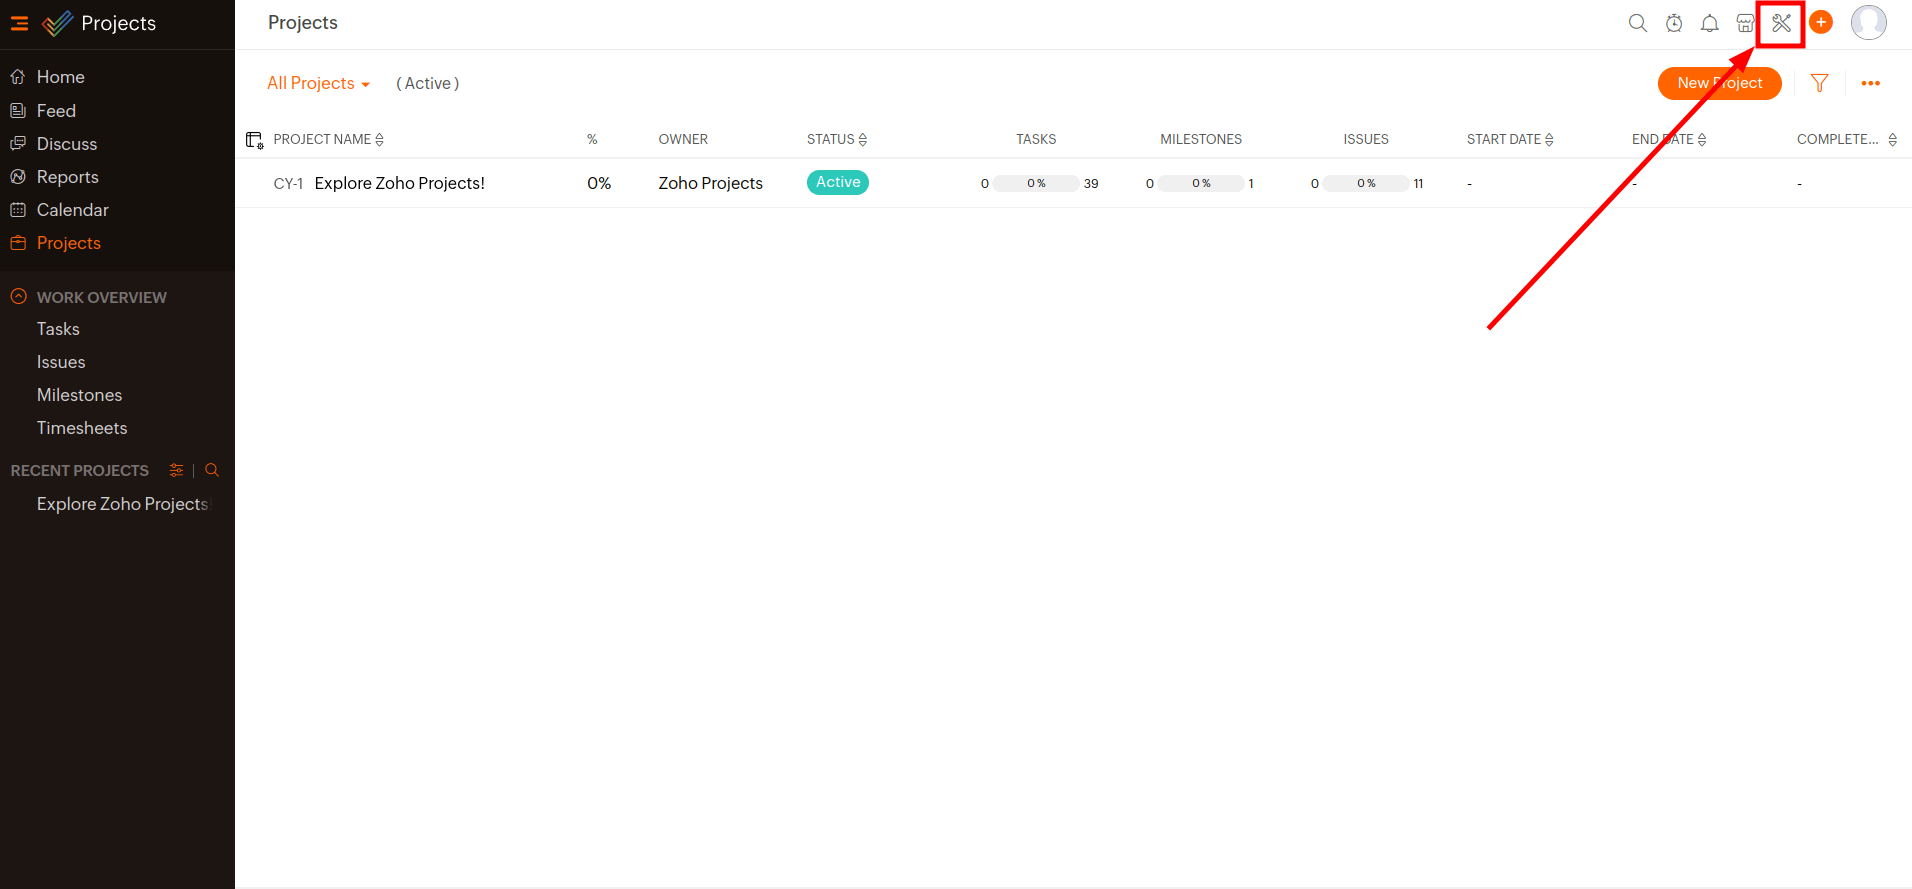
2. Press the Setup icon in the top navigation band.
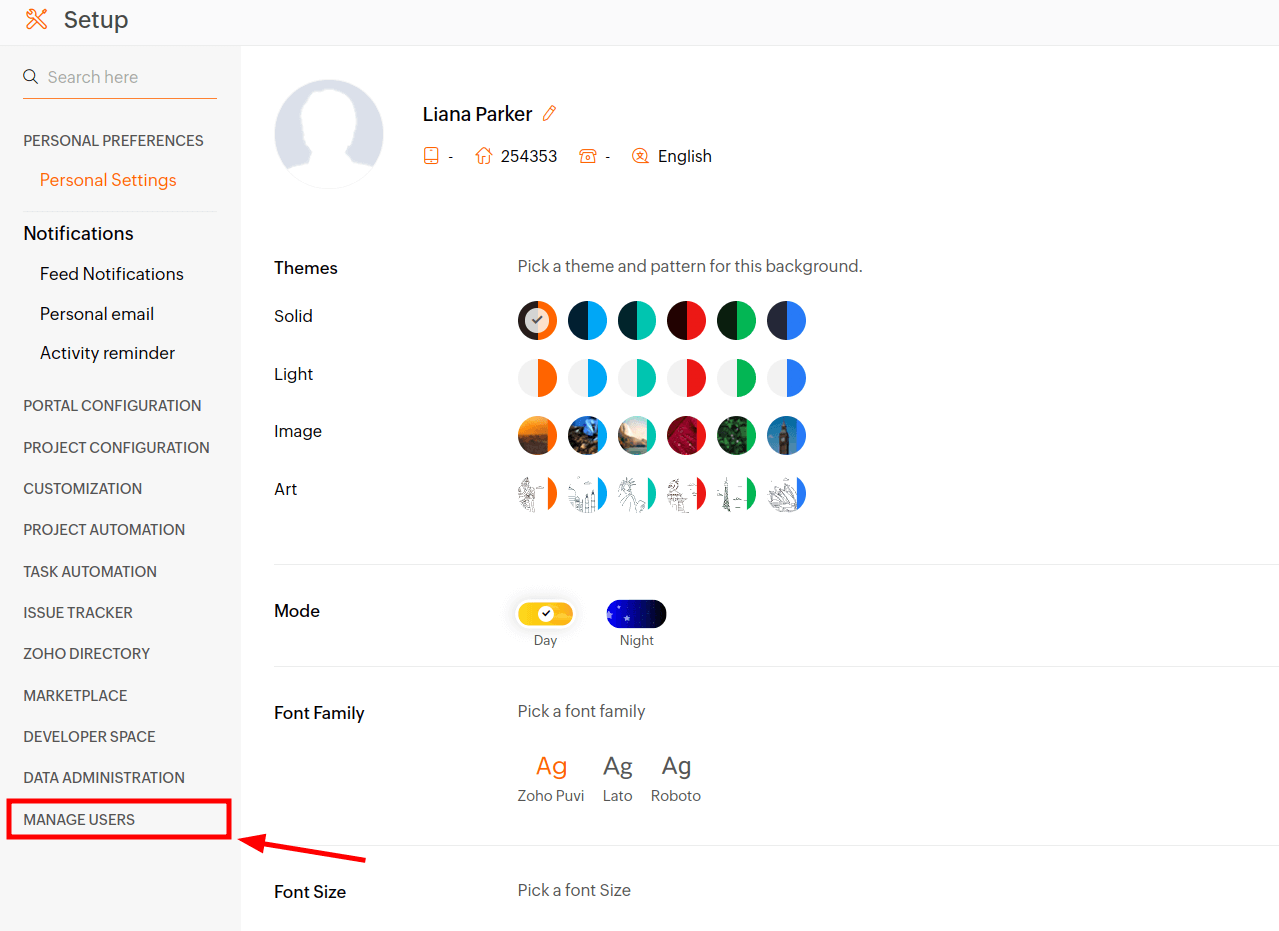
3. Navigate to Manage Users under Setup.
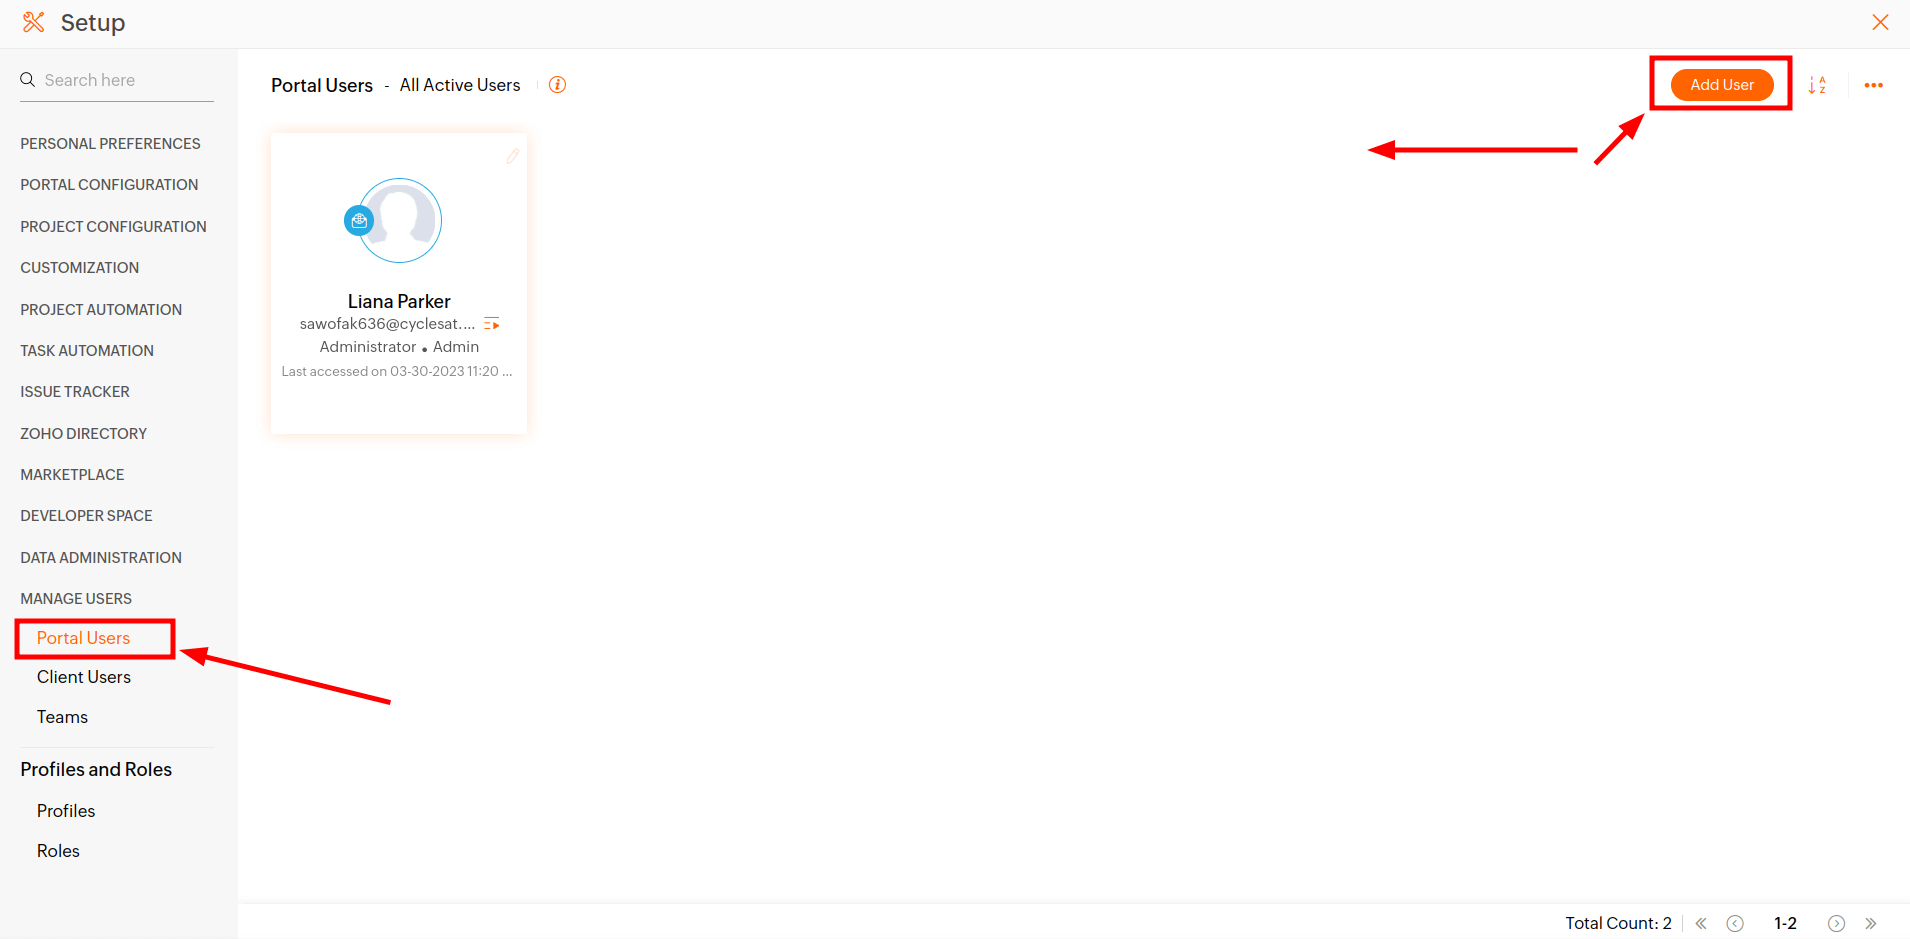
4. Then click Portal Users and go to Add User in the upper right corner
5. Fill in a User Email address. You can add multiple email addresses - just separate them by a comma.
6. Choose a Role and Profile for the users.
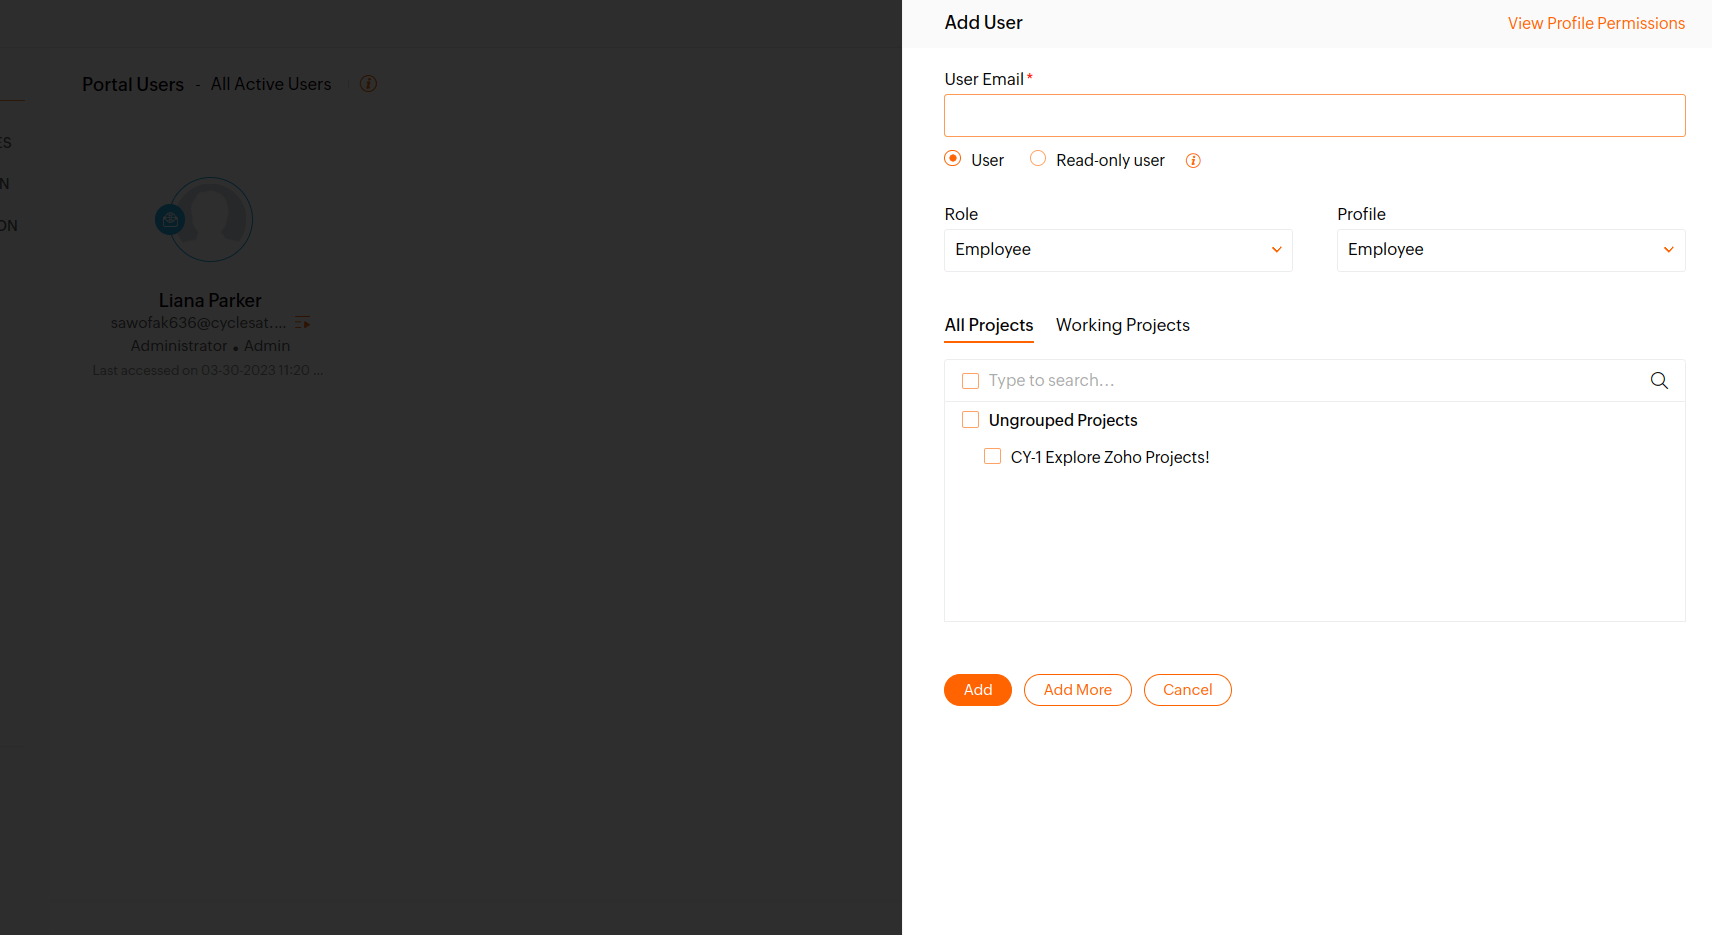
7. Choose the required project from the picklist to add users to it.
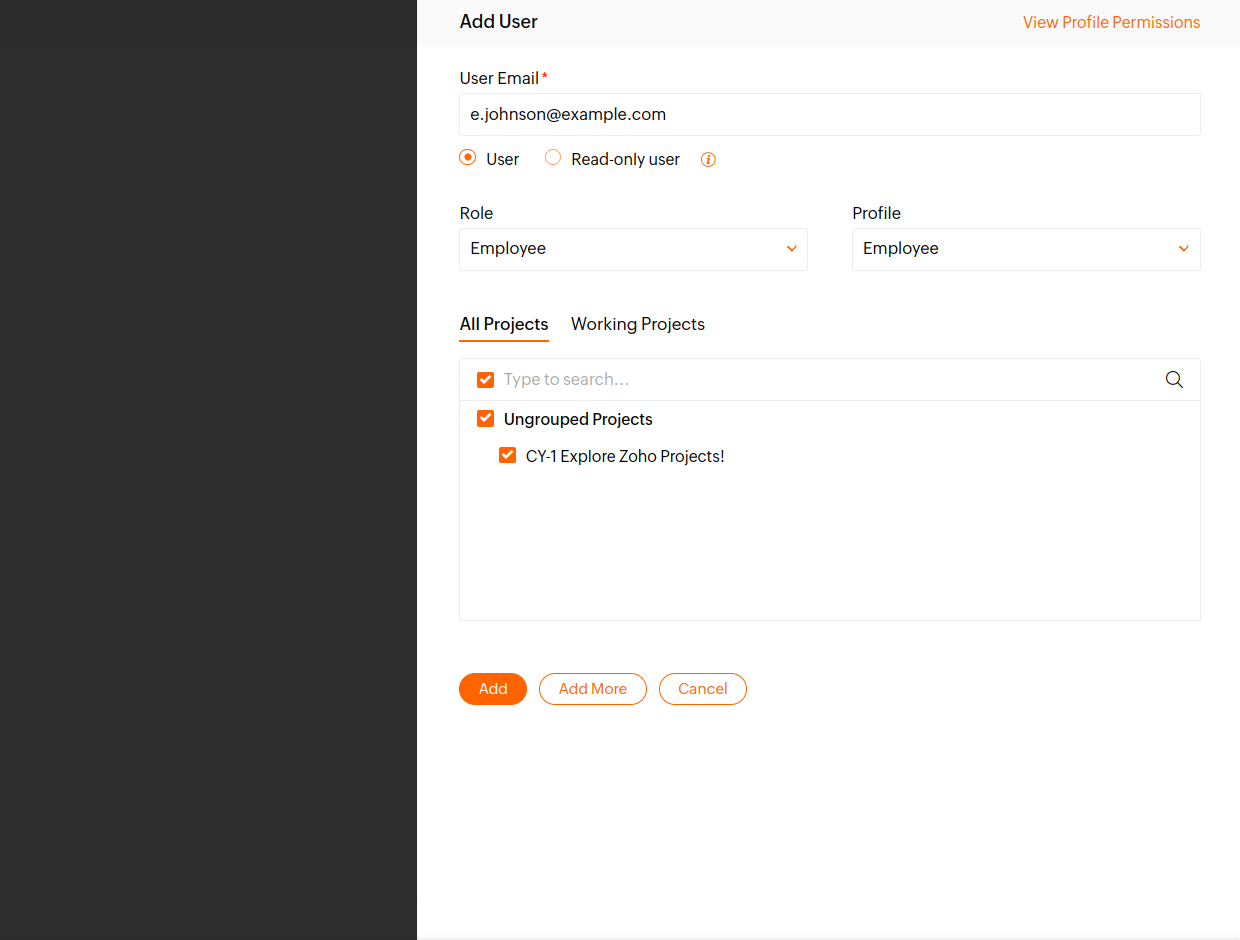
8. Click Add to create user profiles.
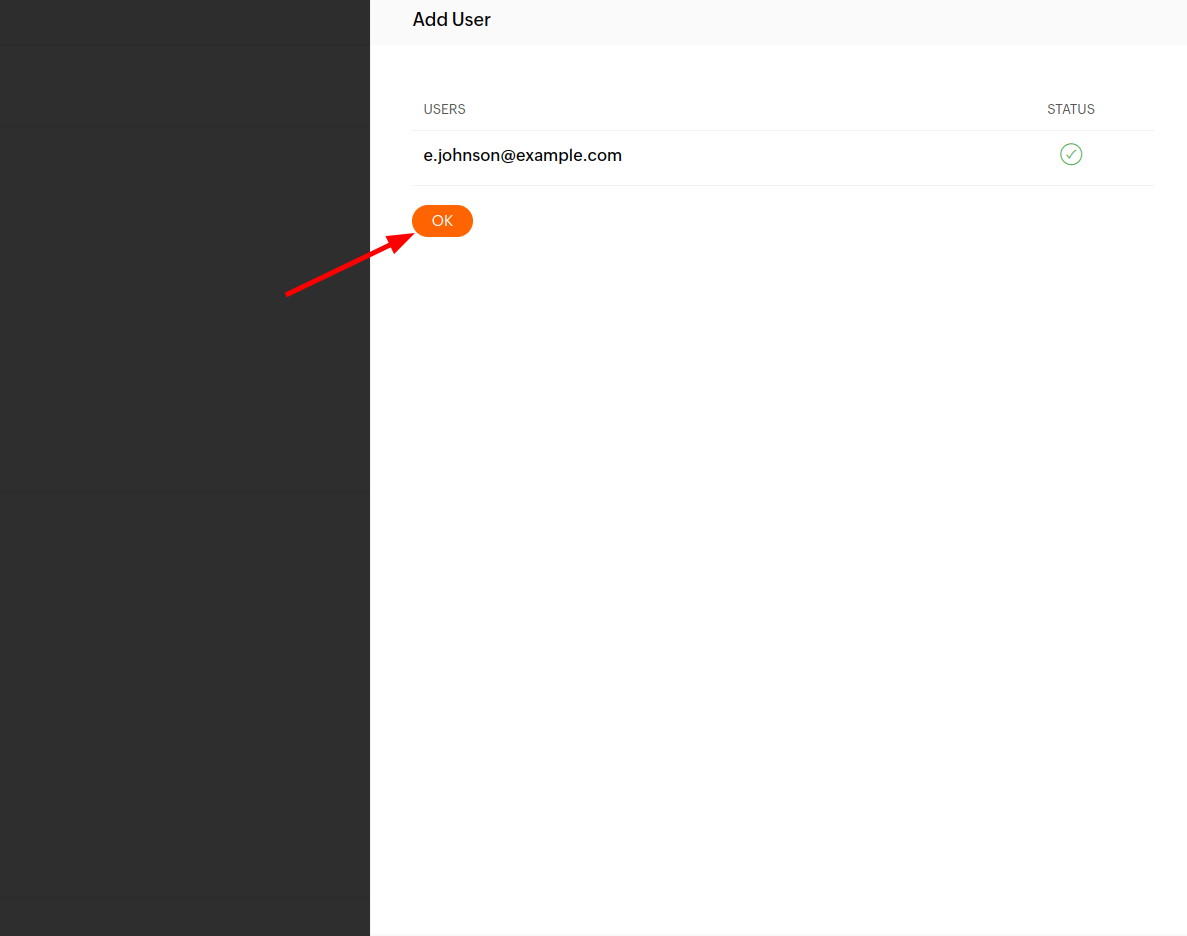
9. Once you’ve checked the newly added users, press OK.
Accepting invitations to Zoho Projects
When inviting Users to your Zoho Projects account, there are two scenarios to consider:
1. If the users are new to the system and don't have a Zoho account:
- Once they click the invitation button “Accept Invitation,” they will be directed to the Sign Up page to create a Zoho account.
- During the account creation process, they should click on the "Continue signing in" button.
- Then, they must confirm their email address and registration by clicking the link in the Confirmation Email.
2. If users already have a Zoho account but not a Zoho Projects account:
- When they access the invitation link, they should only click the "Accept" button to join the organization.
- They will be logged in to the Zoho Projects account associated with their company.