Relokia’s team has some excellent news for you: from now on, you can export your data from any other project management platform and import it to Jira Software. So, keep reading this article for detailed information on how Jira Software import works.
Jira Software in a nutshell
Jira is a world-known platform that can help you to manage your projects effectively. As its webpage suggests, it is a number one software development tool used by agile teams. Being built for every member of your team, Jira Software helps you to plan, track, and release software projects. Moreover, you can either use an out-of-the-box workflow or create your own to meet your team’s needs.
In simple words, Jira Software is a multi-functional and powerful project management platform, so it’s worth to be taken into account when choosing a new helper to manage your tasks.
What data you can import into Jira Software
Please find the list of records that you can migrate from any of the Supported Platforms to Jira Software:
- Tasks along with tags, comments, attachments (all Attachments from your Comments will migrate to the Task Attachments section)
- Sub-tasks together with tags, comments, attachments (all Attachments from your Comments will migrate to the Sub-task Attachments section)
- Authors and “Created At” Dates for Comments
- Users
- “Created At”, “Updated At”, and “Due” Dates
Note: The same fields migrate for both tasks and subtasks.
If you haven’t found something you’d still like to import into Jira on the list above, don’t hesitate to contact our support team. They will do their best to find a solution for you and customize your data migration according to your individual needs.
How to migrate to Jira Software
1. Open the Migration Wizard web page and sign in or log into your account.
2. Connect your source platform to Migration Wizard. Select it from the drop-down menu and fill in the necessary credentials in order to connect it to the Migration Wizard tool.
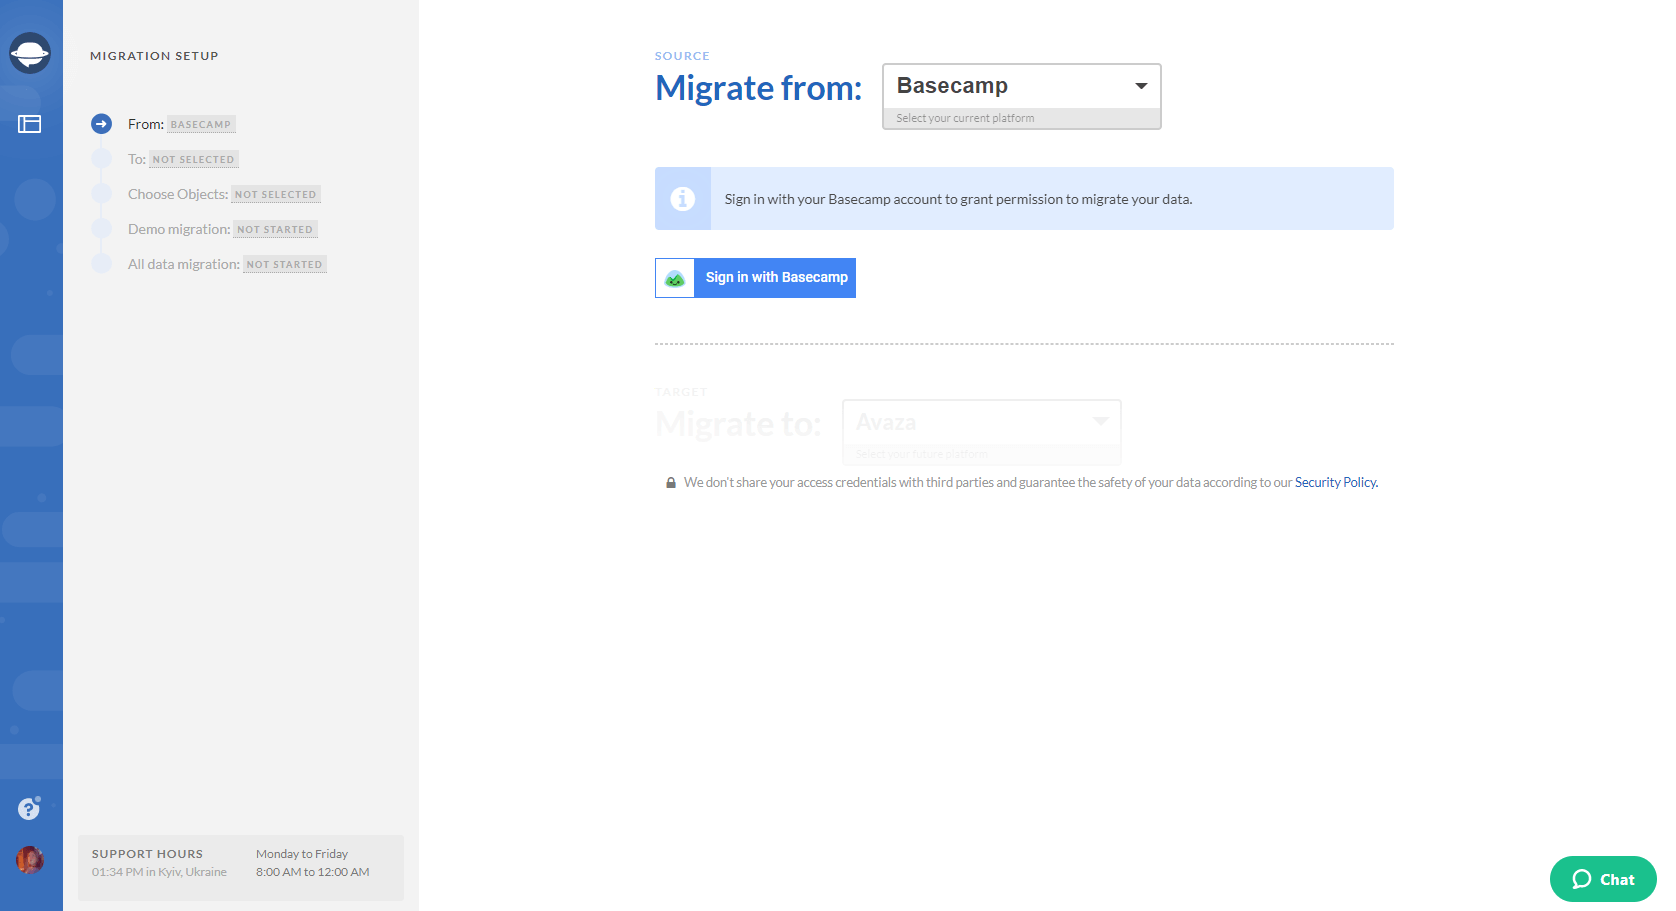
Note: With Relokia, you can import your data to Jira Software from a variety of Supported Platforms. However, if you haven’t found your current platform on the list, drop us a line and we’ll see what we can do.
Depending on the platform you’re migrating from, you might also need to configure the connection.
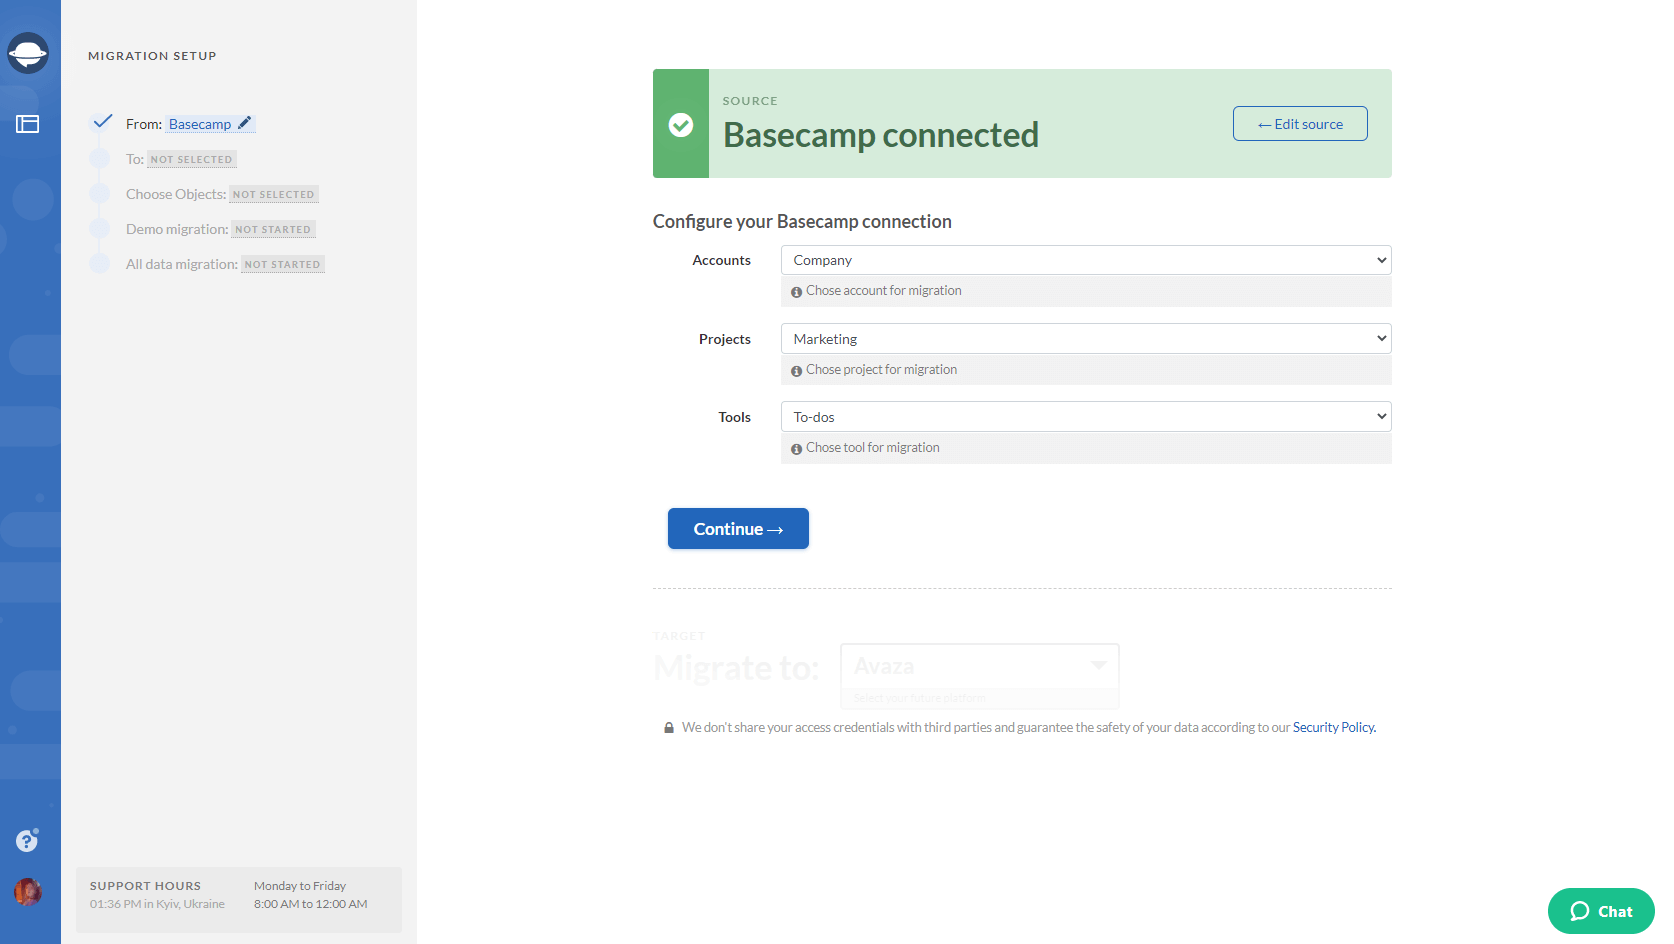
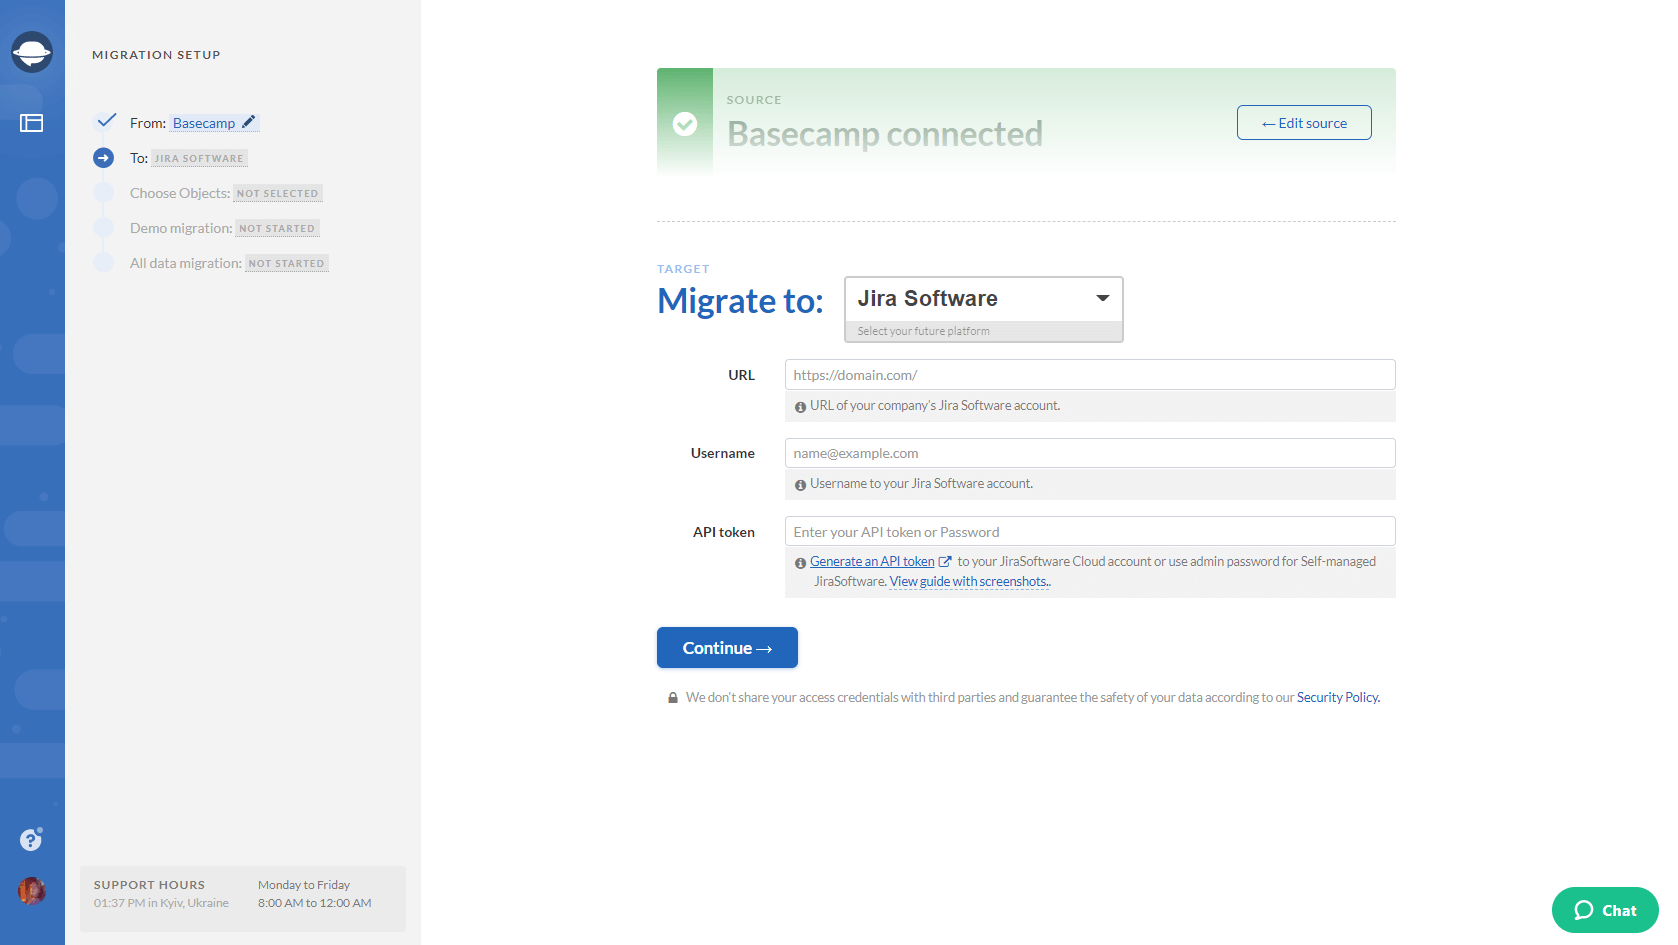
3. Now, select Jira Software as your target platform and sign in with your URL, Username, and API token.
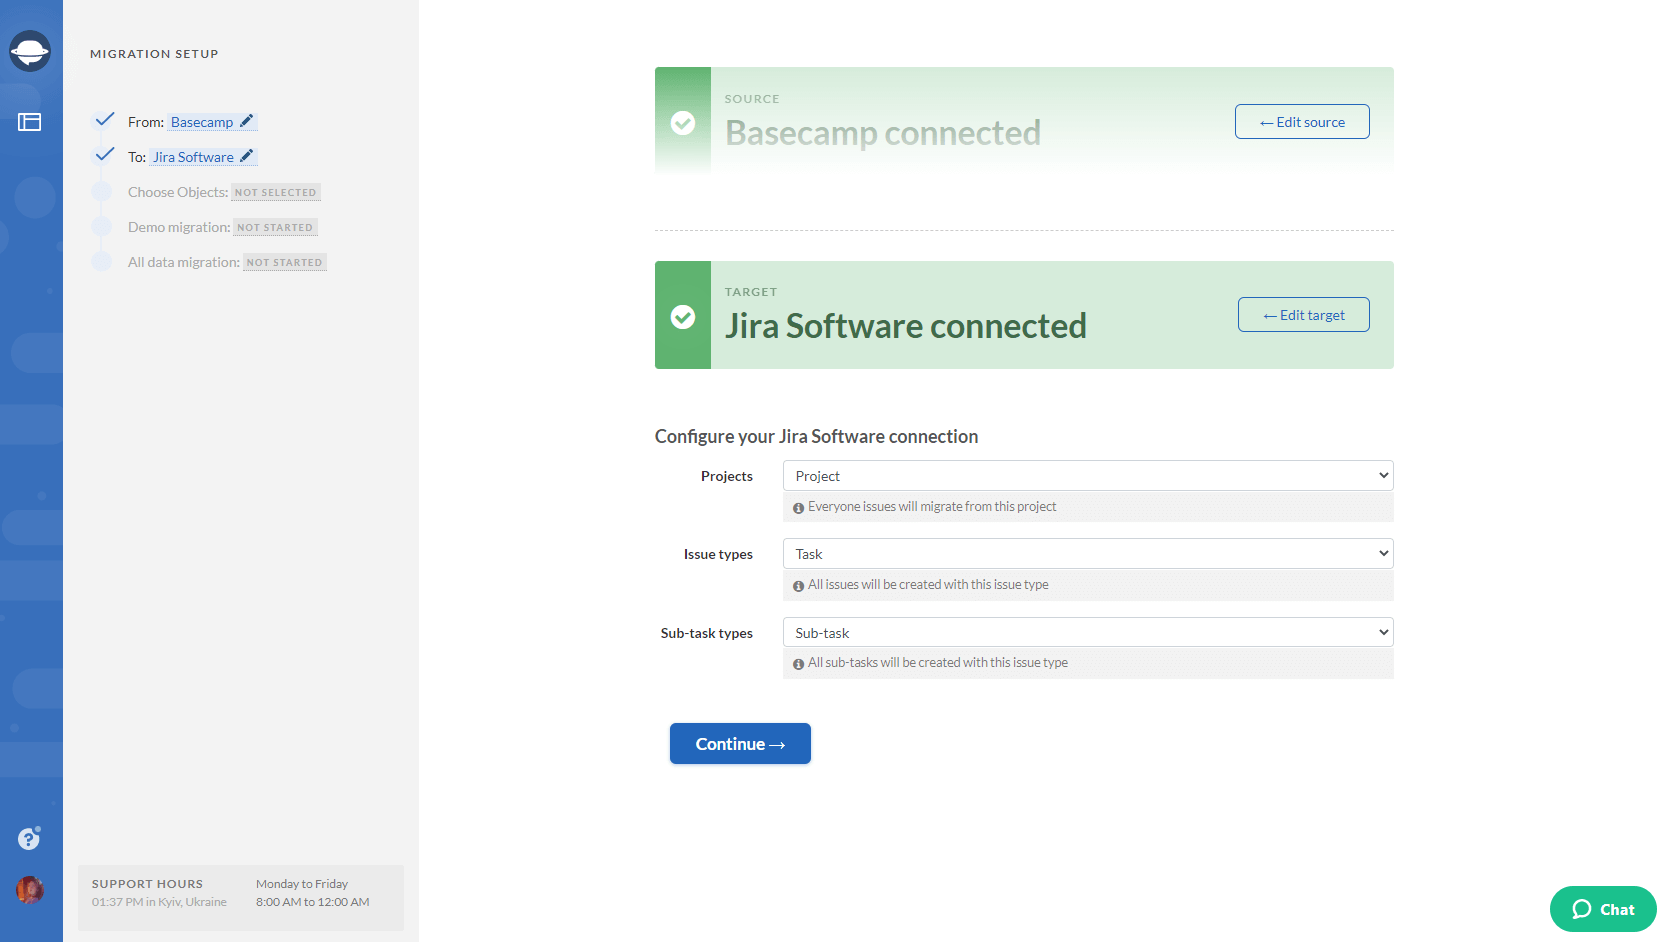
As well, configure your Jira Software connection by choosing a Project you want to migrate to.
4. Select Tasks and Migration Wizard will open a task mapping form.
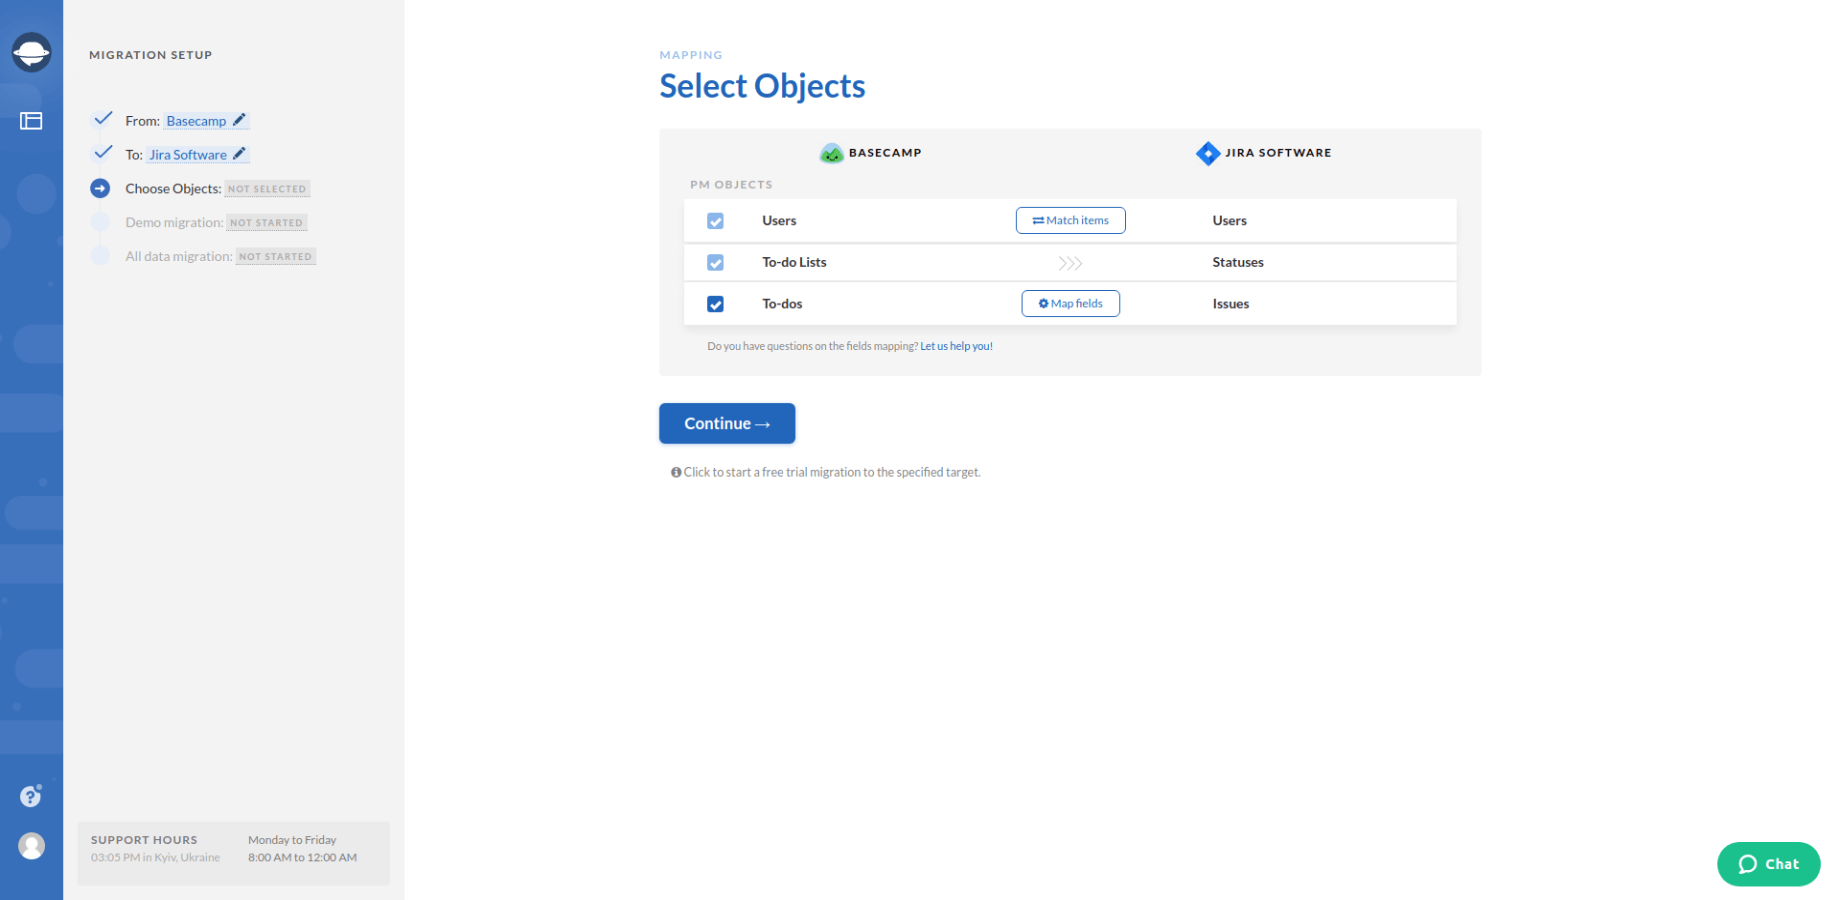
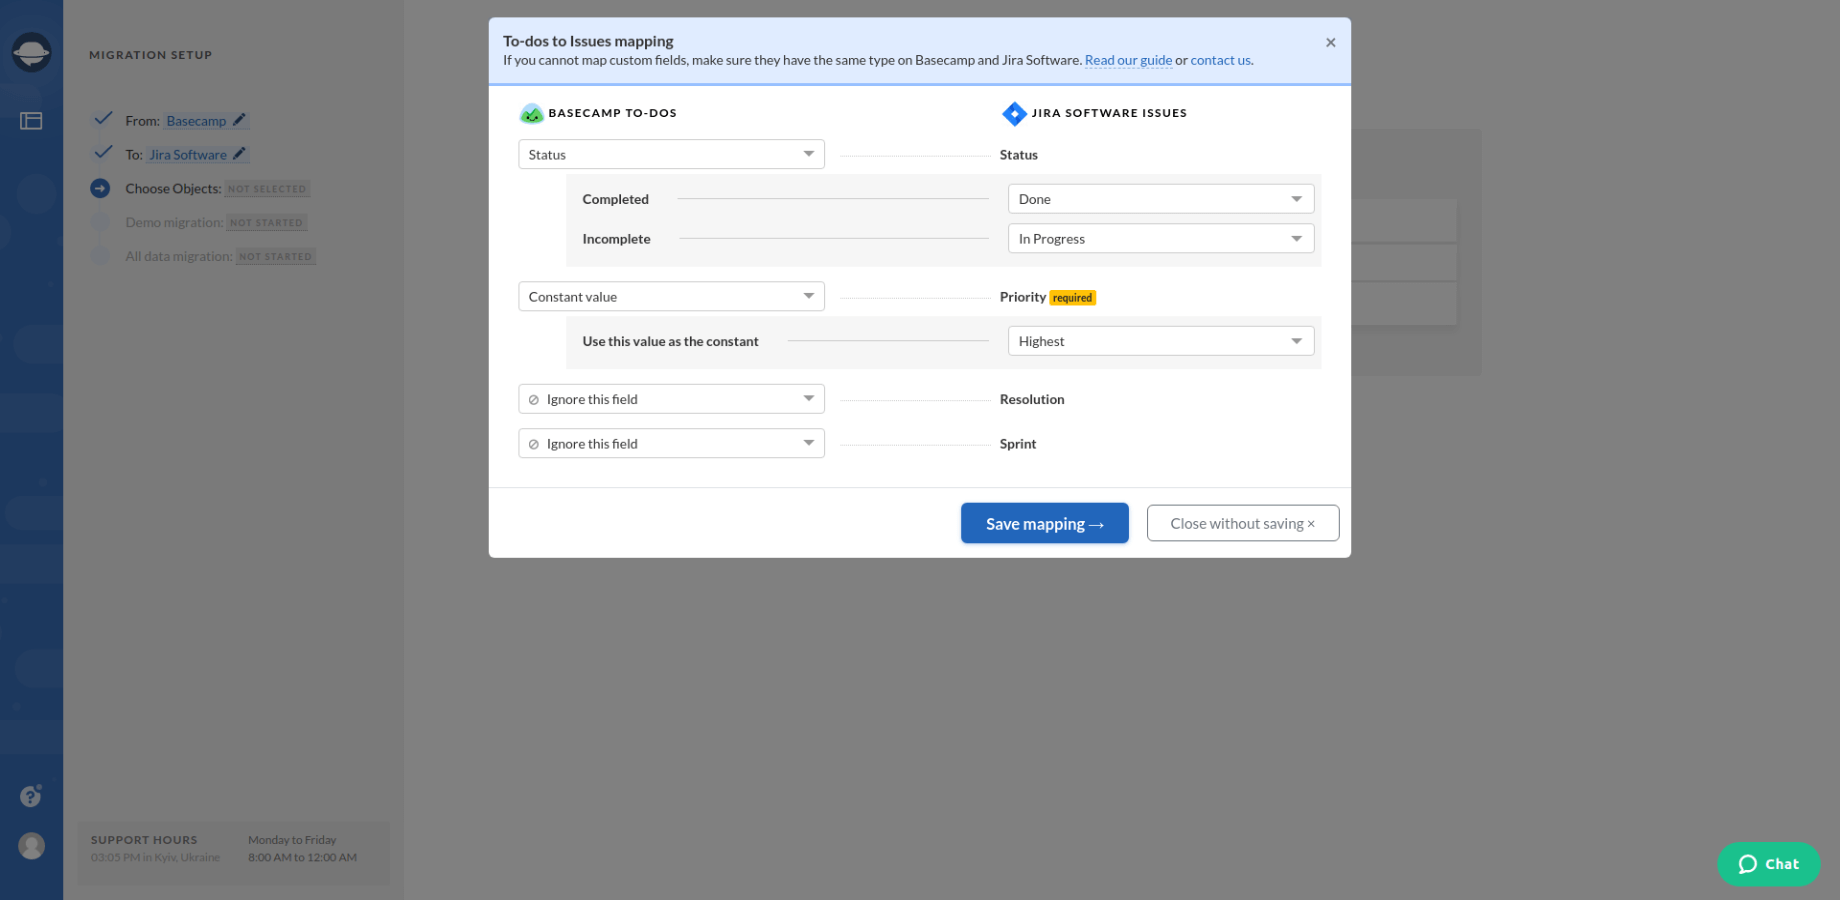
5. Map the route of your data and make sure it moves the way you want. Map sub-tasks if applicable.
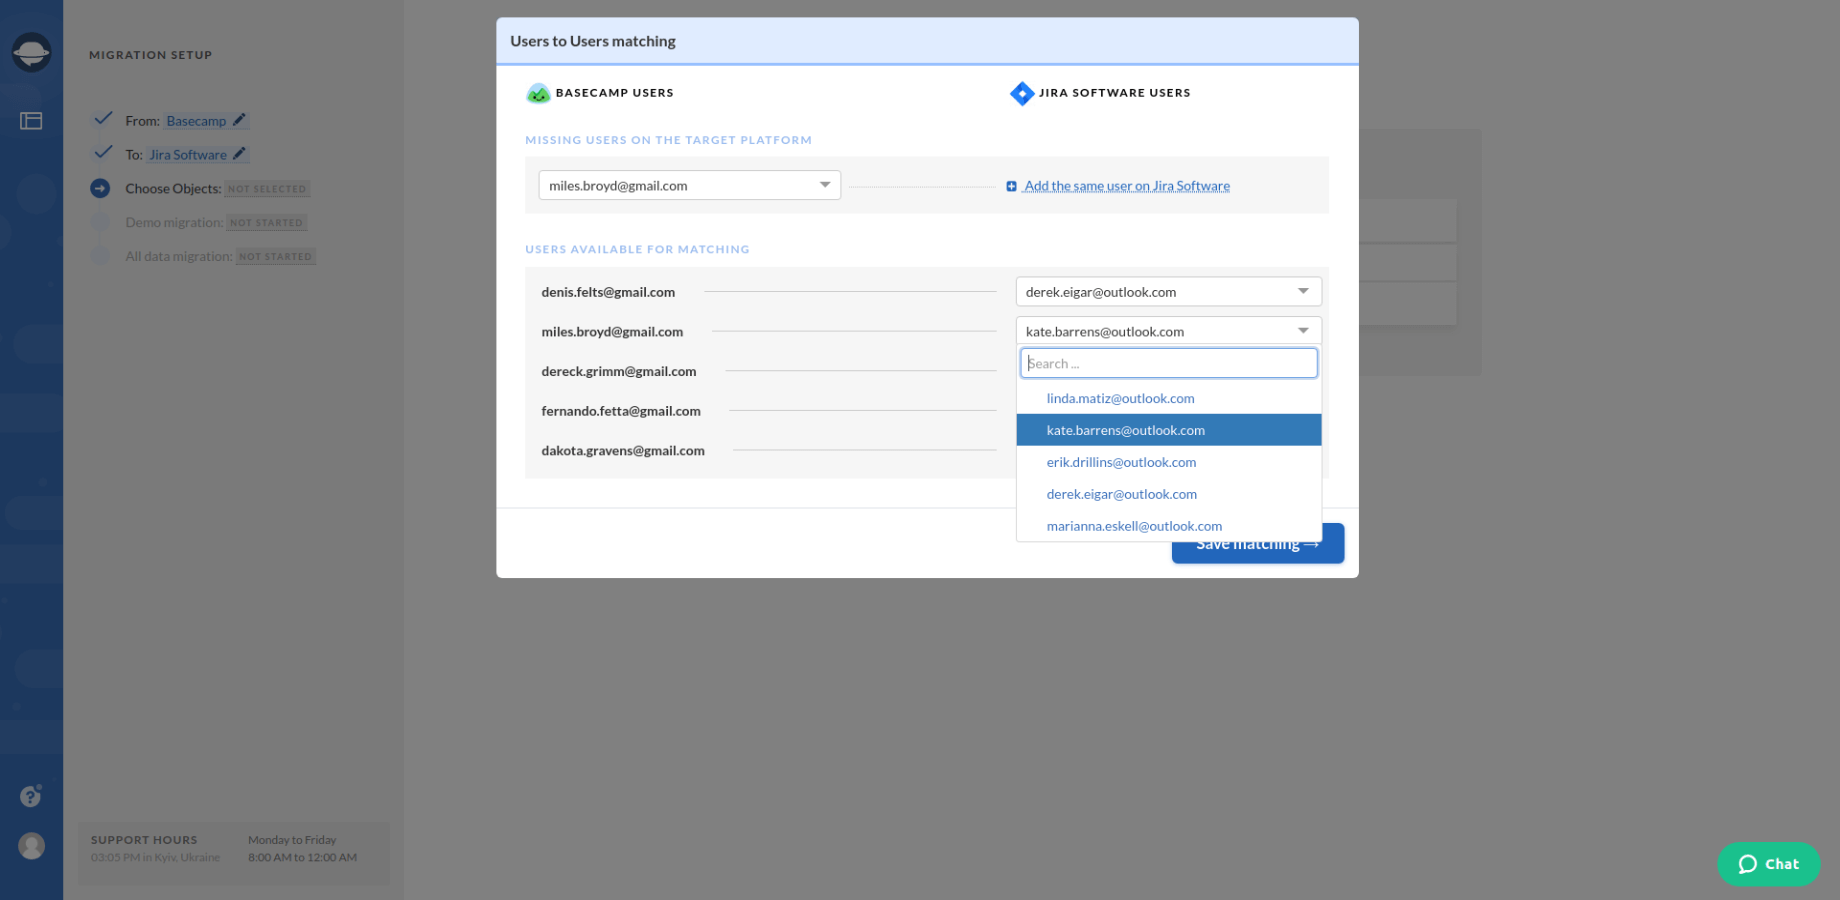
6. Move on to user matching. Click the Match items button and match users between the systems
7. Start the free demo migration and wait until it’s complete. Check the result of your demo data import to Jira Software by going through the information on how your data migrated.
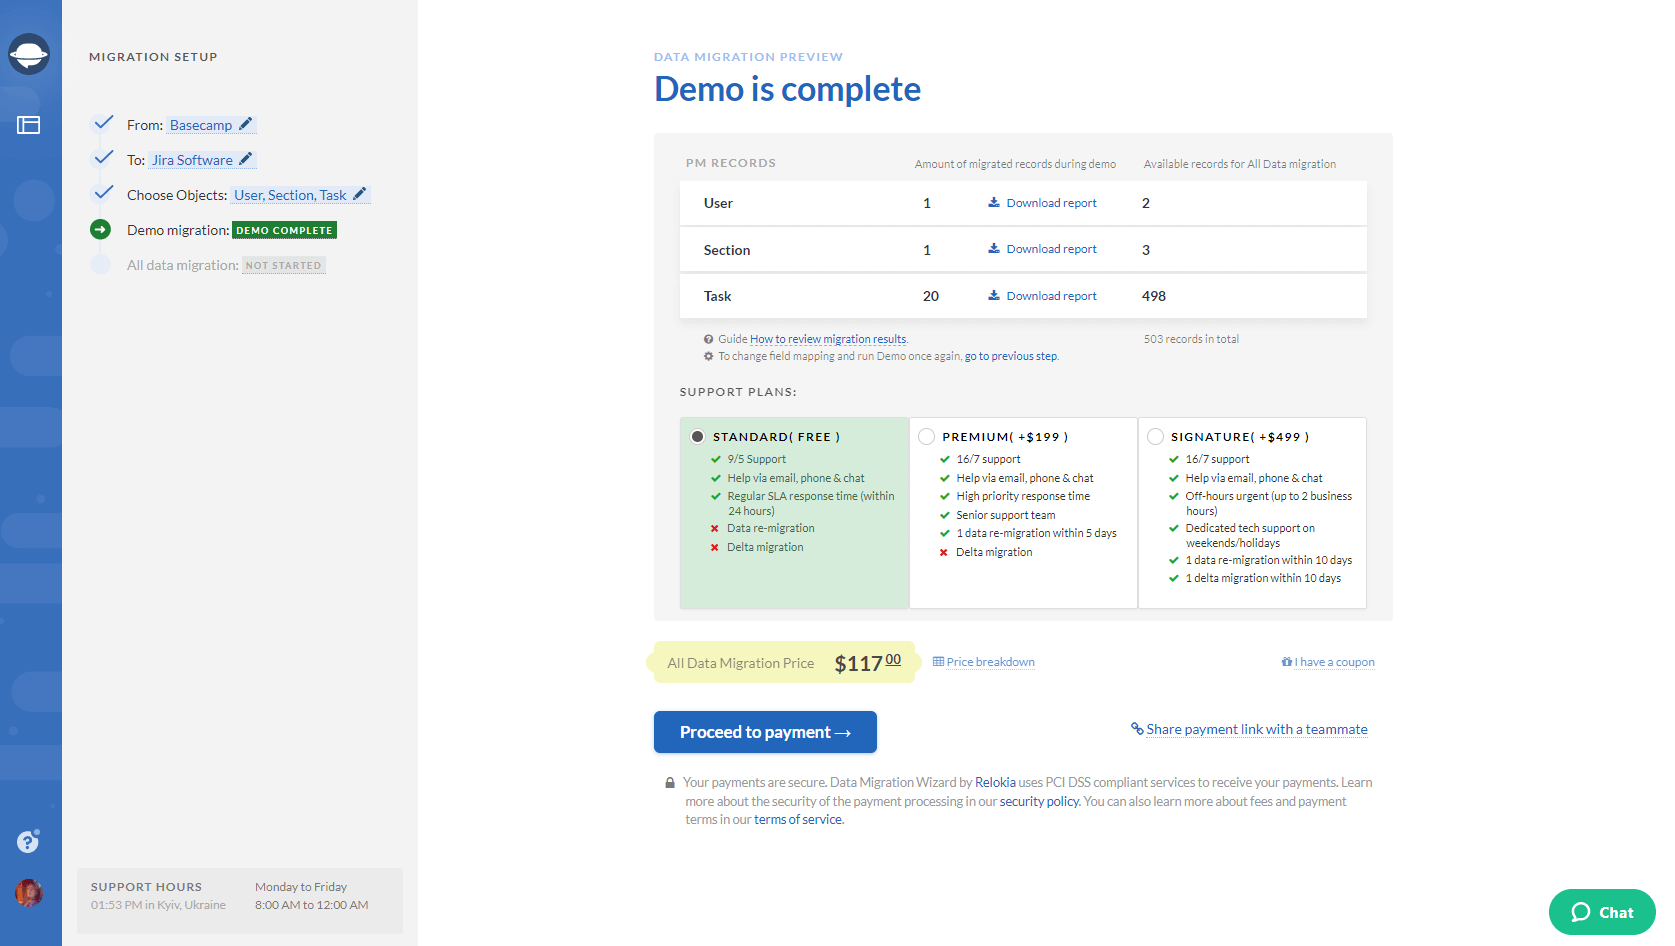
Note: Go on to the next step only if you are satisfied with your demo migration result. If you still want to change anything, contact us immediately.
8. Run the Full Demo Migration to import all the needed data to Jira Software.
Let’s migrate your data!
As you can see, the process of Jira Software data import is pretty straightforward. So, how about migrating from your current platform right away? Simply drop us a line and start enjoying your Jira Software project management platform right away!
Ready to migrate your data to Jira Software?


